COVID-19 has forced many of us to work from and practice social distancing to flatten the curve. As a result, I’ve been spending a lot of time in my home office. Since I’ll be working from home for the foreseeable future, I decided it was time to clean and organize my office. When I clean/organize I end up digging up a bunch of stuff I haven’t used in years. Most of these items usually get recycled or donated, and some sometimes I’ll find small treasures that I’ve held on to but forgot about.
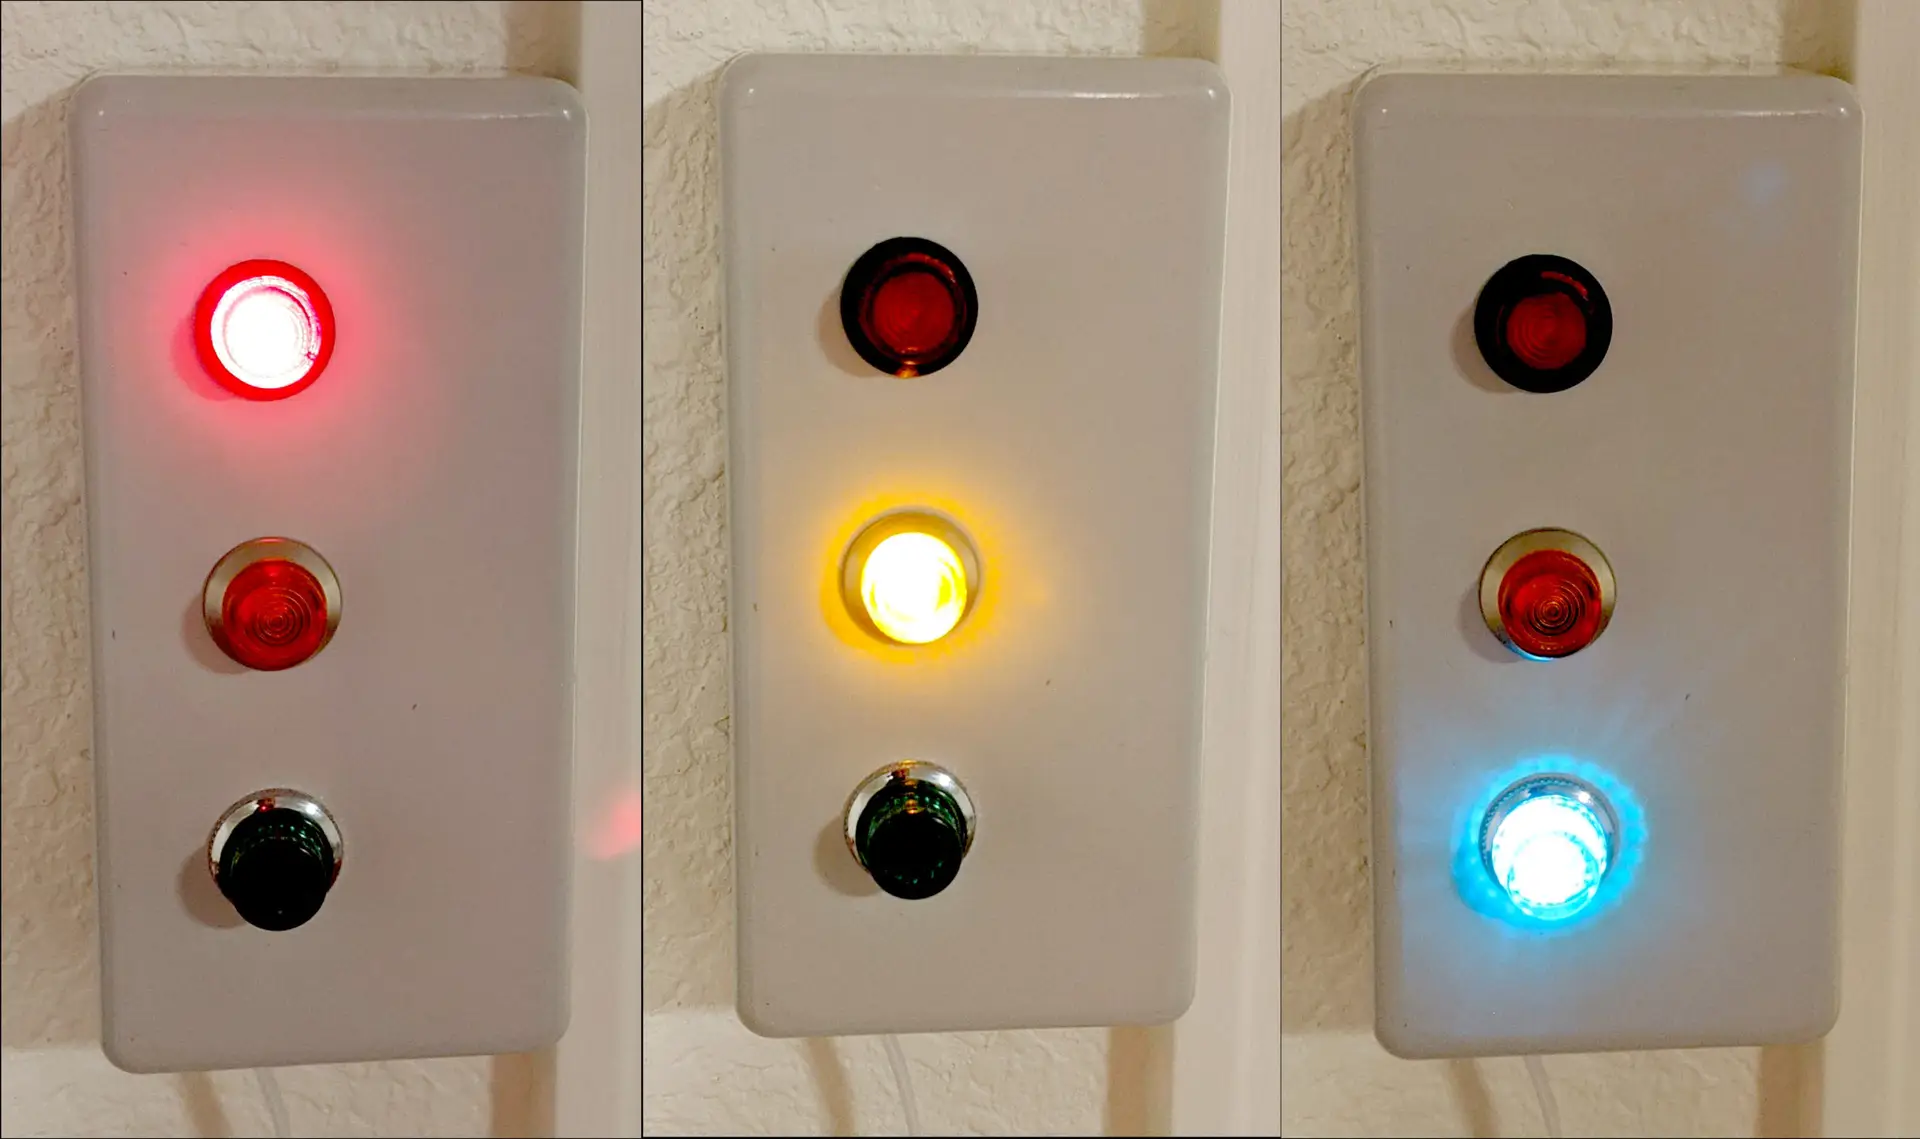
This time I found my Dad’s original office stoplight that he used when I was a kid in one of the random-stuff boxes. Essentially, it’s miniature stoplight that was used to indicate my Dad’s availability at any given moment. It was made with incandescent light fixtures with colored light covers. The light were controlled by two toggle switches.
Since my kids are home from school too, for the same reason I’m working from home, I thought this would be a perfect opportunity to give this stoplight box new life. Hopefully it will help the kids understand when I’m in the middle of something and can’t be bothered.
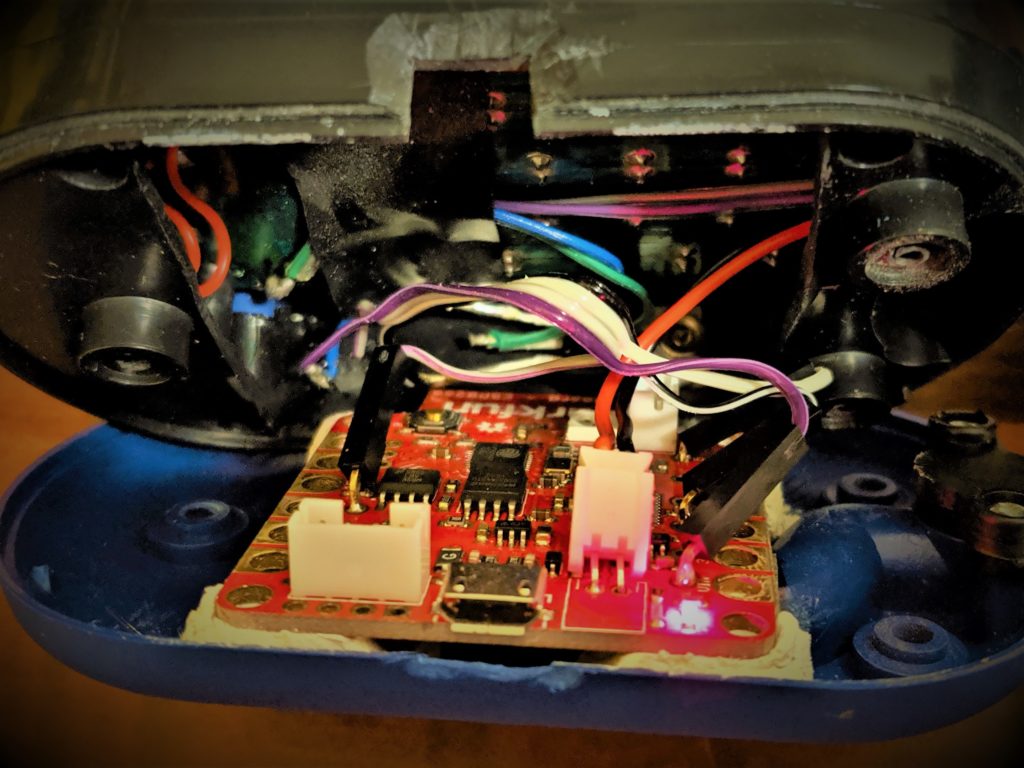
While I could have made this from scratch that would have a much smaller profile, I wanted to keep the original look. I did replace the 6V incandescent light bulbs with colored LED’s. This was simple enough to do by cutting the light bulb fixture in half on the bandsaw. Then it was as simple as wiring up the LED’s and programming an ESP8266 thing with a very simple web interface.
Parts list:
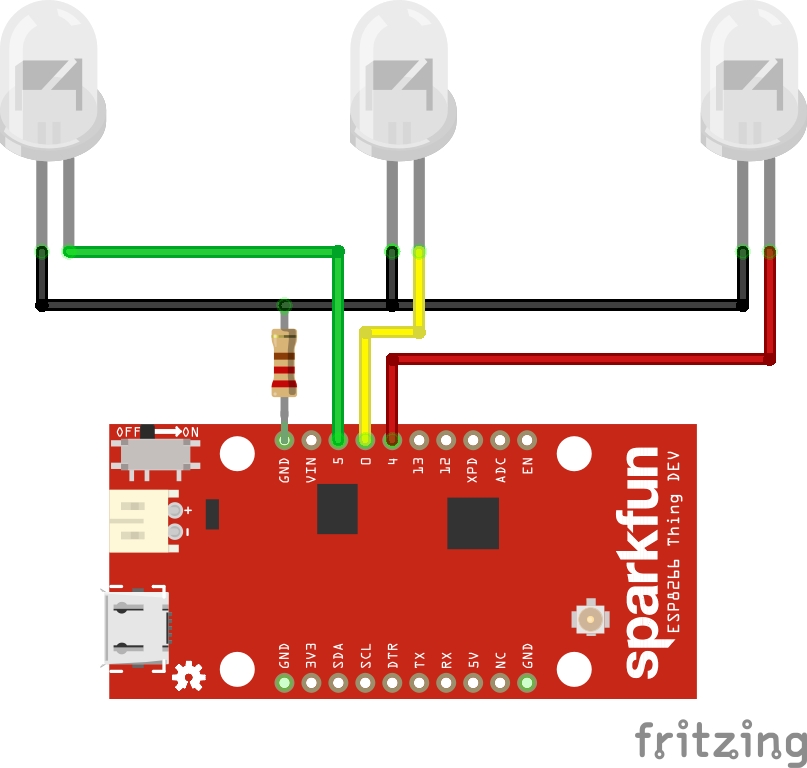
- Red LED
- Yellow LED
- Green LED
- 220Ω resistor
- Sparkfun ESP8266 thing
- USB Cable
- USB power adapter
Code:
/*
 *  Simple web LED control for a stop light.
 *  The server IP address of the ESP8266 module, will be printed to Serial when the module is connected.
 */

#include <ESP8266WiFi.h>
#include <WiFiClient.h>
#include <ESP8266WebServer.h>

//////////////////////
// WiFi Definitions //
//////////////////////
const char *ssid = "your_wifi";
const char *password = "your_password";
const char *hostname = "office-stop-light";
const String title = "OFFICE STOP LIGHT CONTROL";

/////////////////////
// Pin Definitions //
/////////////////////
const int RED_LED_PIN = 4;
const int YEL_LED_PIN = 0;
const int GRN_LED_PIN = 5; // Thing's onboard, green LED

// Create an instance of the server
// specify the port to listen on as an argument
ESP8266WebServer server(80);


/* Homepage Webcode */
void send_homepage() {
  String server_index = "<!DOCTYPE html><html lang=\"en\"><head><meta name=\"viewport\" content=\"width=device-width, initial-scale=1, user-scalable=no\"/><title>"+title+"</title>";
  server_index += "<style>.c{text-align: center;} div,input{padding:5px;font-size:1em;}  input{width:90%;}  body{text-align: center;font-family:verdana;} button{border:0;border-radius:0.6rem;background-color:#1fb3ec;color:#fdd;line-height:2.4rem;font-size:1.2rem;width:100%;} .q{float: right;width: 64px;text-align: right;} .button_blue {background-color: #008CBA;} .button_red {background-color: #f44336;} .button_yellow {background-color: #ffdd00; color: black;} .button_dark_grey {background-color: #555555;} .button_green {background-color: #4CAF50;} </style>";
  server_index += "<script>function c(l){document.getElementById('s').value=l.innerText||l.textContent;document.getElementById('p').focus();}</script>";
  server_index += "</head><body><div style='text-align:left;display:inline-block;min-width:260px;'>";
  server_index += "<H3>"+title+"</H3>";
  server_index += "<form action=\"/cmd_red_on\" method=\"get\"><button class=\"button_red\">Red</button></form><br/><form action=\"/cmd_yellow_on\" method=\"get\"><button class=\"button_yellow\">Yellow</button></form><br/> <form action=\"/cmd_green_on\" method=\"get\"><button class=\"button_green\">Green</button></form><br/><form action=\"/cmd_all_off\" method=\"get\"><button class=\"button_dark_grey\">Off</button></form><br/>    ";
  server.send(200, "text/html", server_index);
}

/* Go to http://office-stop-light in a web browser with a device on the same network as this ESP8266 thing. */
void handleRoot() {
  send_homepage();
}

void cmd_red_on() {
  send_homepage();
  digitalWrite(RED_LED_PIN, 1);
  digitalWrite(YEL_LED_PIN, 0);
  digitalWrite(GRN_LED_PIN, 0);
}

void cmd_yellow_on() {
  send_homepage();
  digitalWrite(RED_LED_PIN, 0);
  digitalWrite(YEL_LED_PIN, 1);
  digitalWrite(GRN_LED_PIN, 0);
}

void cmd_green_on() {
  send_homepage();
  digitalWrite(RED_LED_PIN, 0);
  digitalWrite(YEL_LED_PIN, 0);
  digitalWrite(GRN_LED_PIN, 1);
}

void cmd_all_off() {
  send_homepage();
  digitalWrite(RED_LED_PIN, 0);
  digitalWrite(YEL_LED_PIN, 0);
  digitalWrite(GRN_LED_PIN, 0);
}

void setup() {
  Serial.begin(115200);
  delay(10);

  // prepare GPIO / LED
  pinMode(RED_LED_PIN, OUTPUT);
  pinMode(YEL_LED_PIN, OUTPUT);
  pinMode(GRN_LED_PIN, OUTPUT);
  digitalWrite(RED_LED_PIN, 0);
  digitalWrite(YEL_LED_PIN, 0);
  digitalWrite(GRN_LED_PIN, 0);

  // Connect to WiFi network
  Serial.println();
  Serial.println();
  Serial.print("Connecting to ");
  Serial.println(ssid);

  WiFi.hostname(hostname);
  WiFi.begin(ssid, password);

  while (WiFi.status() != WL_CONNECTED) {
    delay(500);
    Serial.print(".");
  }
  Serial.println("");
  Serial.println("WiFi connected");

  // Configure and start the server
  server.on("/", handleRoot);
  server.on("/cmd_red_on", cmd_red_on);
  server.on("/cmd_yellow_on", cmd_yellow_on);
  server.on("/cmd_green_on", cmd_green_on);
  server.on("/cmd_all_off", cmd_all_off);

  //get heap status, analog input value and all GPIO statuses in one json call
  server.on("/all.json", HTTP_GET, []() {
    String json = "{";
    json += "\"heap\":" + String(ESP.getFreeHeap());
    json += ", \"analog\":" + String(analogRead(A0));
    json += ", \"gpio\":" + String((uint32_t)(((GPI | GPO) & 0xFFFF) | ((GP16I & 0x01) << 16)));
    json += "}";
    server.send(200, "text/json", json);
    json = String();
  });
  server.begin();
  Serial.println("Server started");

  // Print the IP address
  Serial.println(WiFi.localIP());
}

void loop() {
  server.handleClient();
}
Wiring Diagram
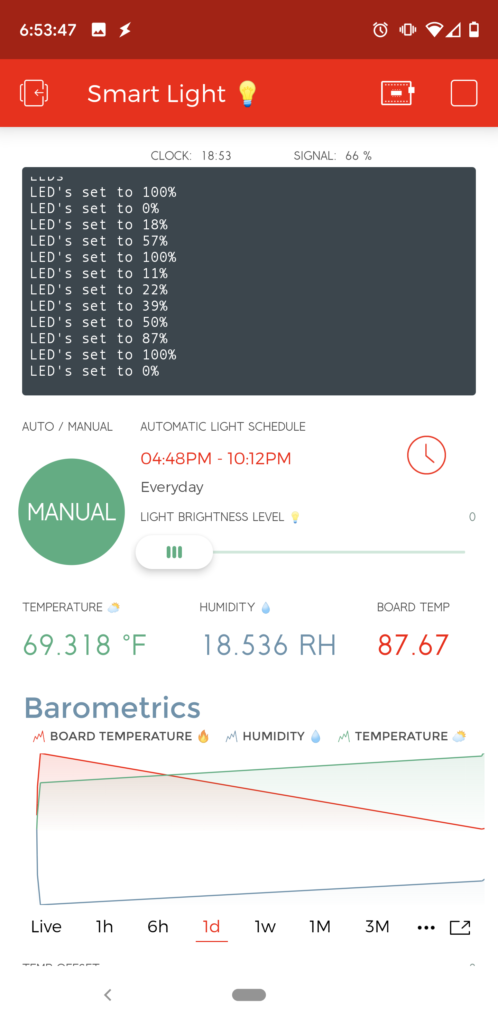
Web Interface