My kids got me this for Father’s Day!
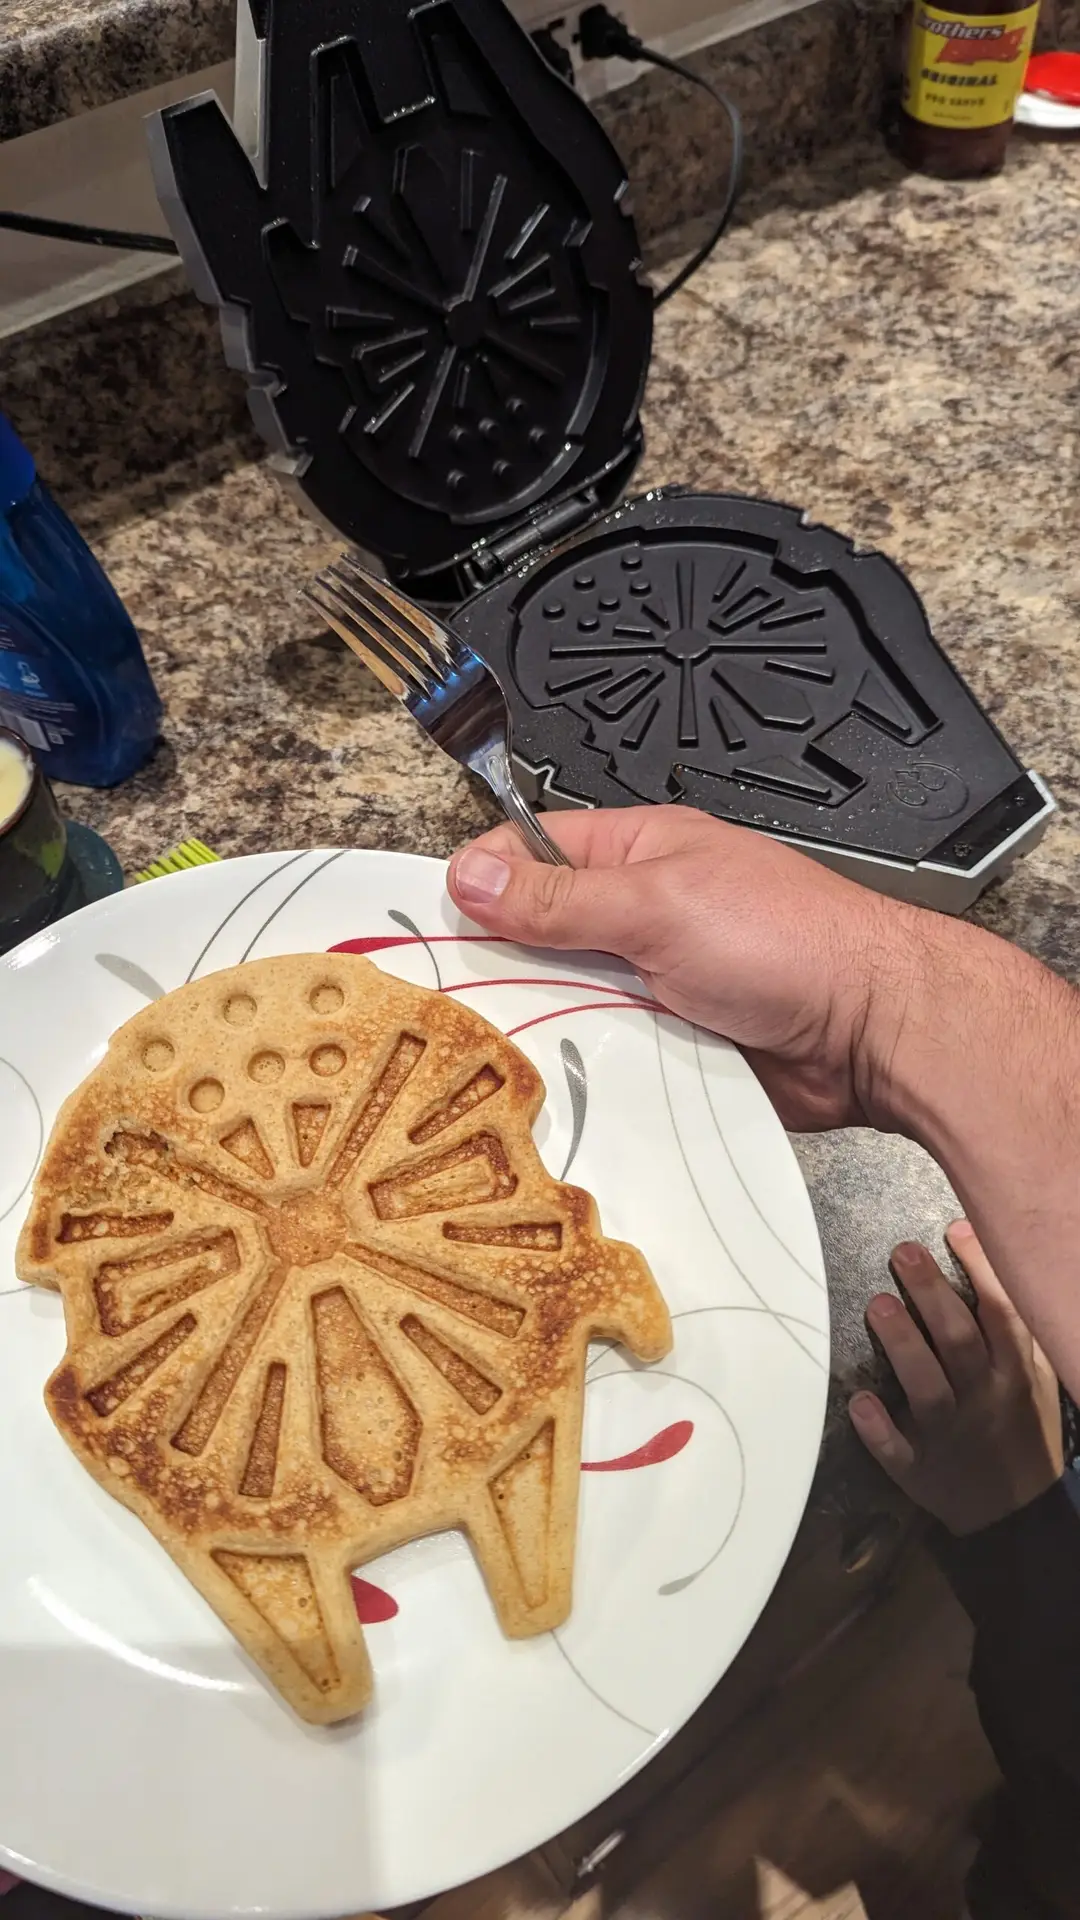
My kids got me this for Father’s Day!
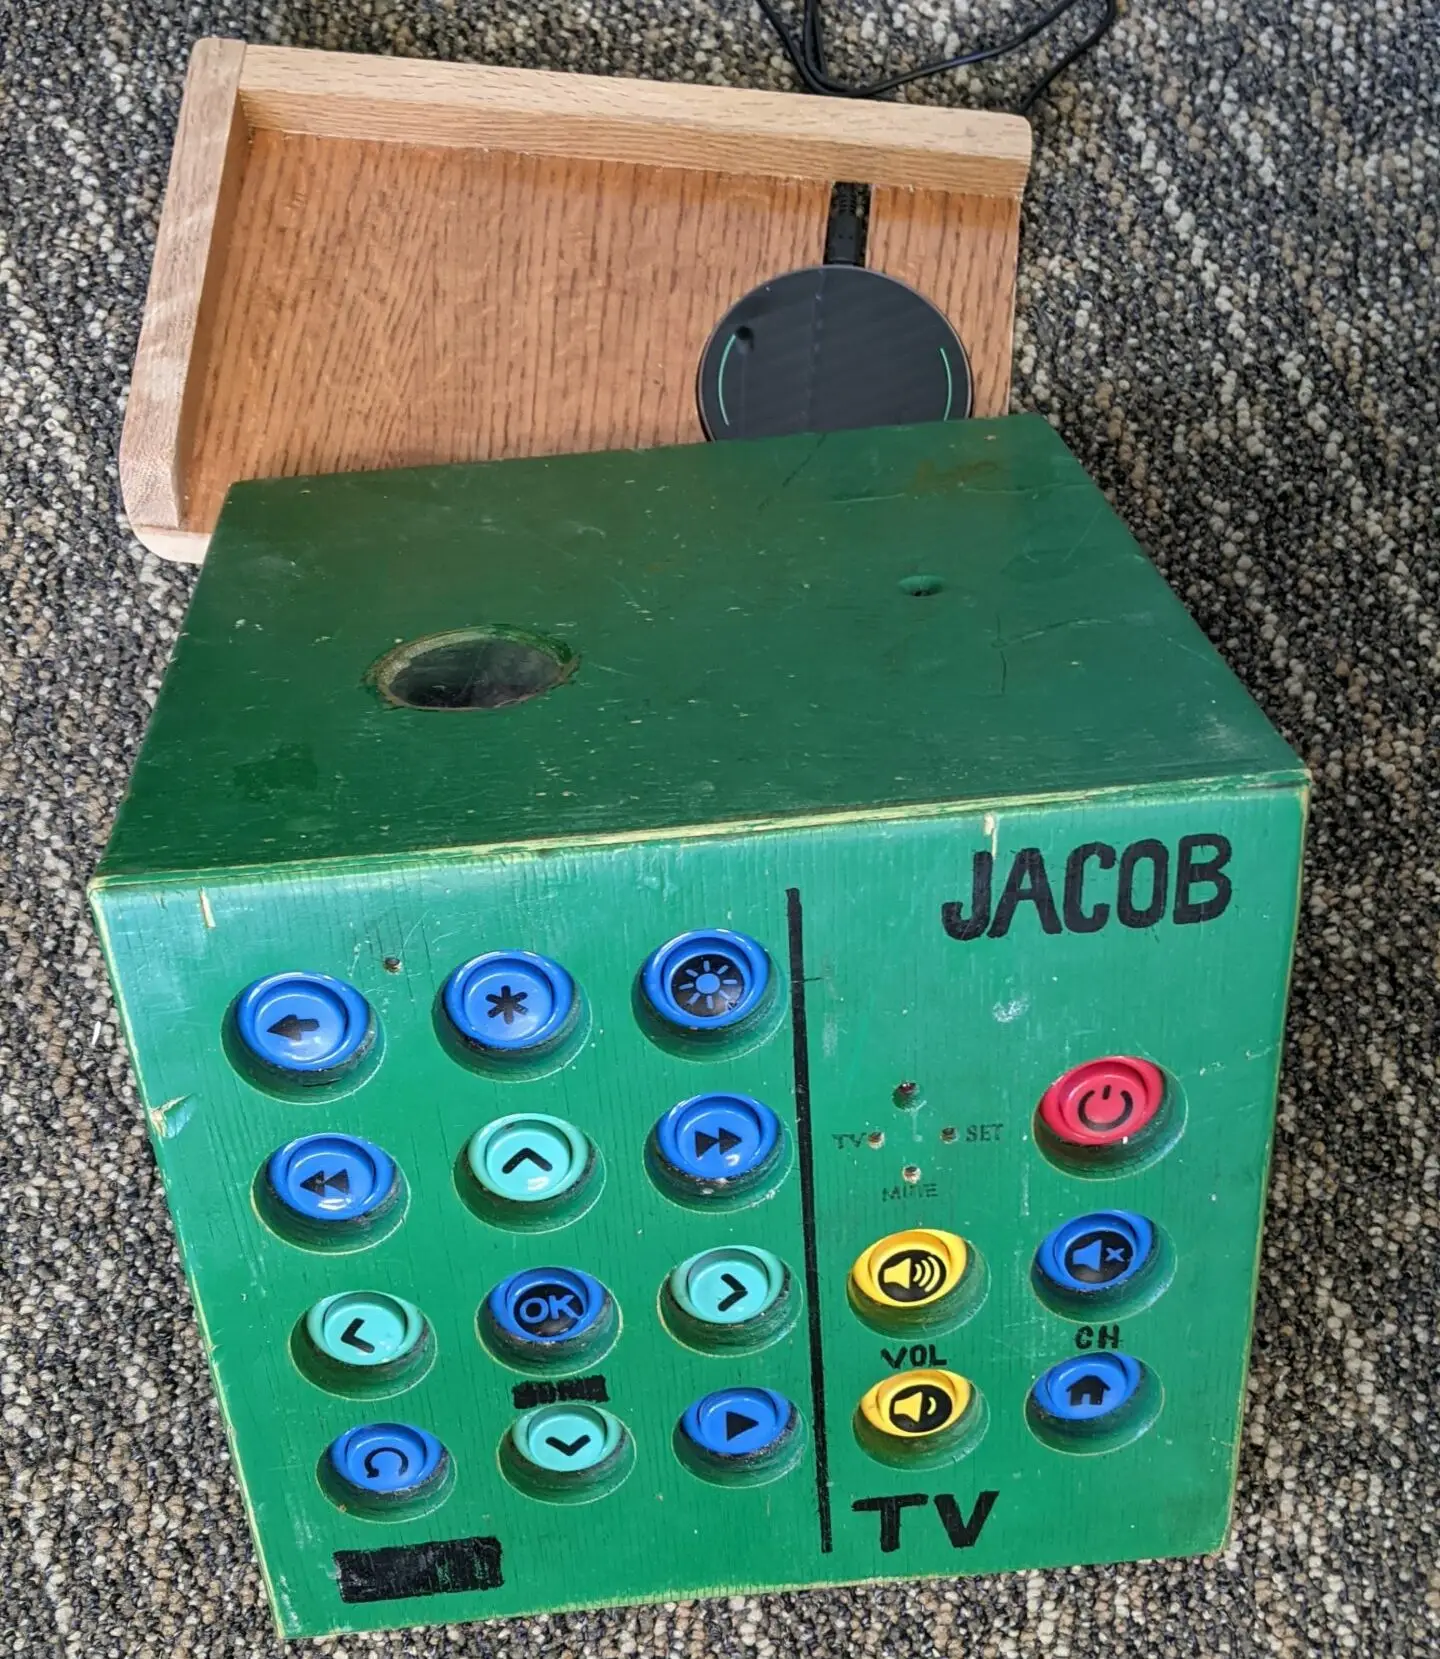
As a simple upgrade to the Megabutton Universal Remote Mk II+ / Adaptive Universal Remote, here is a simple way to add wireless charging to almost any project.
Parts
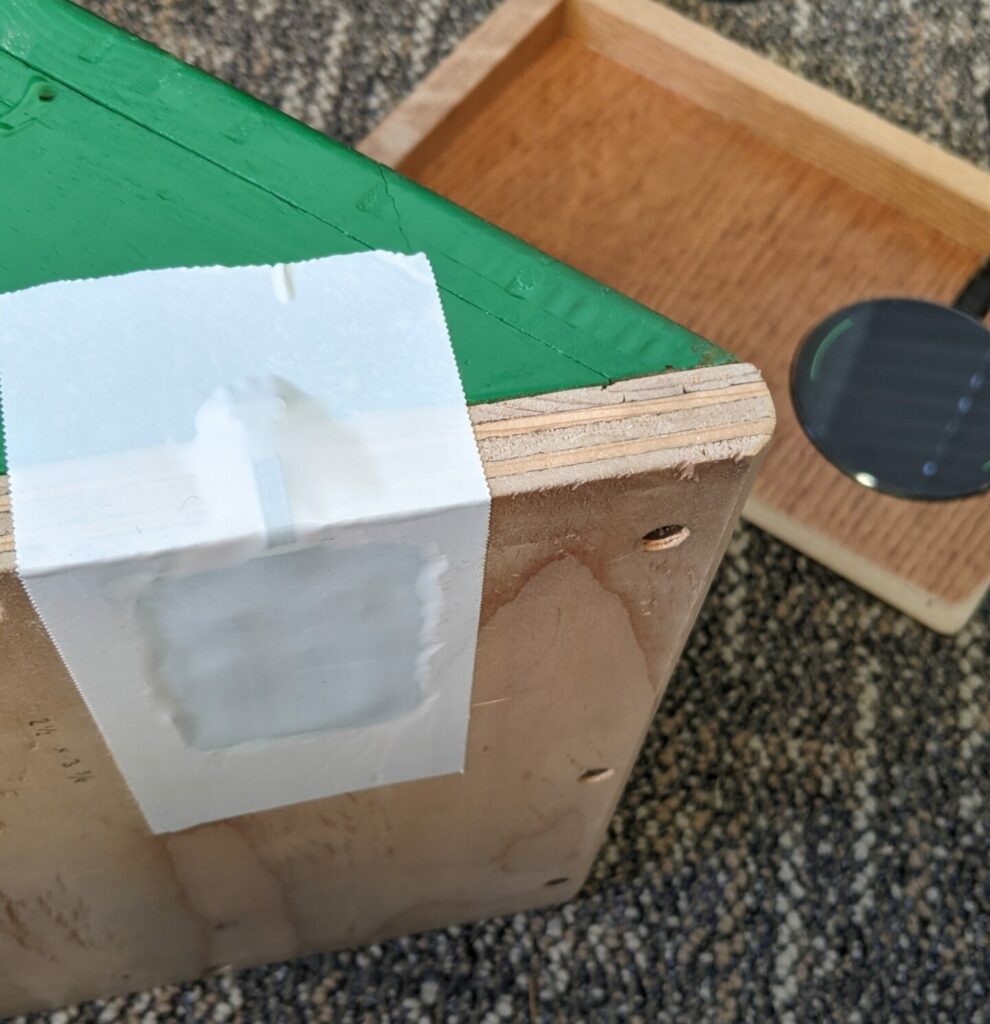
By attaching the wireless charger receiver to your device, you can then use it with a compatible wireless charger. In the instance of the Megabutton Universal Remote Mk III, I carved out a section of the base to ensure the receiver was completely flush, then covered the entire wireless charger receiver with tape to protect it, as it is quite thin. Then I built a tray to hold the wireless phone charger creating a charging station. Now Jacob can slide the Megabutton remote into the charge station whenever the batter gets low.
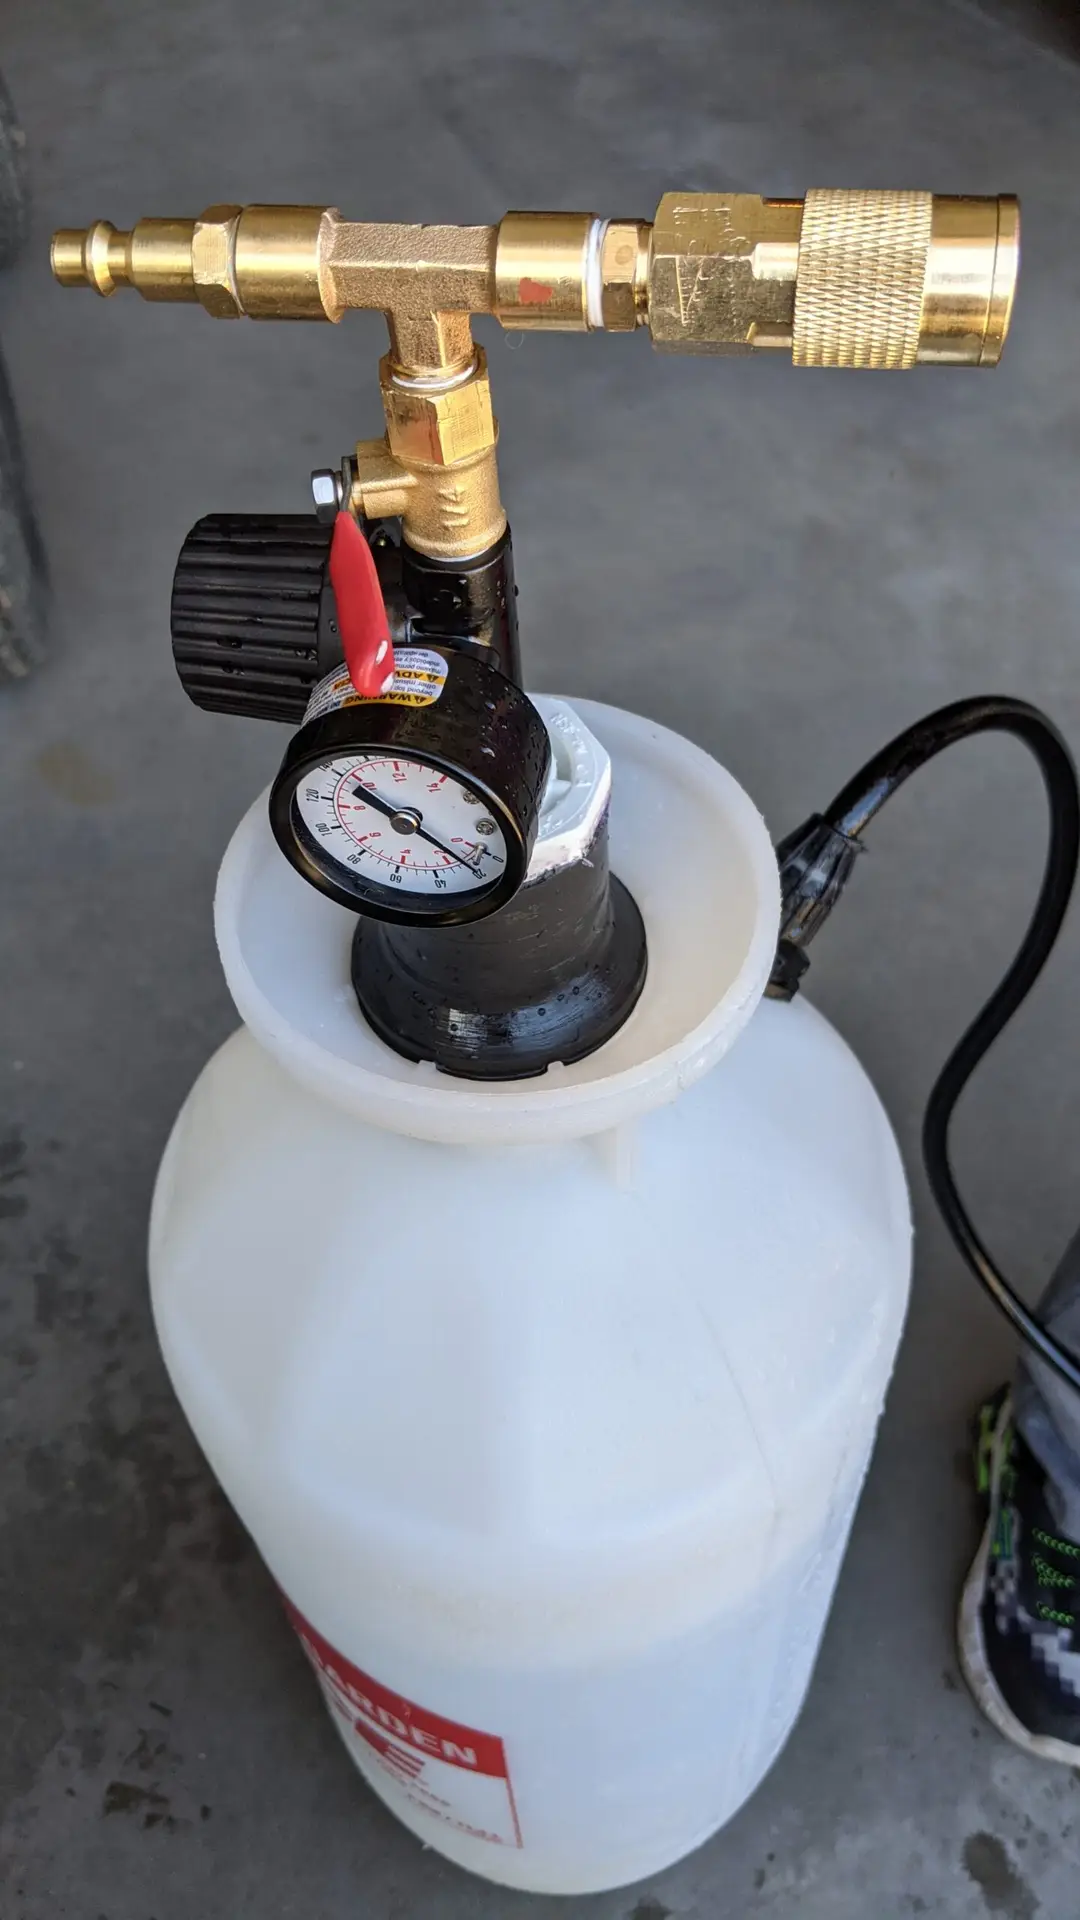
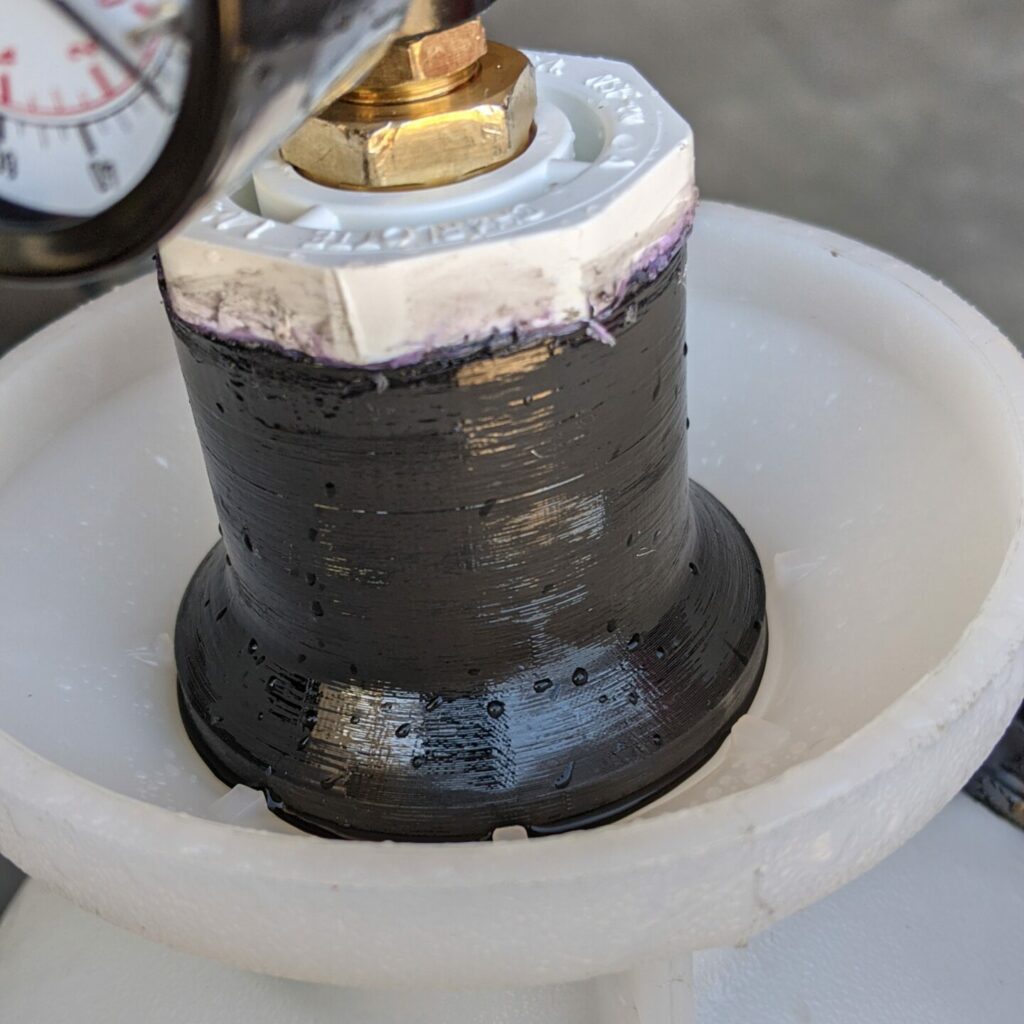
I use this pump sprayer only for water, as it is my water supply for a water bottle rocket launcher. I got tired of constantly having to manually pump the water container when I was already using an air compressor to fill and pressurize the water bottle rockets.
This is when I took on the task of building a threaded adapter that could be glued to a standard PVC coupling. Then I can add pneumatic accessories, like an adjustable pressure valve and a shutoff valve.
Because of the way the threaded adapter was designed, I decided to split it into to parts, so I could print the threads without needing supports. Then by gluing the ABS 3D printed thread adapter parts onto the PVC coupling with PVC/ABS glue, I was able to make a pretty solid pump sprayer pneumatic adapter.
COVID-19 has forced many of us to work from and practice social distancing to flatten the curve. As a result, I’ve been spending a lot of time in my home office. Since I’ll be working from home for the foreseeable future, I decided it was time to clean and organize my office. When I clean/organize I end up digging up a bunch of stuff I haven’t used in years. Most of these items usually get recycled or donated, and some sometimes I’ll find small treasures that I’ve held on to but forgot about.
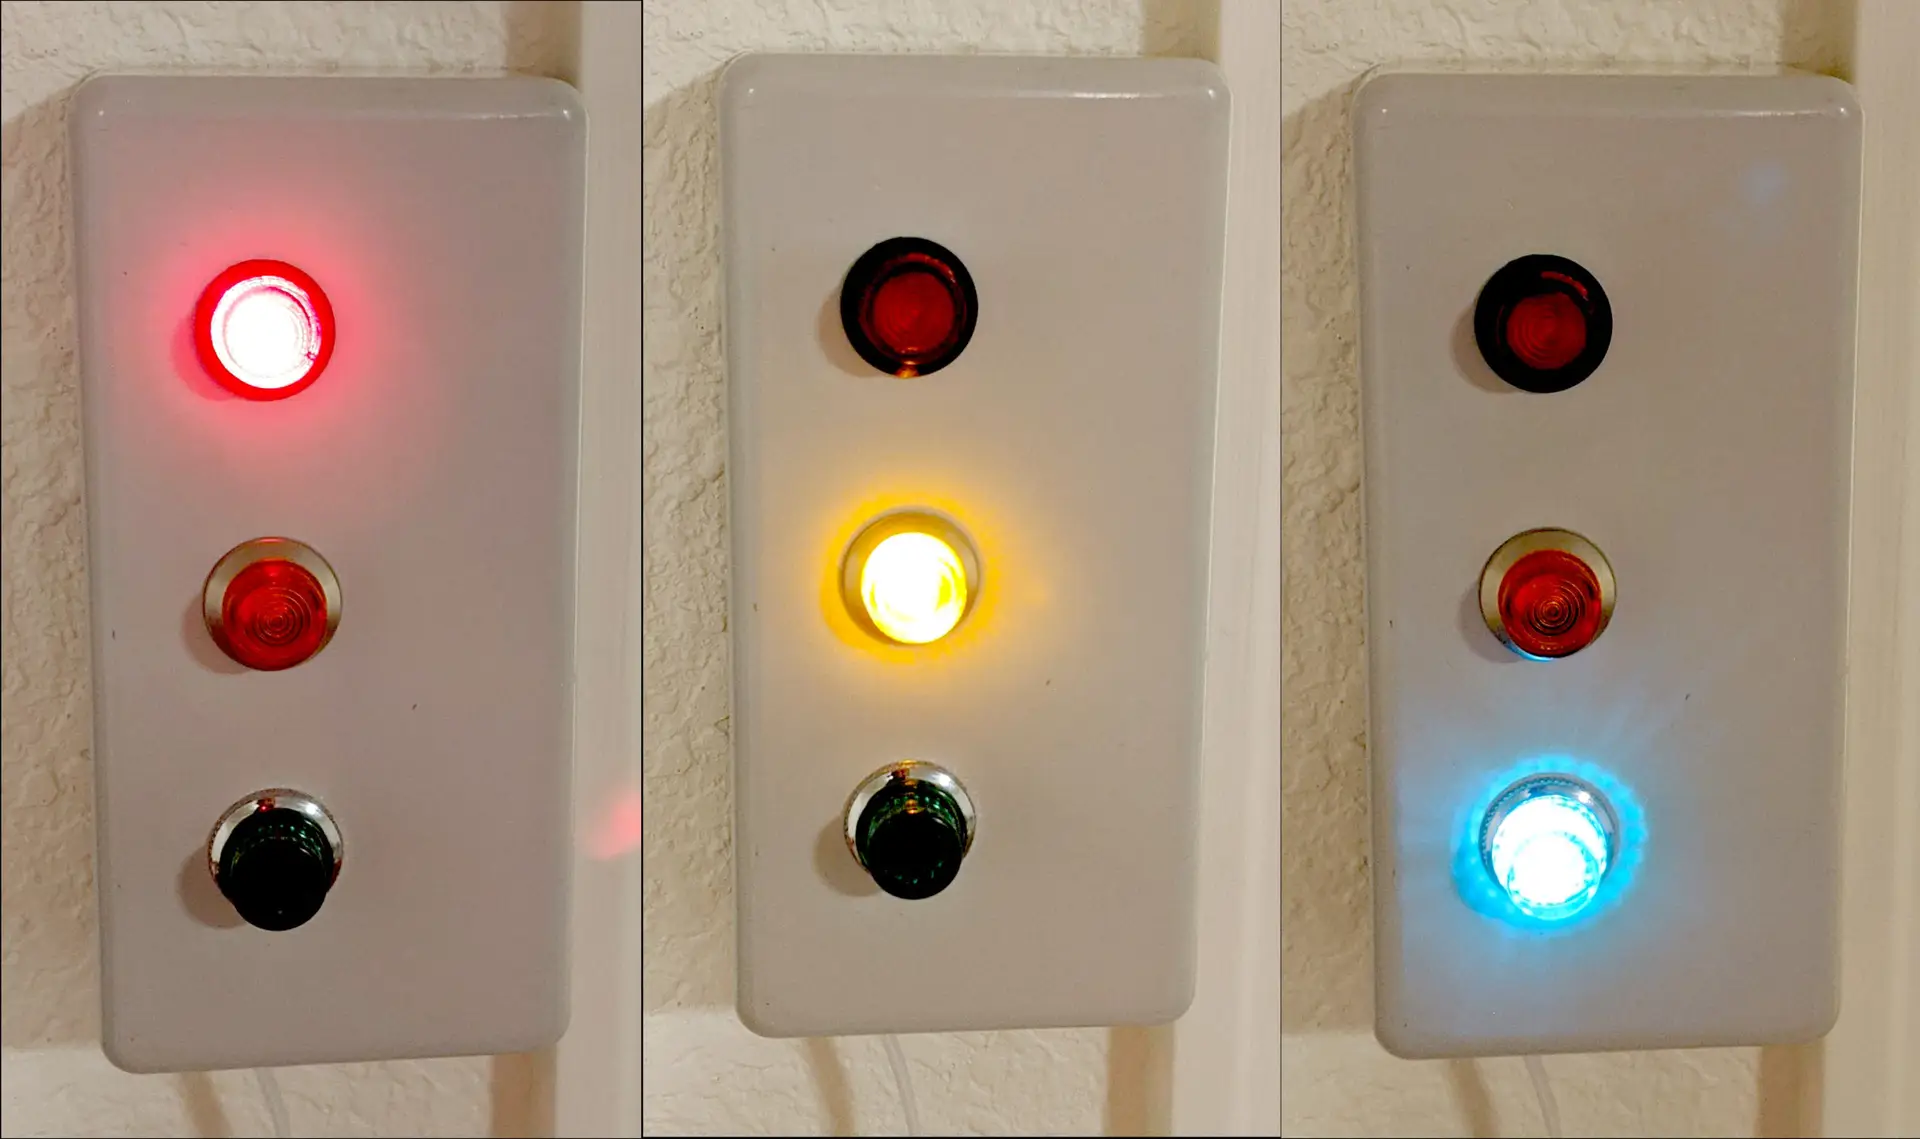
This time I found my Dad’s original office stoplight that he used when I was a kid in one of the random-stuff boxes. Essentially, it’s miniature stoplight that was used to indicate my Dad’s availability at any given moment. It was made with incandescent light fixtures with colored light covers. The light were controlled by two toggle switches.
Since my kids are home from school too, for the same reason I’m working from home, I thought this would be a perfect opportunity to give this stoplight box new life. Hopefully it will help the kids understand when I’m in the middle of something and can’t be bothered.
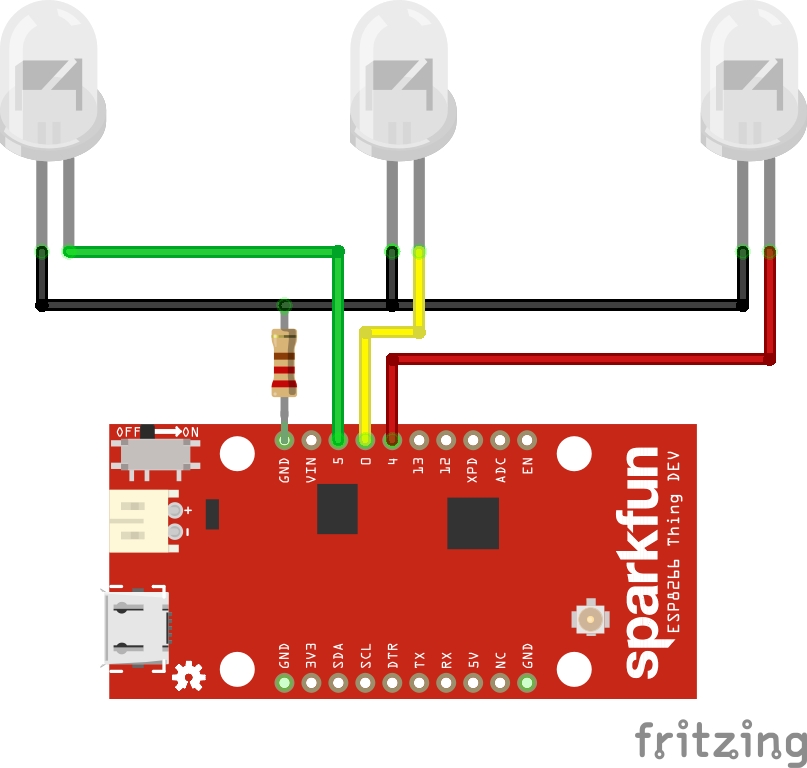
While I could have made this from scratch that would have a much smaller profile, I wanted to keep the original look. I did replace the 6V incandescent light bulbs with colored LED’s. This was simple enough to do by cutting the light bulb fixture in half on the bandsaw. Then it was as simple as wiring up the LED’s and programming an ESP8266 thing with a very simple web interface.
/*
 *  Simple web LED control for a stop light.
 *  The server IP address of the ESP8266 module, will be printed to Serial when the module is connected.
 */

#include <ESP8266WiFi.h>
#include <WiFiClient.h>
#include <ESP8266WebServer.h>

//////////////////////
// WiFi Definitions //
//////////////////////
const char *ssid = "your_wifi";
const char *password = "your_password";
const char *hostname = "office-stop-light";
const String title = "OFFICE STOP LIGHT CONTROL";

/////////////////////
// Pin Definitions //
/////////////////////
const int RED_LED_PIN = 4;
const int YEL_LED_PIN = 0;
const int GRN_LED_PIN = 5; // Thing's onboard, green LED

// Create an instance of the server
// specify the port to listen on as an argument
ESP8266WebServer server(80);


/* Homepage Webcode */
void send_homepage() {
  String server_index = "<!DOCTYPE html><html lang=\"en\"><head><meta name=\"viewport\" content=\"width=device-width, initial-scale=1, user-scalable=no\"/><title>"+title+"</title>";
  server_index += "<style>.c{text-align: center;} div,input{padding:5px;font-size:1em;}  input{width:90%;}  body{text-align: center;font-family:verdana;} button{border:0;border-radius:0.6rem;background-color:#1fb3ec;color:#fdd;line-height:2.4rem;font-size:1.2rem;width:100%;} .q{float: right;width: 64px;text-align: right;} .button_blue {background-color: #008CBA;} .button_red {background-color: #f44336;} .button_yellow {background-color: #ffdd00; color: black;} .button_dark_grey {background-color: #555555;} .button_green {background-color: #4CAF50;} </style>";
  server_index += "<script>function c(l){document.getElementById('s').value=l.innerText||l.textContent;document.getElementById('p').focus();}</script>";
  server_index += "</head><body><div style='text-align:left;display:inline-block;min-width:260px;'>";
  server_index += "<H3>"+title+"</H3>";
  server_index += "<form action=\"/cmd_red_on\" method=\"get\"><button class=\"button_red\">Red</button></form><br/><form action=\"/cmd_yellow_on\" method=\"get\"><button class=\"button_yellow\">Yellow</button></form><br/> <form action=\"/cmd_green_on\" method=\"get\"><button class=\"button_green\">Green</button></form><br/><form action=\"/cmd_all_off\" method=\"get\"><button class=\"button_dark_grey\">Off</button></form><br/>    ";
  server.send(200, "text/html", server_index);
}

/* Go to http://office-stop-light in a web browser with a device on the same network as this ESP8266 thing. */
void handleRoot() {
  send_homepage();
}

void cmd_red_on() {
  send_homepage();
  digitalWrite(RED_LED_PIN, 1);
  digitalWrite(YEL_LED_PIN, 0);
  digitalWrite(GRN_LED_PIN, 0);
}

void cmd_yellow_on() {
  send_homepage();
  digitalWrite(RED_LED_PIN, 0);
  digitalWrite(YEL_LED_PIN, 1);
  digitalWrite(GRN_LED_PIN, 0);
}

void cmd_green_on() {
  send_homepage();
  digitalWrite(RED_LED_PIN, 0);
  digitalWrite(YEL_LED_PIN, 0);
  digitalWrite(GRN_LED_PIN, 1);
}

void cmd_all_off() {
  send_homepage();
  digitalWrite(RED_LED_PIN, 0);
  digitalWrite(YEL_LED_PIN, 0);
  digitalWrite(GRN_LED_PIN, 0);
}

void setup() {
  Serial.begin(115200);
  delay(10);

  // prepare GPIO / LED
  pinMode(RED_LED_PIN, OUTPUT);
  pinMode(YEL_LED_PIN, OUTPUT);
  pinMode(GRN_LED_PIN, OUTPUT);
  digitalWrite(RED_LED_PIN, 0);
  digitalWrite(YEL_LED_PIN, 0);
  digitalWrite(GRN_LED_PIN, 0);

  // Connect to WiFi network
  Serial.println();
  Serial.println();
  Serial.print("Connecting to ");
  Serial.println(ssid);

  WiFi.hostname(hostname);
  WiFi.begin(ssid, password);

  while (WiFi.status() != WL_CONNECTED) {
    delay(500);
    Serial.print(".");
  }
  Serial.println("");
  Serial.println("WiFi connected");

  // Configure and start the server
  server.on("/", handleRoot);
  server.on("/cmd_red_on", cmd_red_on);
  server.on("/cmd_yellow_on", cmd_yellow_on);
  server.on("/cmd_green_on", cmd_green_on);
  server.on("/cmd_all_off", cmd_all_off);

  //get heap status, analog input value and all GPIO statuses in one json call
  server.on("/all.json", HTTP_GET, []() {
    String json = "{";
    json += "\"heap\":" + String(ESP.getFreeHeap());
    json += ", \"analog\":" + String(analogRead(A0));
    json += ", \"gpio\":" + String((uint32_t)(((GPI | GPO) & 0xFFFF) | ((GP16I & 0x01) << 16)));
    json += "}";
    server.send(200, "text/json", json);
    json = String();
  });
  server.begin();
  Serial.println("Server started");

  // Print the IP address
  Serial.println(WiFi.localIP());
}

void loop() {
  server.handleClient();
}

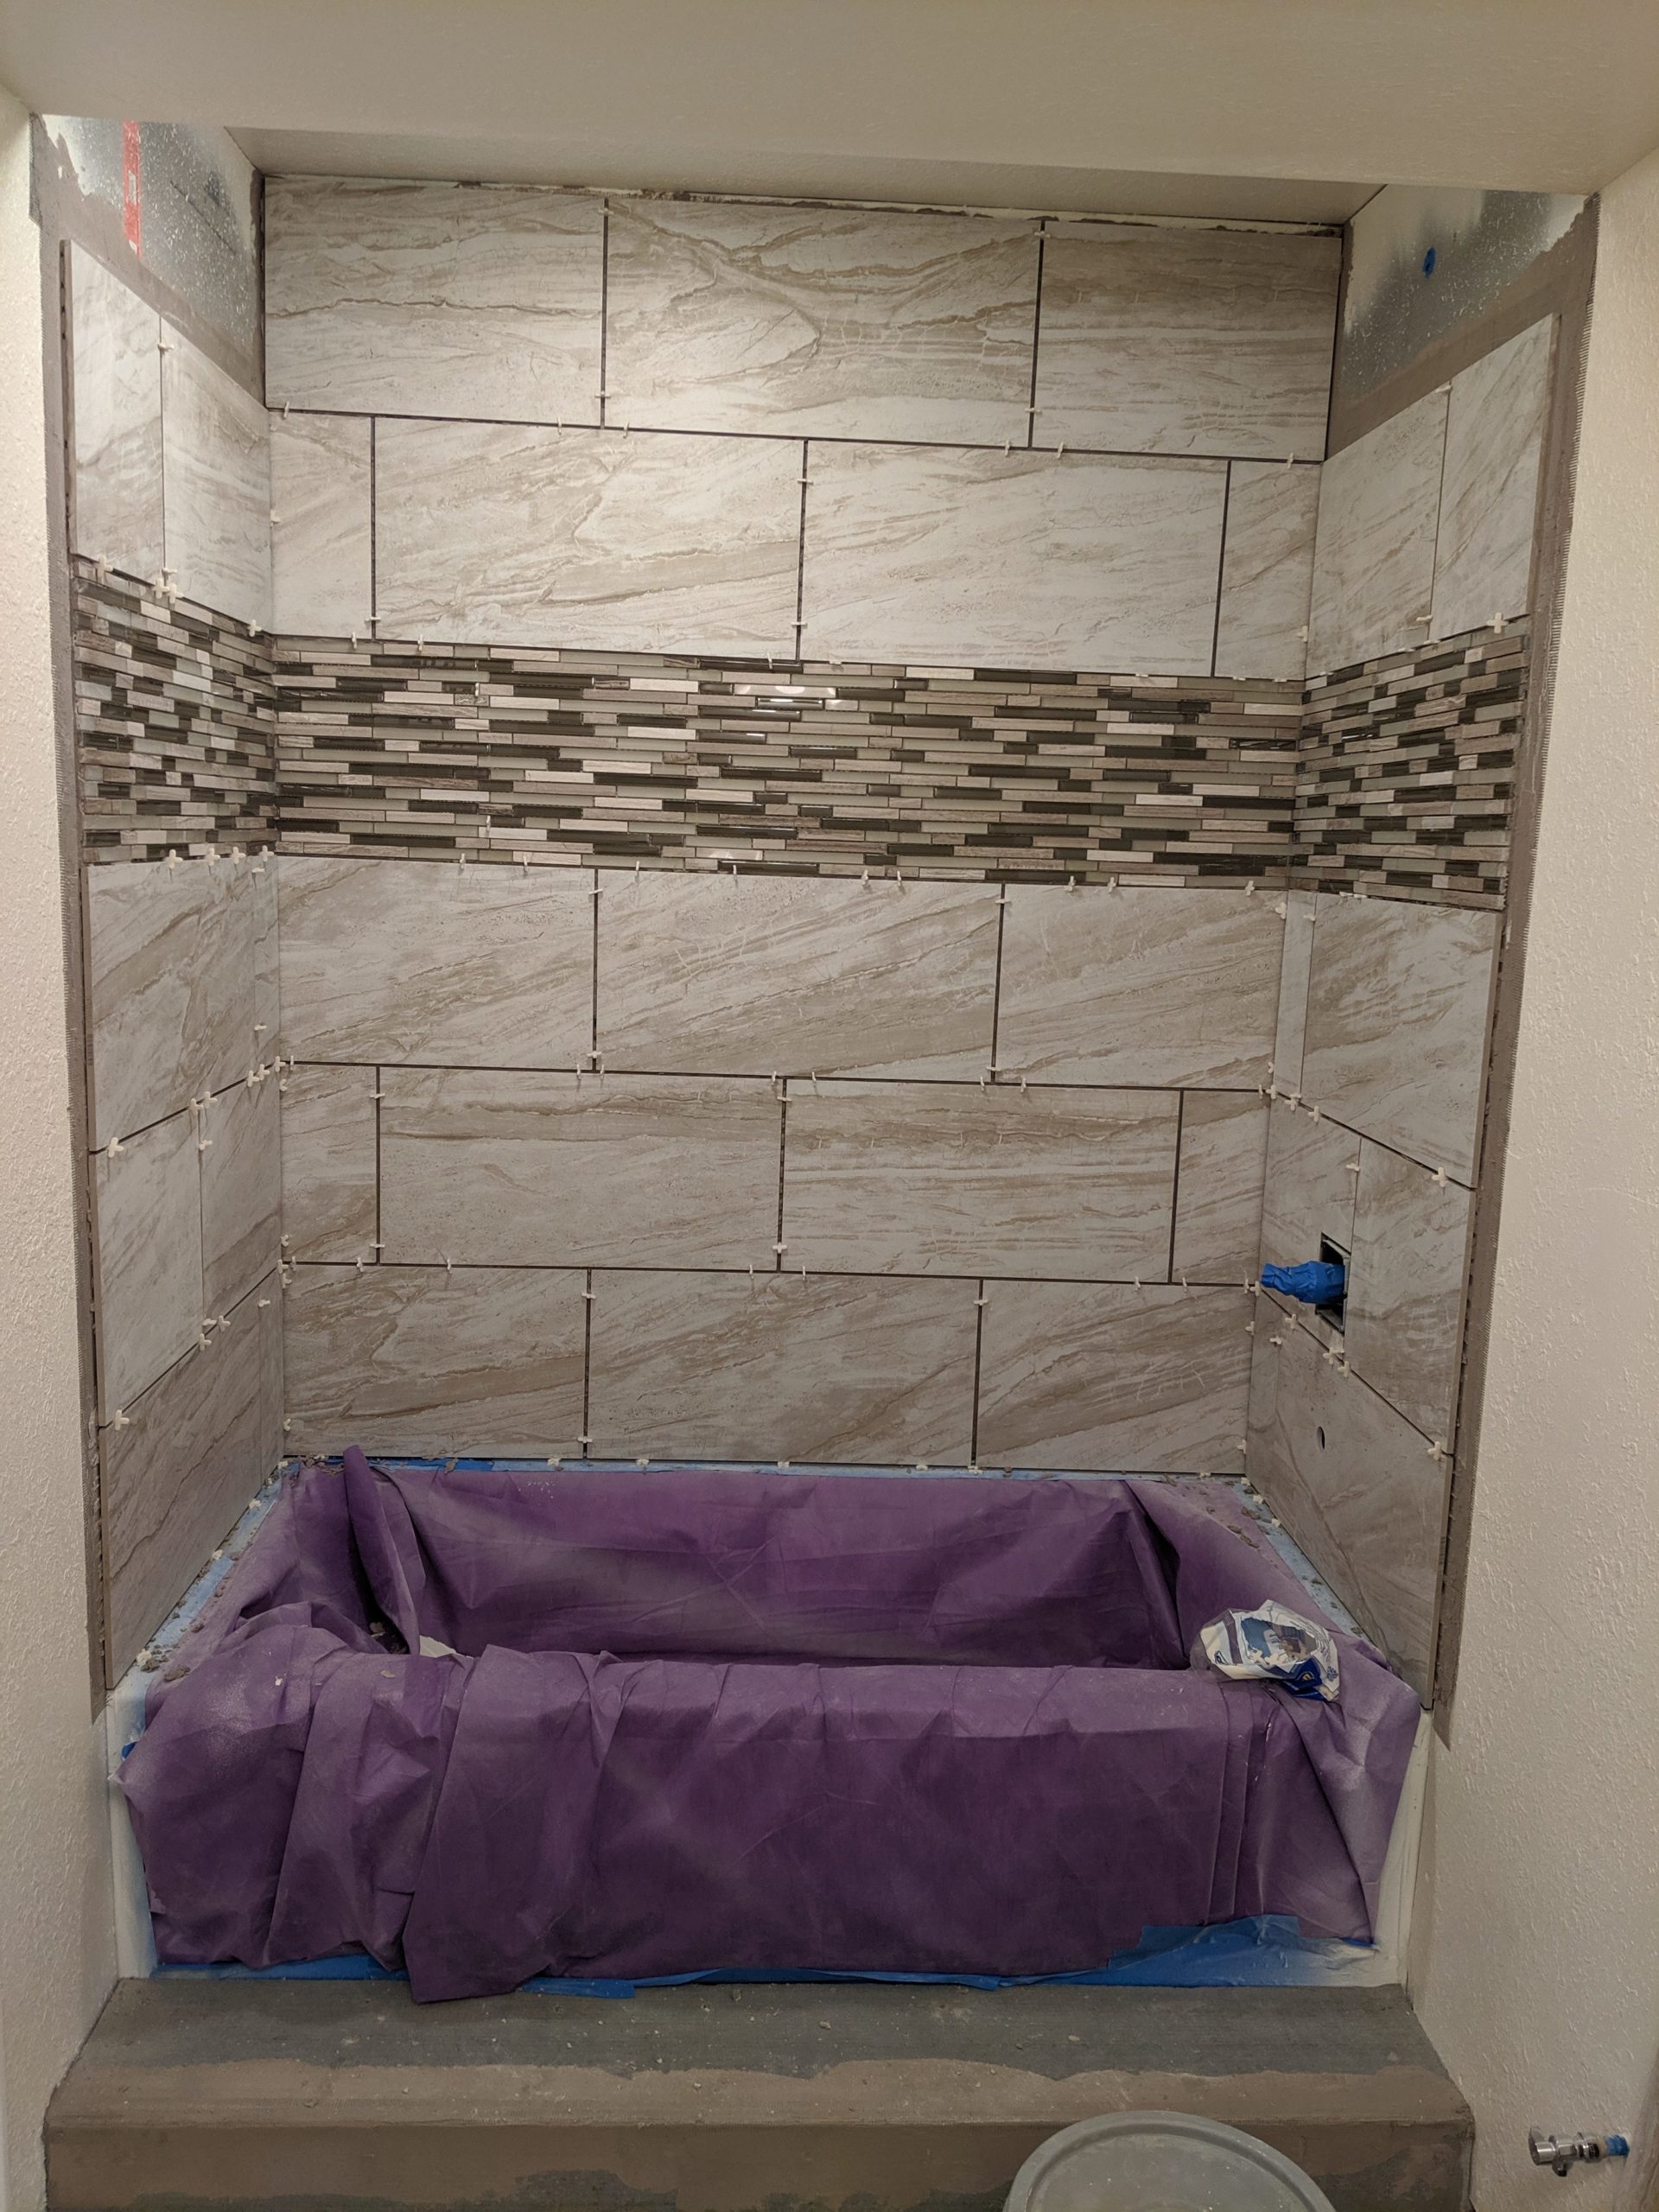
In case anyone has been wondering why I haven’t been posting as much, I’ve been finishing my own basement for the past year and a half and counting. Just started on the bathroom today.
I’ll be sure to update this post with more details and lessons learned.
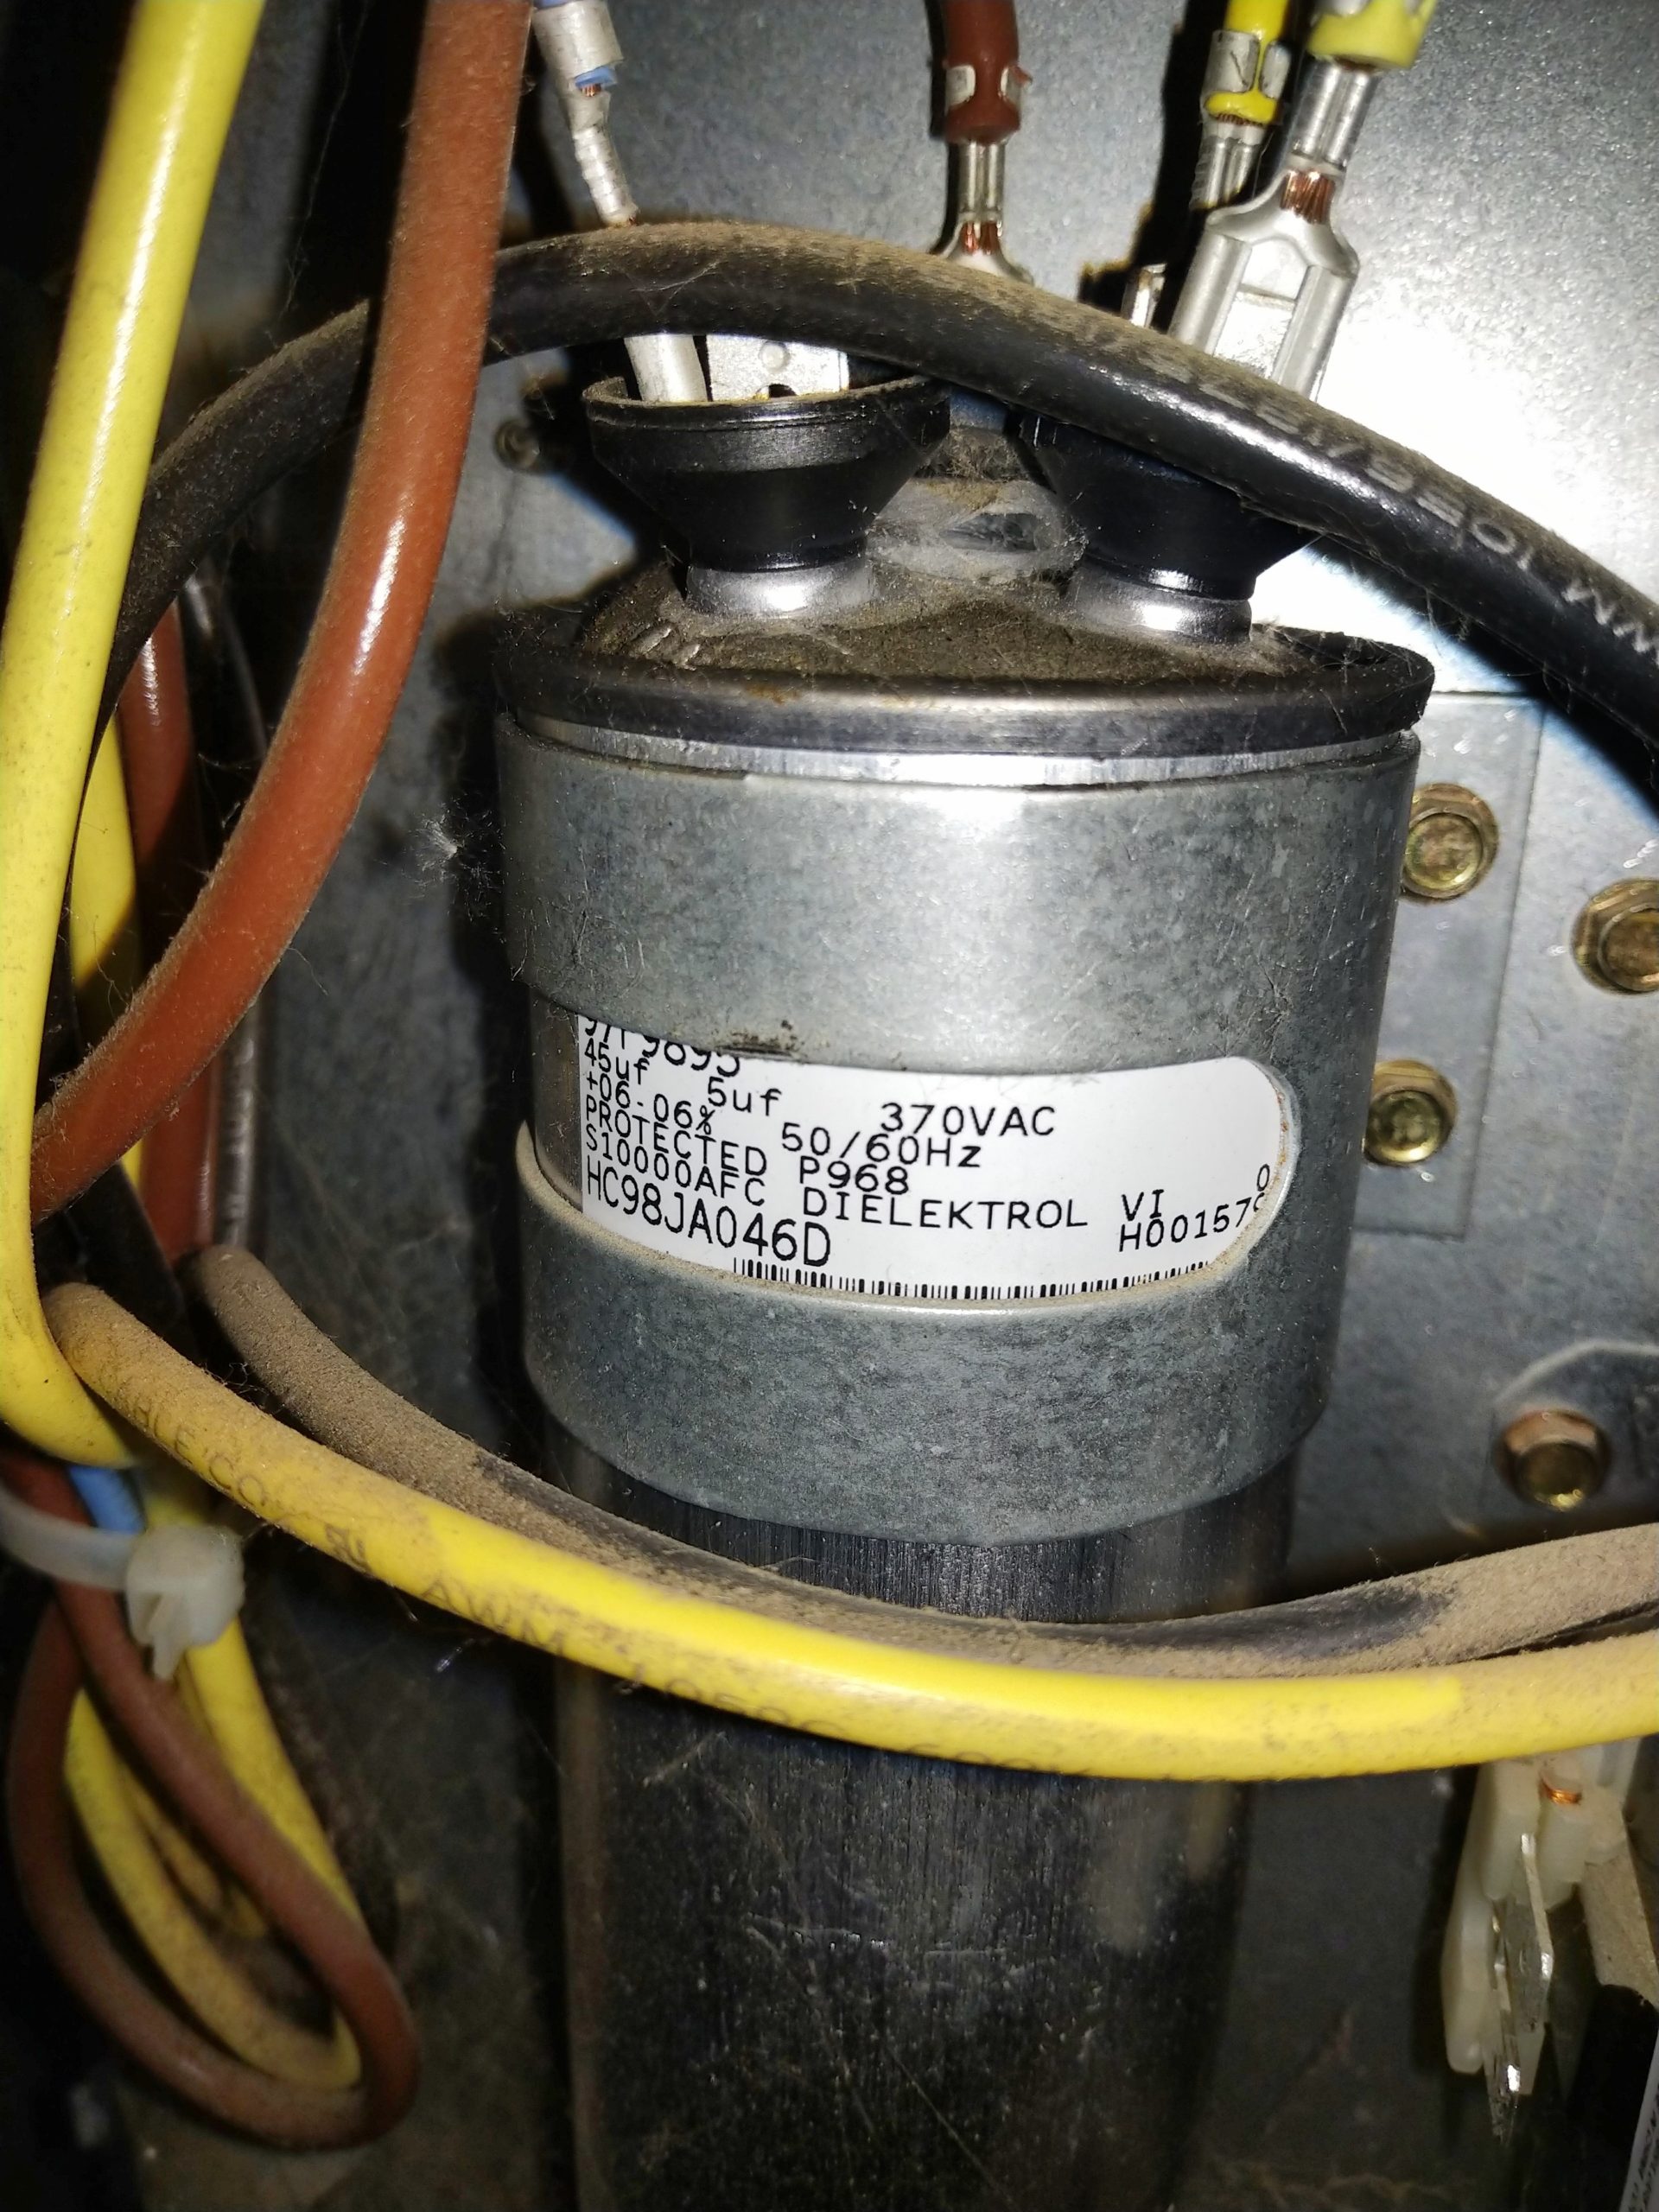
Oh fun, the AC died on us in the middle of the hot season. It seems to want to run, but doesn’t kick on properly.

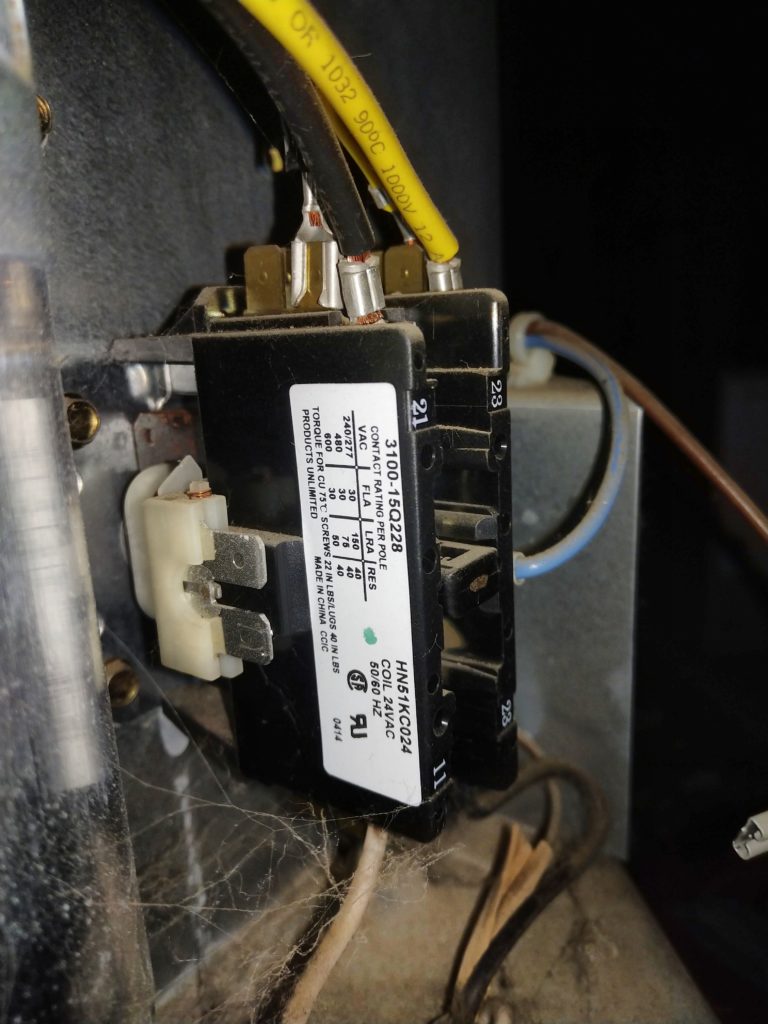
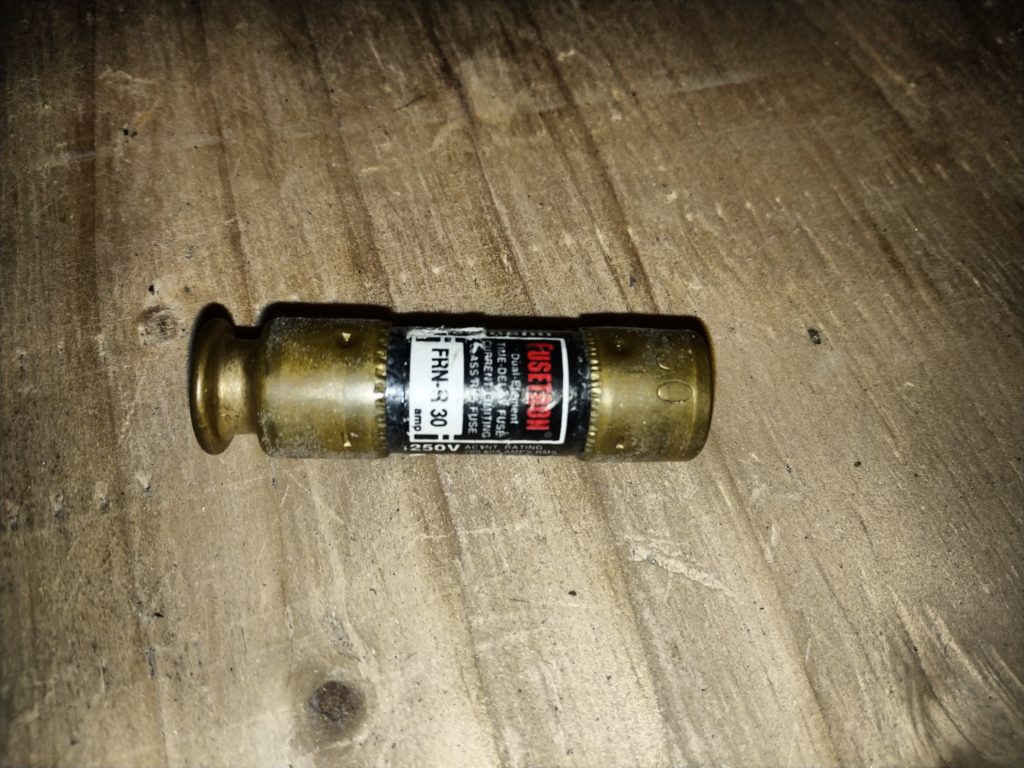
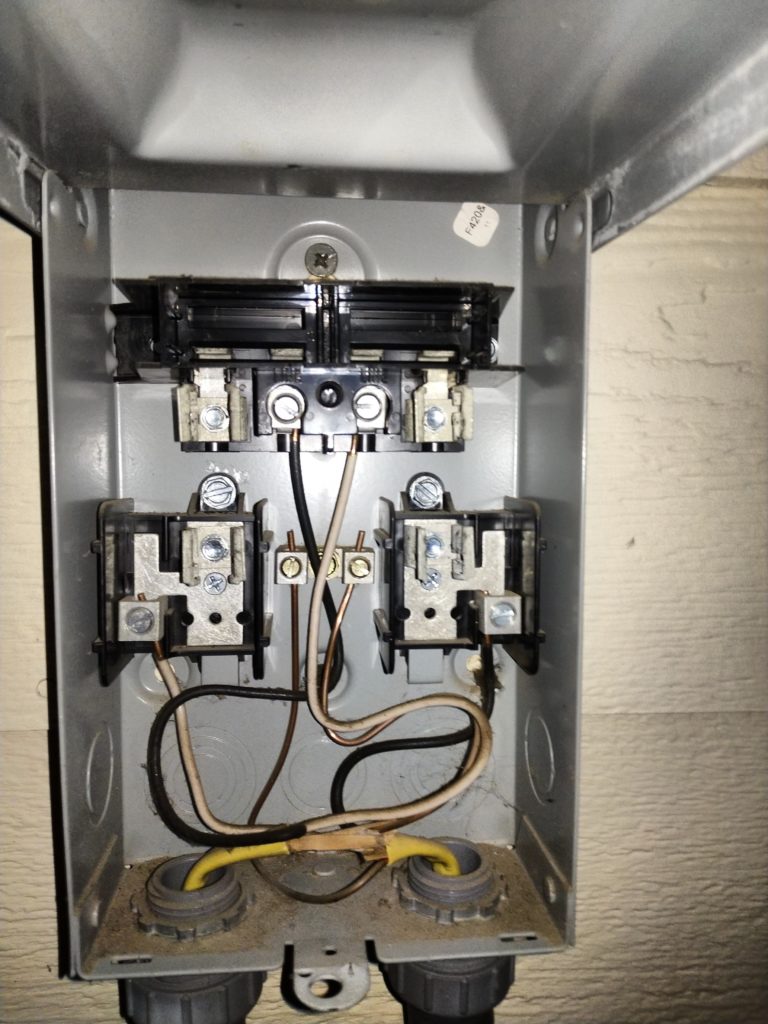
Doing some research online, I discovered that it must be either the relay, or the starting capacitor. Luckily I was able to find some replacements on Amazon. Those two days seemed like forever! But one I replaced the parts (and the fuses) it started right back up.
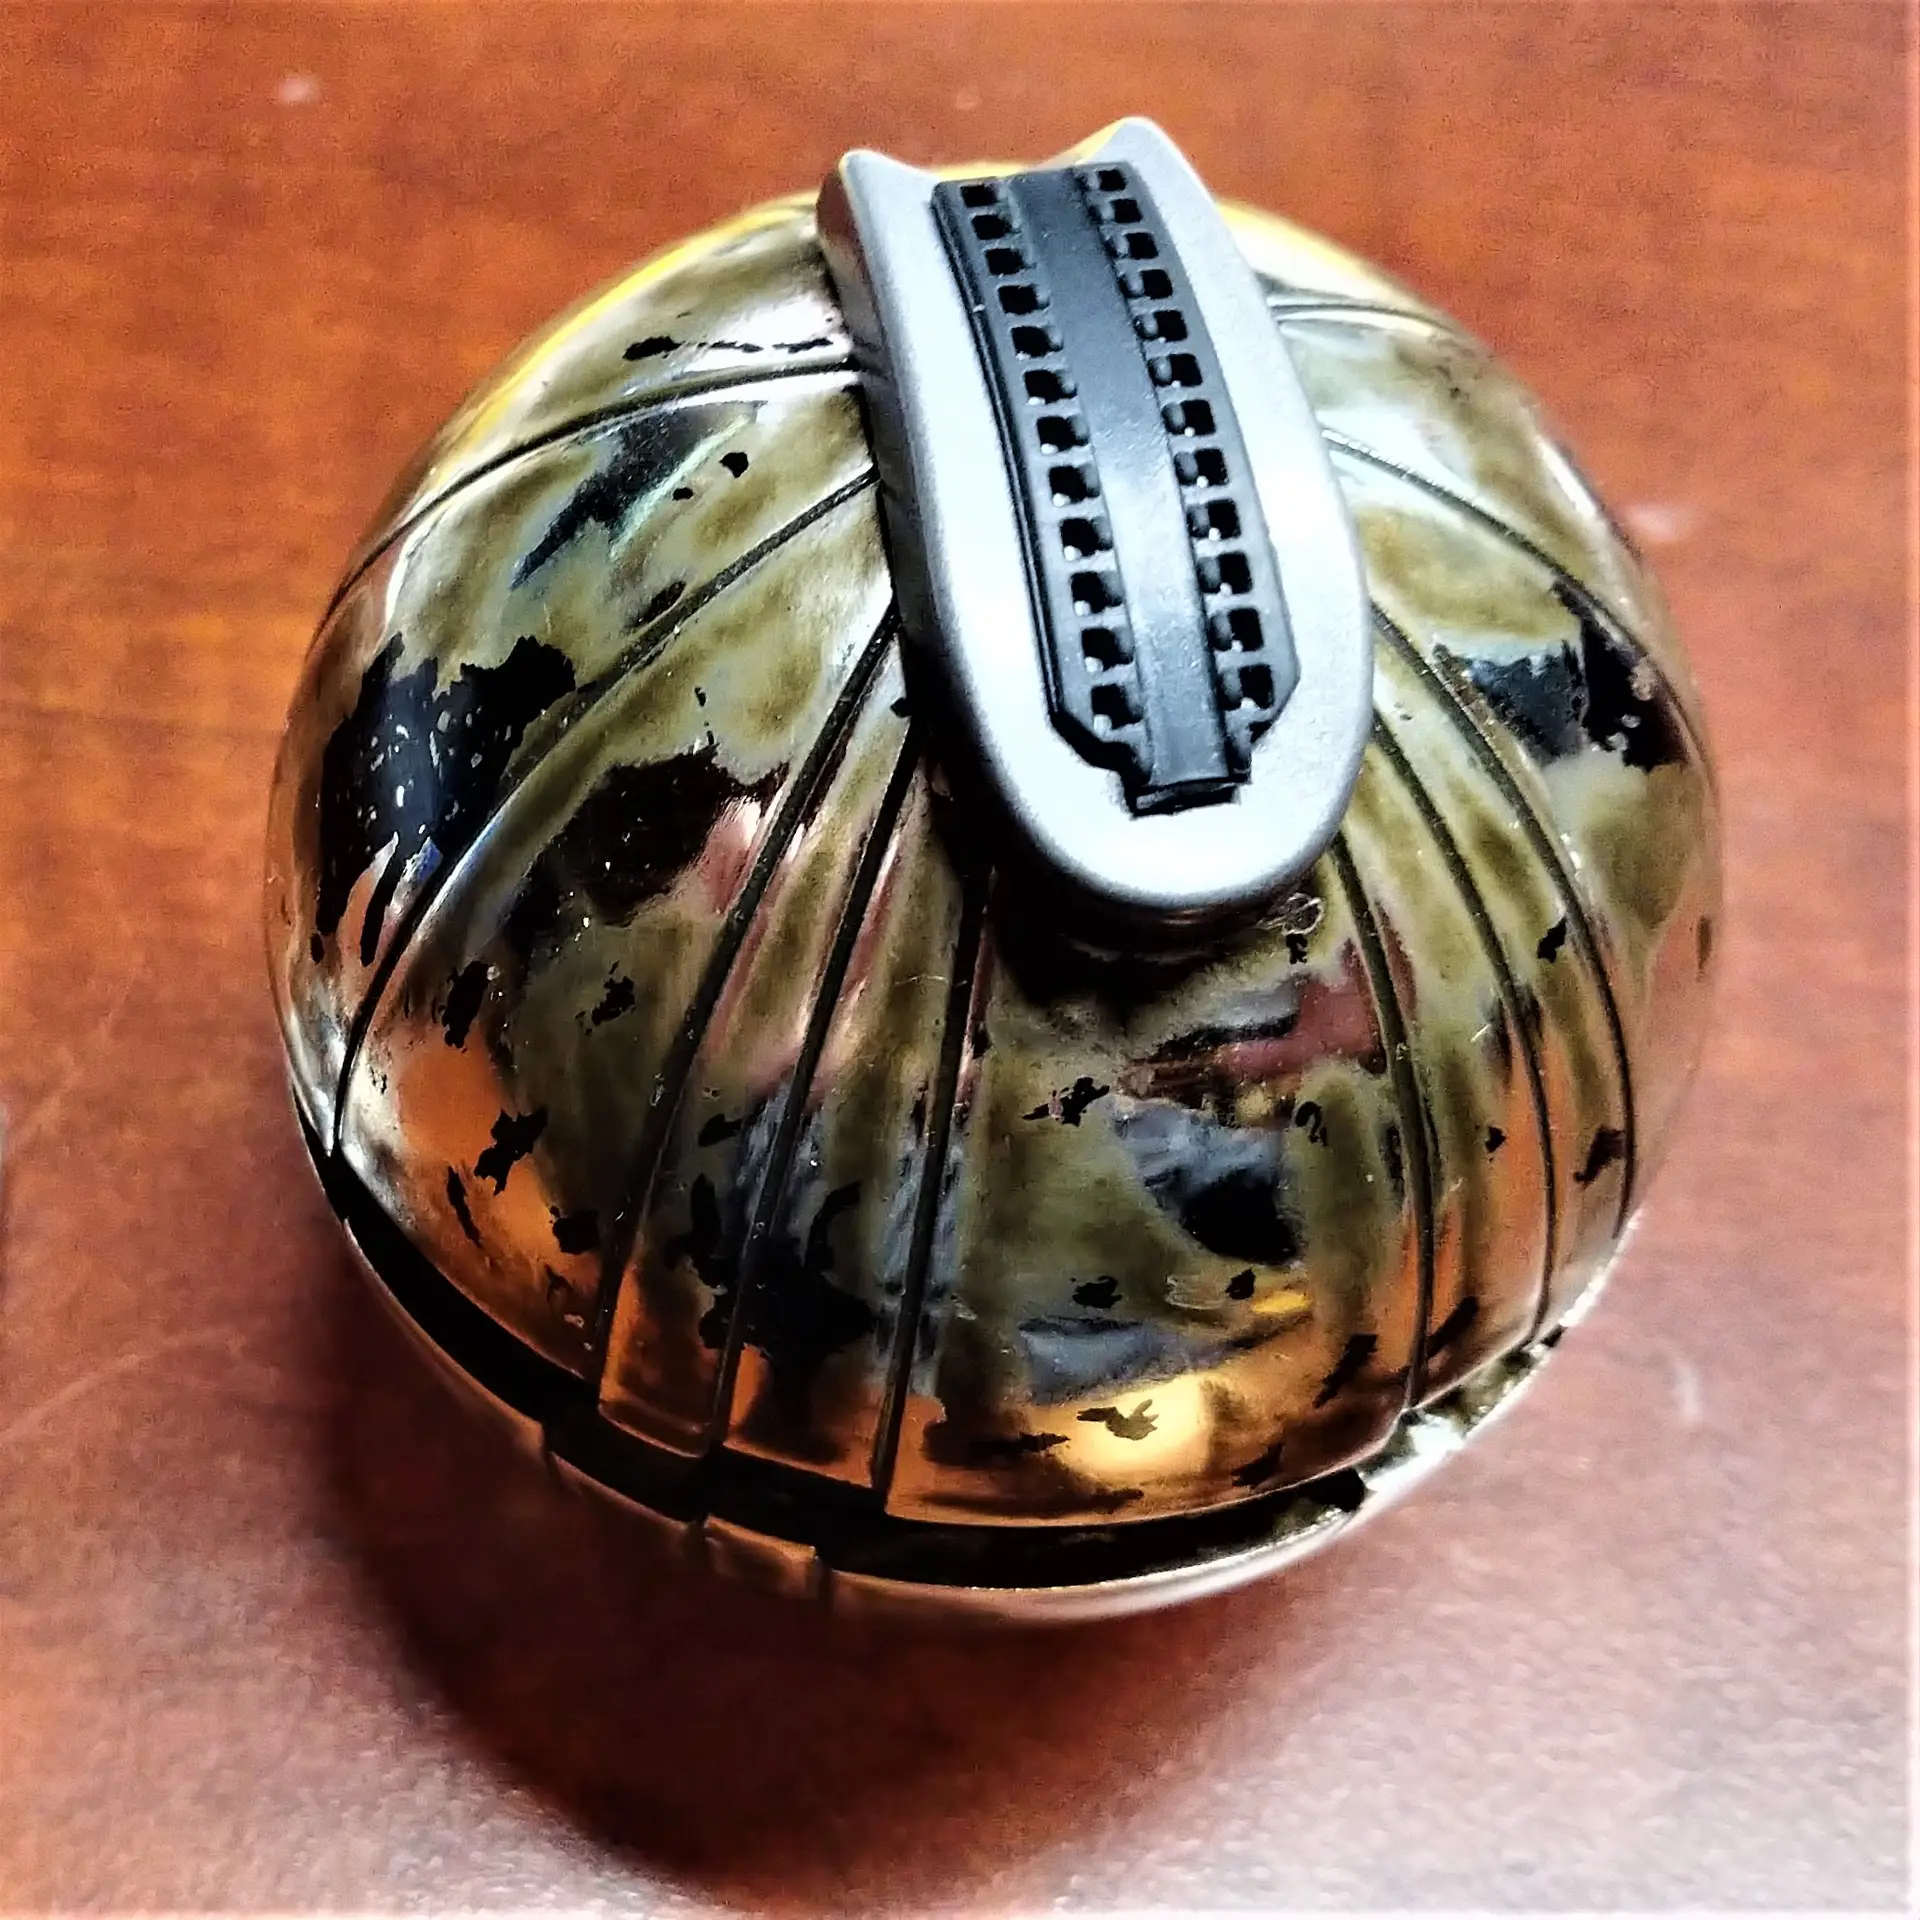
This is a repair job my brother came across. Apparently there were a few of these replica Star Wars Thermal Detonators made with lights and sound. Unfortunately, the one I was asked to look at, was completely dead. It didn’t take me long to find out the problem. The owner of this prop made a very terrible but honest mistake. When it came time to replace the batteries, they accidentally replaced the required N size 1.5V batteries with the similarly sized A23 12V batteries. There’s no indication at all on the battery compartment or elsewhere to clue the owner in on what size to use. Very unfortunate. At this point the internal electronics are toast and will need to be replaced, however the owner didn’t want to spend the money to get it working again. Still, it’s a pretty cool prop.


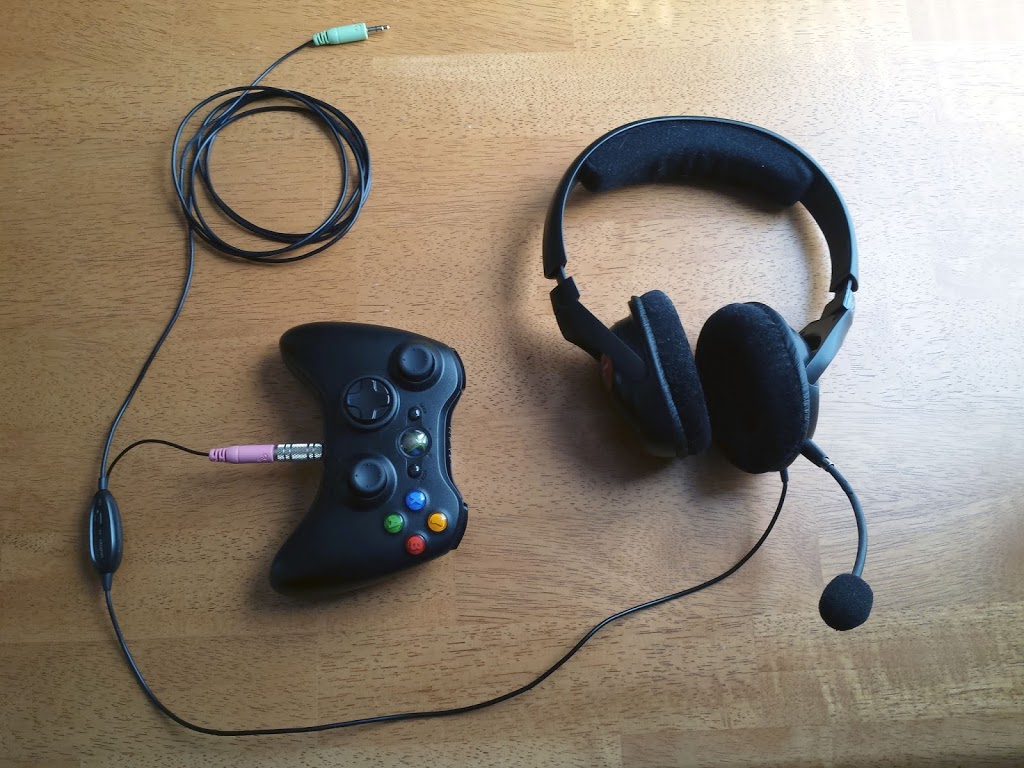
I’ve been using this headset with my Xbox 360 for a while now. But I always found it so cumbersome to use by running an extension from the end of the cable up to where I hold my controller. So about 3 months ago I modified them to be the perfect Xbox headset.
I realize that many of my posts would be much more helpful if they had detailed instructions on how I was able to do what I did. This is one of those times where I wish I had taken more pictures while working on them, instead of just afterwards. I don’t even have a decent before picture.
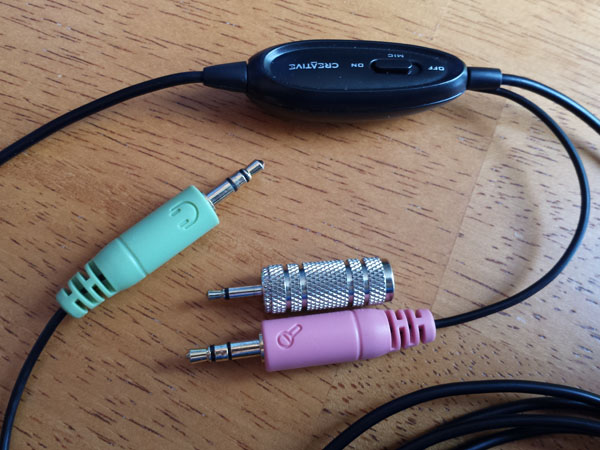
Essentially, I removed the mic plug and cable and soldered it directly into the volume/mic control
The silver adapter, in the right photo above the mic plug, makes it so I can plug it directly into my Xbox 360 controller.
Now the distance from the headset to my controller is perfect with no more extra cables. So much nicer than what I was doing before.
If I ever get my hand on another one I’ll be sure to do a How-To step-by-step guide. And if anyone would like me to mod theirs I’ll do it for free. Just shoot me an email and we can work out the details.
Let’s see… I had an old dell which came to me used and with a few problems. It was at its deathbed several times. Ruben fixed the cd/dvd drive several times. And showed me how to use different programs on my laptop. He also helped me retrieve all of my files off that laptop when it finally died. He fixed my roommate’s lamp and VCR. Oh and he also was a most useful consultant when I was picking out a new computer. Ruben works hard and always makes time to help those of us with less knowledge of electrical and technological things. He’s really good at figuring out how to fix things he hasn’t actually worked with before. Ruben is also really good at explaining what he’s doing in layman’s terms. Thank you for everything, Ruben! You’re awesome!!
~ Cassànndrè Sager