LED RGB Stars

It is nearing Christmas time again.

Last year, I was in an apartment that was doing a Christmas Light Decoration Competition. The first three winner received a discount on the next months rent.

So I decided to order some RGB LED strips from banggood.com and make some really cool IR controllable stars.

The process was simple, if not a bit tedious…

First, I measured the length of the smallest section I could get from the LED strop. Then I made a pattern, on a regular sheet of paper, that would give me the angles and length for each point in the star.

Then, I traced the angles on a piece of cardboard, cut the star out, and placed the sections of LED strips, to make sure everything fit.

Here is a picture of the star, the template, the tools I used, and the LED strips in place.

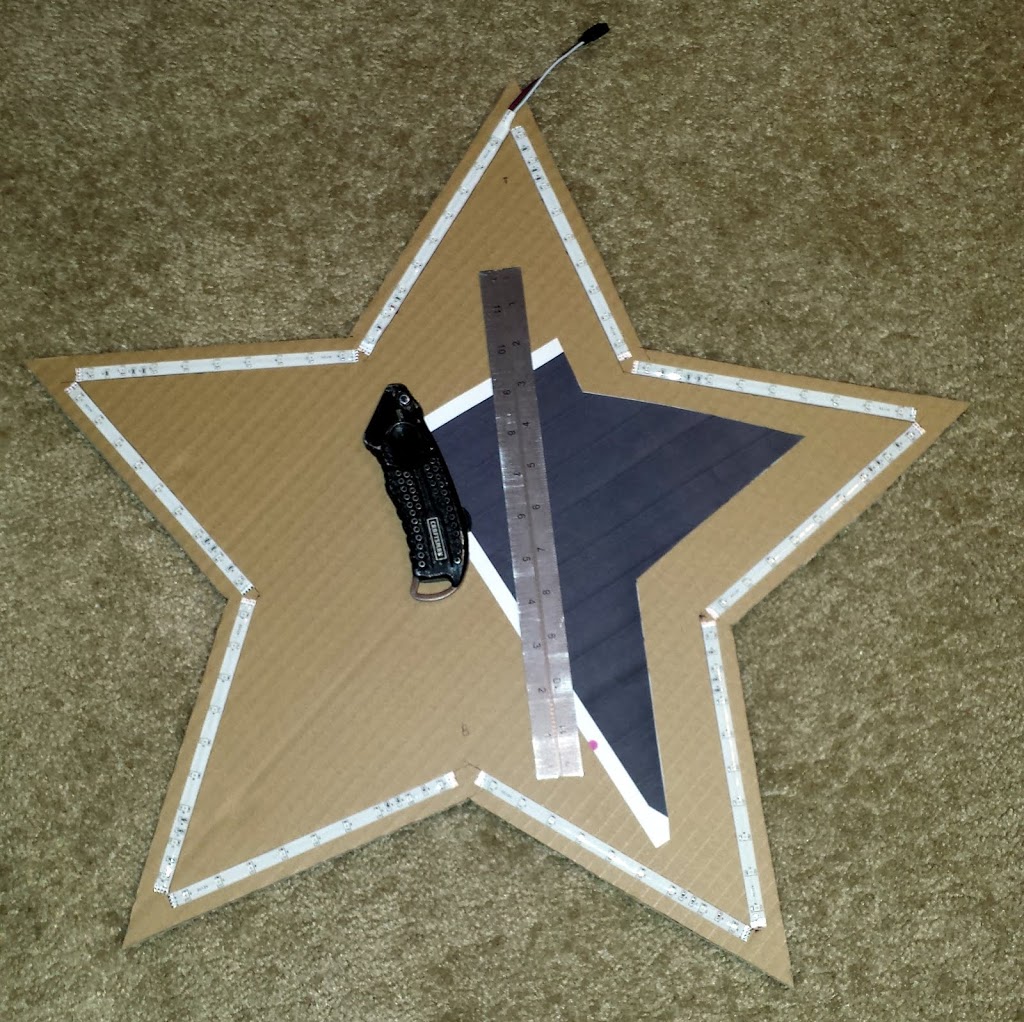
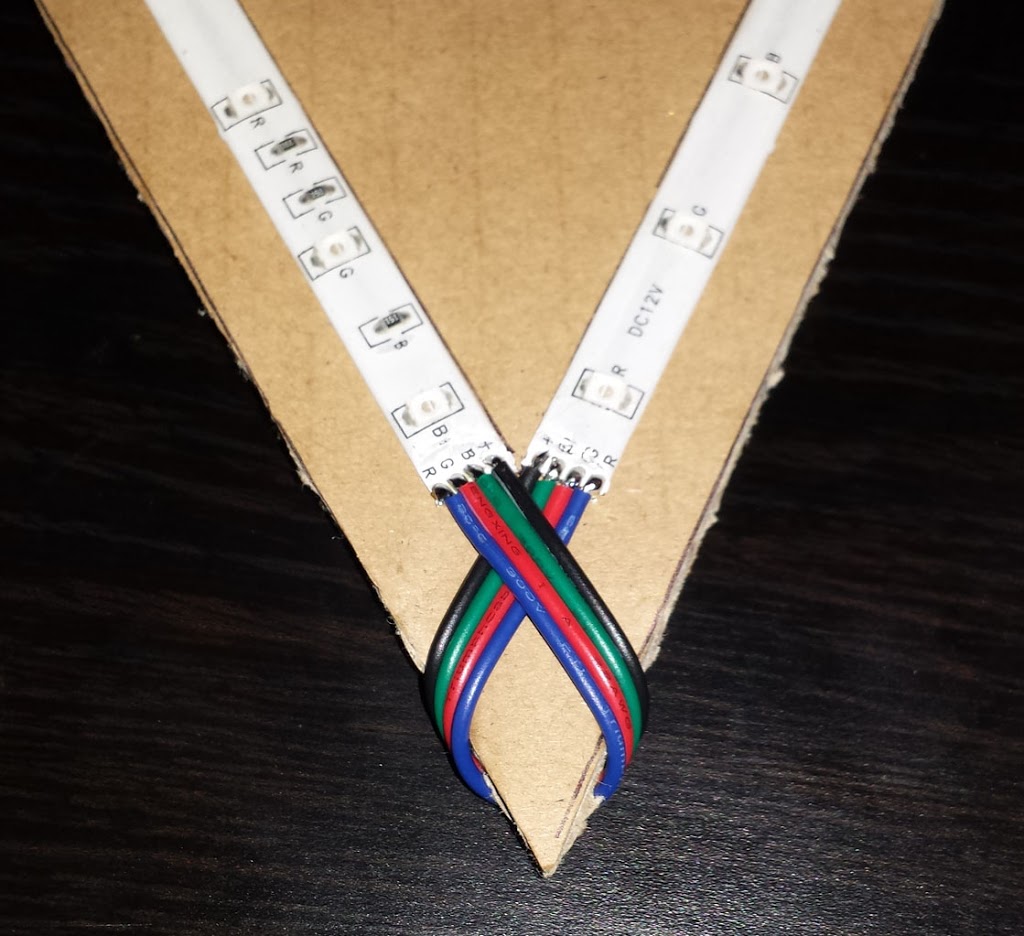
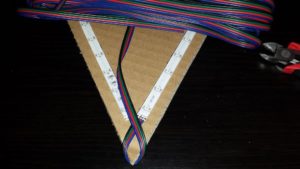
Now all that is left is to solder all the LED segments together.
This was by far the most tedious part.

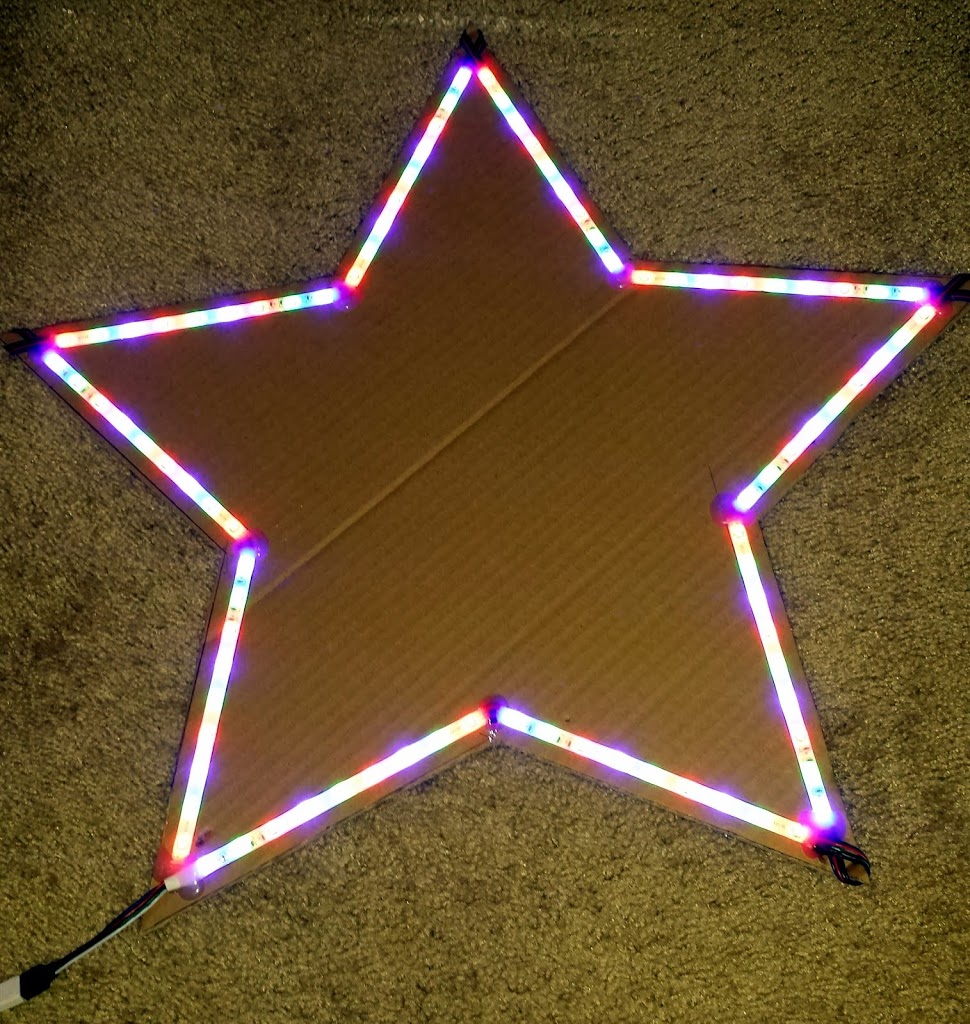
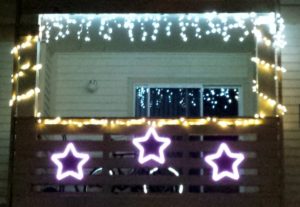
And here it is all lit up.

And, why only make one when I can make three!

So Here is our final apartment balcony.

Click to view on YouTube

Toothless Wings

Nothing much to this costume. I just cut up a black fleece blanket into the general shape of toothless wings. Then used a sowing machine to sow the ridges.

I was very lazy with the lights. I hot-glued some RGB LED strips to the wings, one on each side of the center ridge. Then wired the blue lights to a 9V battery plug. Then hot glued a Velcro cable tie to the back side of the wings to hold the 9V battery.

Controlling a Robotic Arm with an Xbox 360 wireless controller

I’ve always wanted to get into robotics, and building a robotic arm is a great place to start. But what can we do with a simple robotics arm kit?

I’ve got to start somewhere, and when learning a new skill it helps to start simple. So for this project, I wanted to figure out how I could control a robotic arm using a familiar control platform. For me, that was an Xbox controller. I’ve had a USB Xbox wireless controller receiver for a PC and found a Linux driver that would allow me to interface with it on a Raspberry Pi. Then with a bit of python code, I could send serial messages to an Arduino that would control the various robot arm servos using PWM signals.

Then I assigned different buttons to control different parts of the robot arm, and the basics of my project were completed. It was fun attempting to use the robot arm to stack blocks and move other objects. But it was a bit challenging to do, as I wasn’t used to thinking about how to move an arm in terms of individual pivot points.

What could a more intuitive user interface look like. What If the claw could be moved like it were a flying object in 3D space? This lead me down the path of reverse kinematics, which is really fascinating, but was an advanced topic I just started to scratch the surface of. It’s amazing what we learn when we explore new technologies.

Cell Phone Li-ion battery tester

Li-ion Battery Tester

While working at Macalegin Electronics I discovered that many times we need to verify the charge on a cell phone battery. We have a multimeter but is a little cumbersome to use especially when testing several batteries at once.
So I had the opportunity of designing and building a Li-Ion Battery tester for quick and easy battery charge indication.
It consists of one green LED, one red LED, and adjustable leads.
When the leads come in contact with the battery the LED’s will light up as follows:
Green only – the battery charge is ~80% to 100%
Green & Red – the battery charge is between 0% and ~80%. If the green LED is noticeably brighter than the red LED, then the battery charge is between ~65% and ~80%. If the red LED is noticeably brighter than the green LED, then the battery charge is less than ~10%.

Adjustable Leads
Internal Circuit
Li-Ion Battery Tester – EveryCircuit
[iframe width=”560″ height=”360″ src=”https://everycircuit.com/embed/6522073815973888″][/iframe]
To adjust the input voltage: Select the power source in the top right corner, then select the wrench in the bottom bar. then use the wheel in the right corner to change the voltage.


Pinewood Derby – Propeller powered

A week ago my brother invited me to join him for an Anything Goes pinewood derby race. I have great memories of building these cars with my Dad and wouldn’t pass up an opportunity to relive those moments.
First I designed my car in Sketch-Up, and then built the car from a standard derby kit. (see image below)
The hardest part was building the propeller motor stand. I made that part separately and the glued it into place. Before I could glue it I had to drill holes and feed the wires for the motor through the holes.
Then to power the motor I used an old iPhone 4 battery I had laying around. To make the battery easier to use I soldered a new connector on the battery so I could easily plug it into the car and the battery charger. To finish the simple circuit, I added a switch so I wouldn’t have to disconnect the battery to turn it off.
And finally, to finish things off I added some tungsten weights to a cardboard cover painted to match the car.
I say the finished product always looks better than the sketch.