This was just too funny. Apparently these additive fuel system are running windows. I don’t know of any other OS that has the Blue Screen of Death.
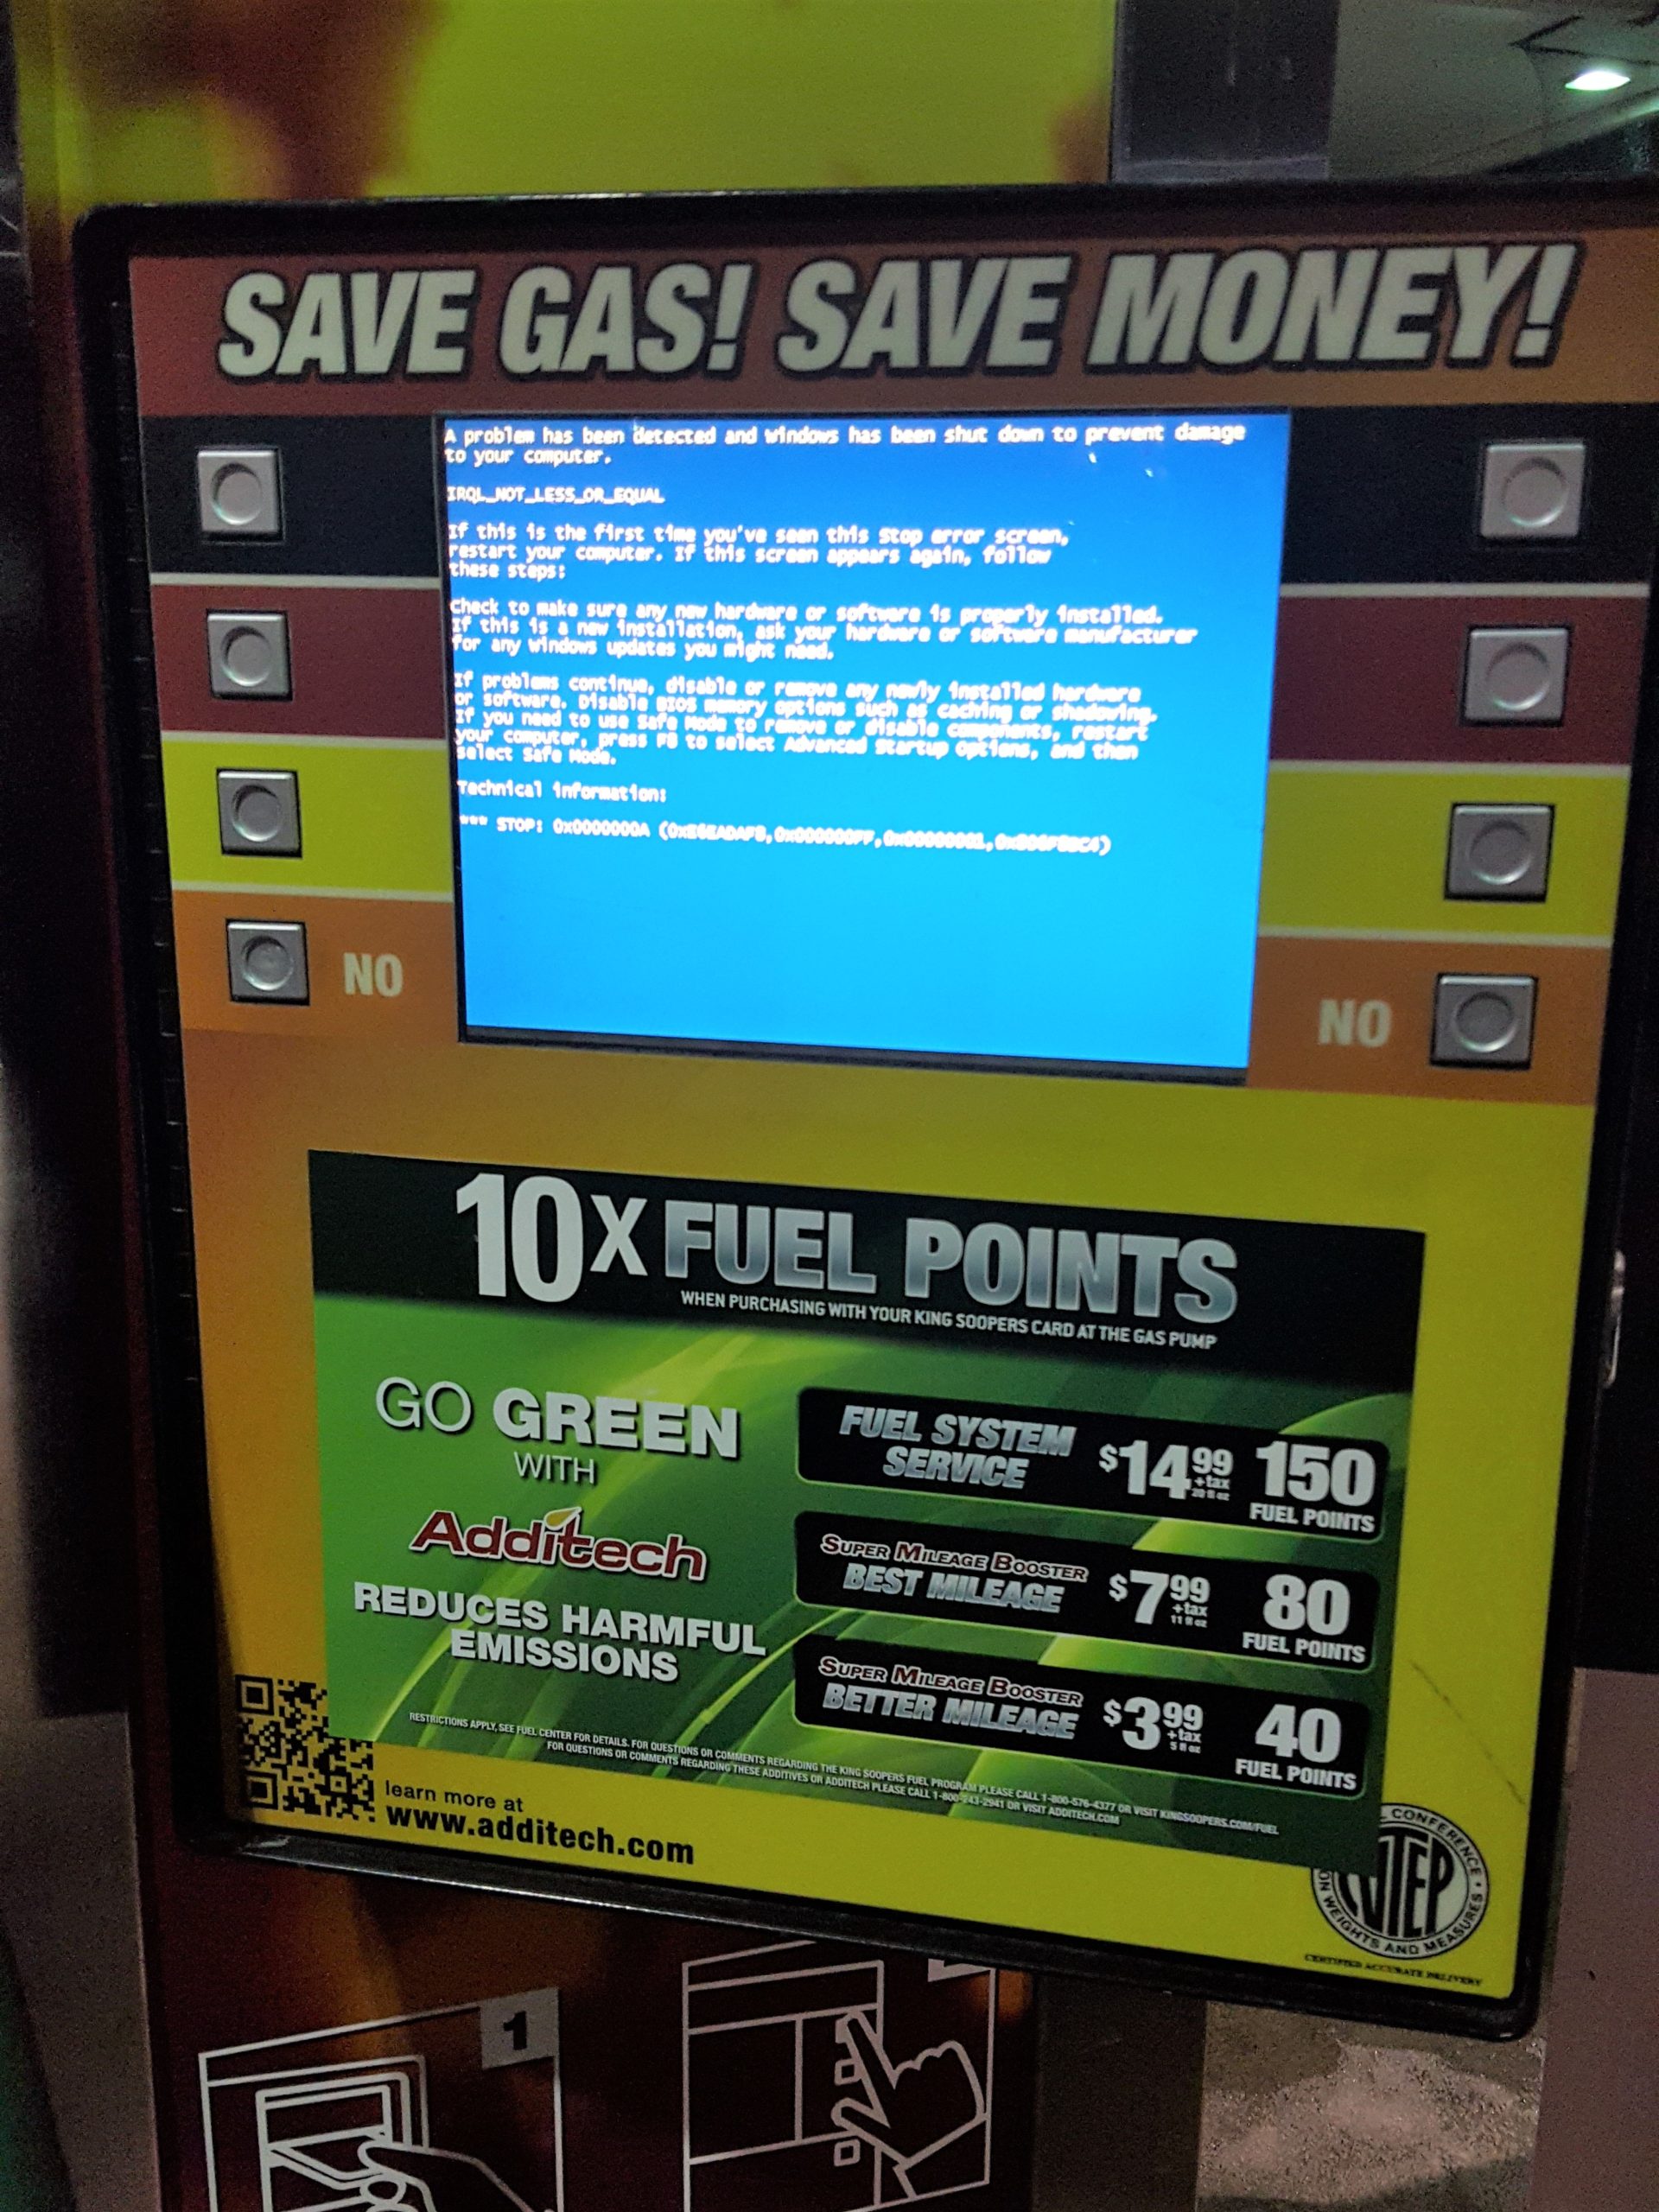
This was just too funny. Apparently these additive fuel system are running windows. I don’t know of any other OS that has the Blue Screen of Death.
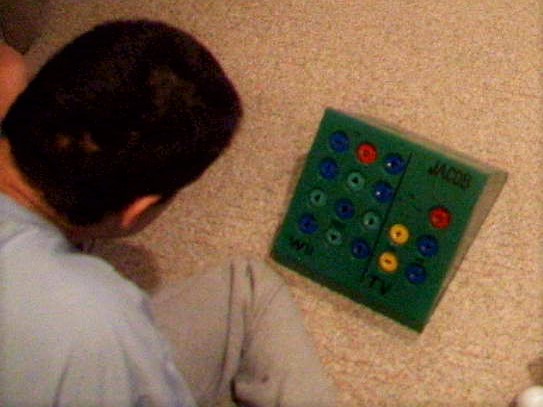
My brother-in-law, Jake, who happens to be the same age as me, was born with Cerebral palsy, and so has trouble using most everyday things. Even though he can’t speak or walk, he can get around by a sort of crawl and is good at using pictures in a binder to communicate. Though it is a bit of a guessing game.
Because of his situation he spends a lot of time watching TV shows and Movies. Whenever he wanted to watch something, he would have to find his binder, and someone willing to help, then play the guessing game until someone figured out what he wanted to watch. Then we’d have to find the DVD or VHS and put it on for him.
While most of us are willing to help, the whole process felt like it could be improved in some way. In addition to a binder for communicating, he had this tablet he could use called a Dynavox. It was large and old, and had some sort of IR capabilities. So I suggested that I could set it up to control the TV and the accessories. The only problem was that the Dynavox was unbelievably expensive and we were afraid it would be abused if left downstairs by the TV.
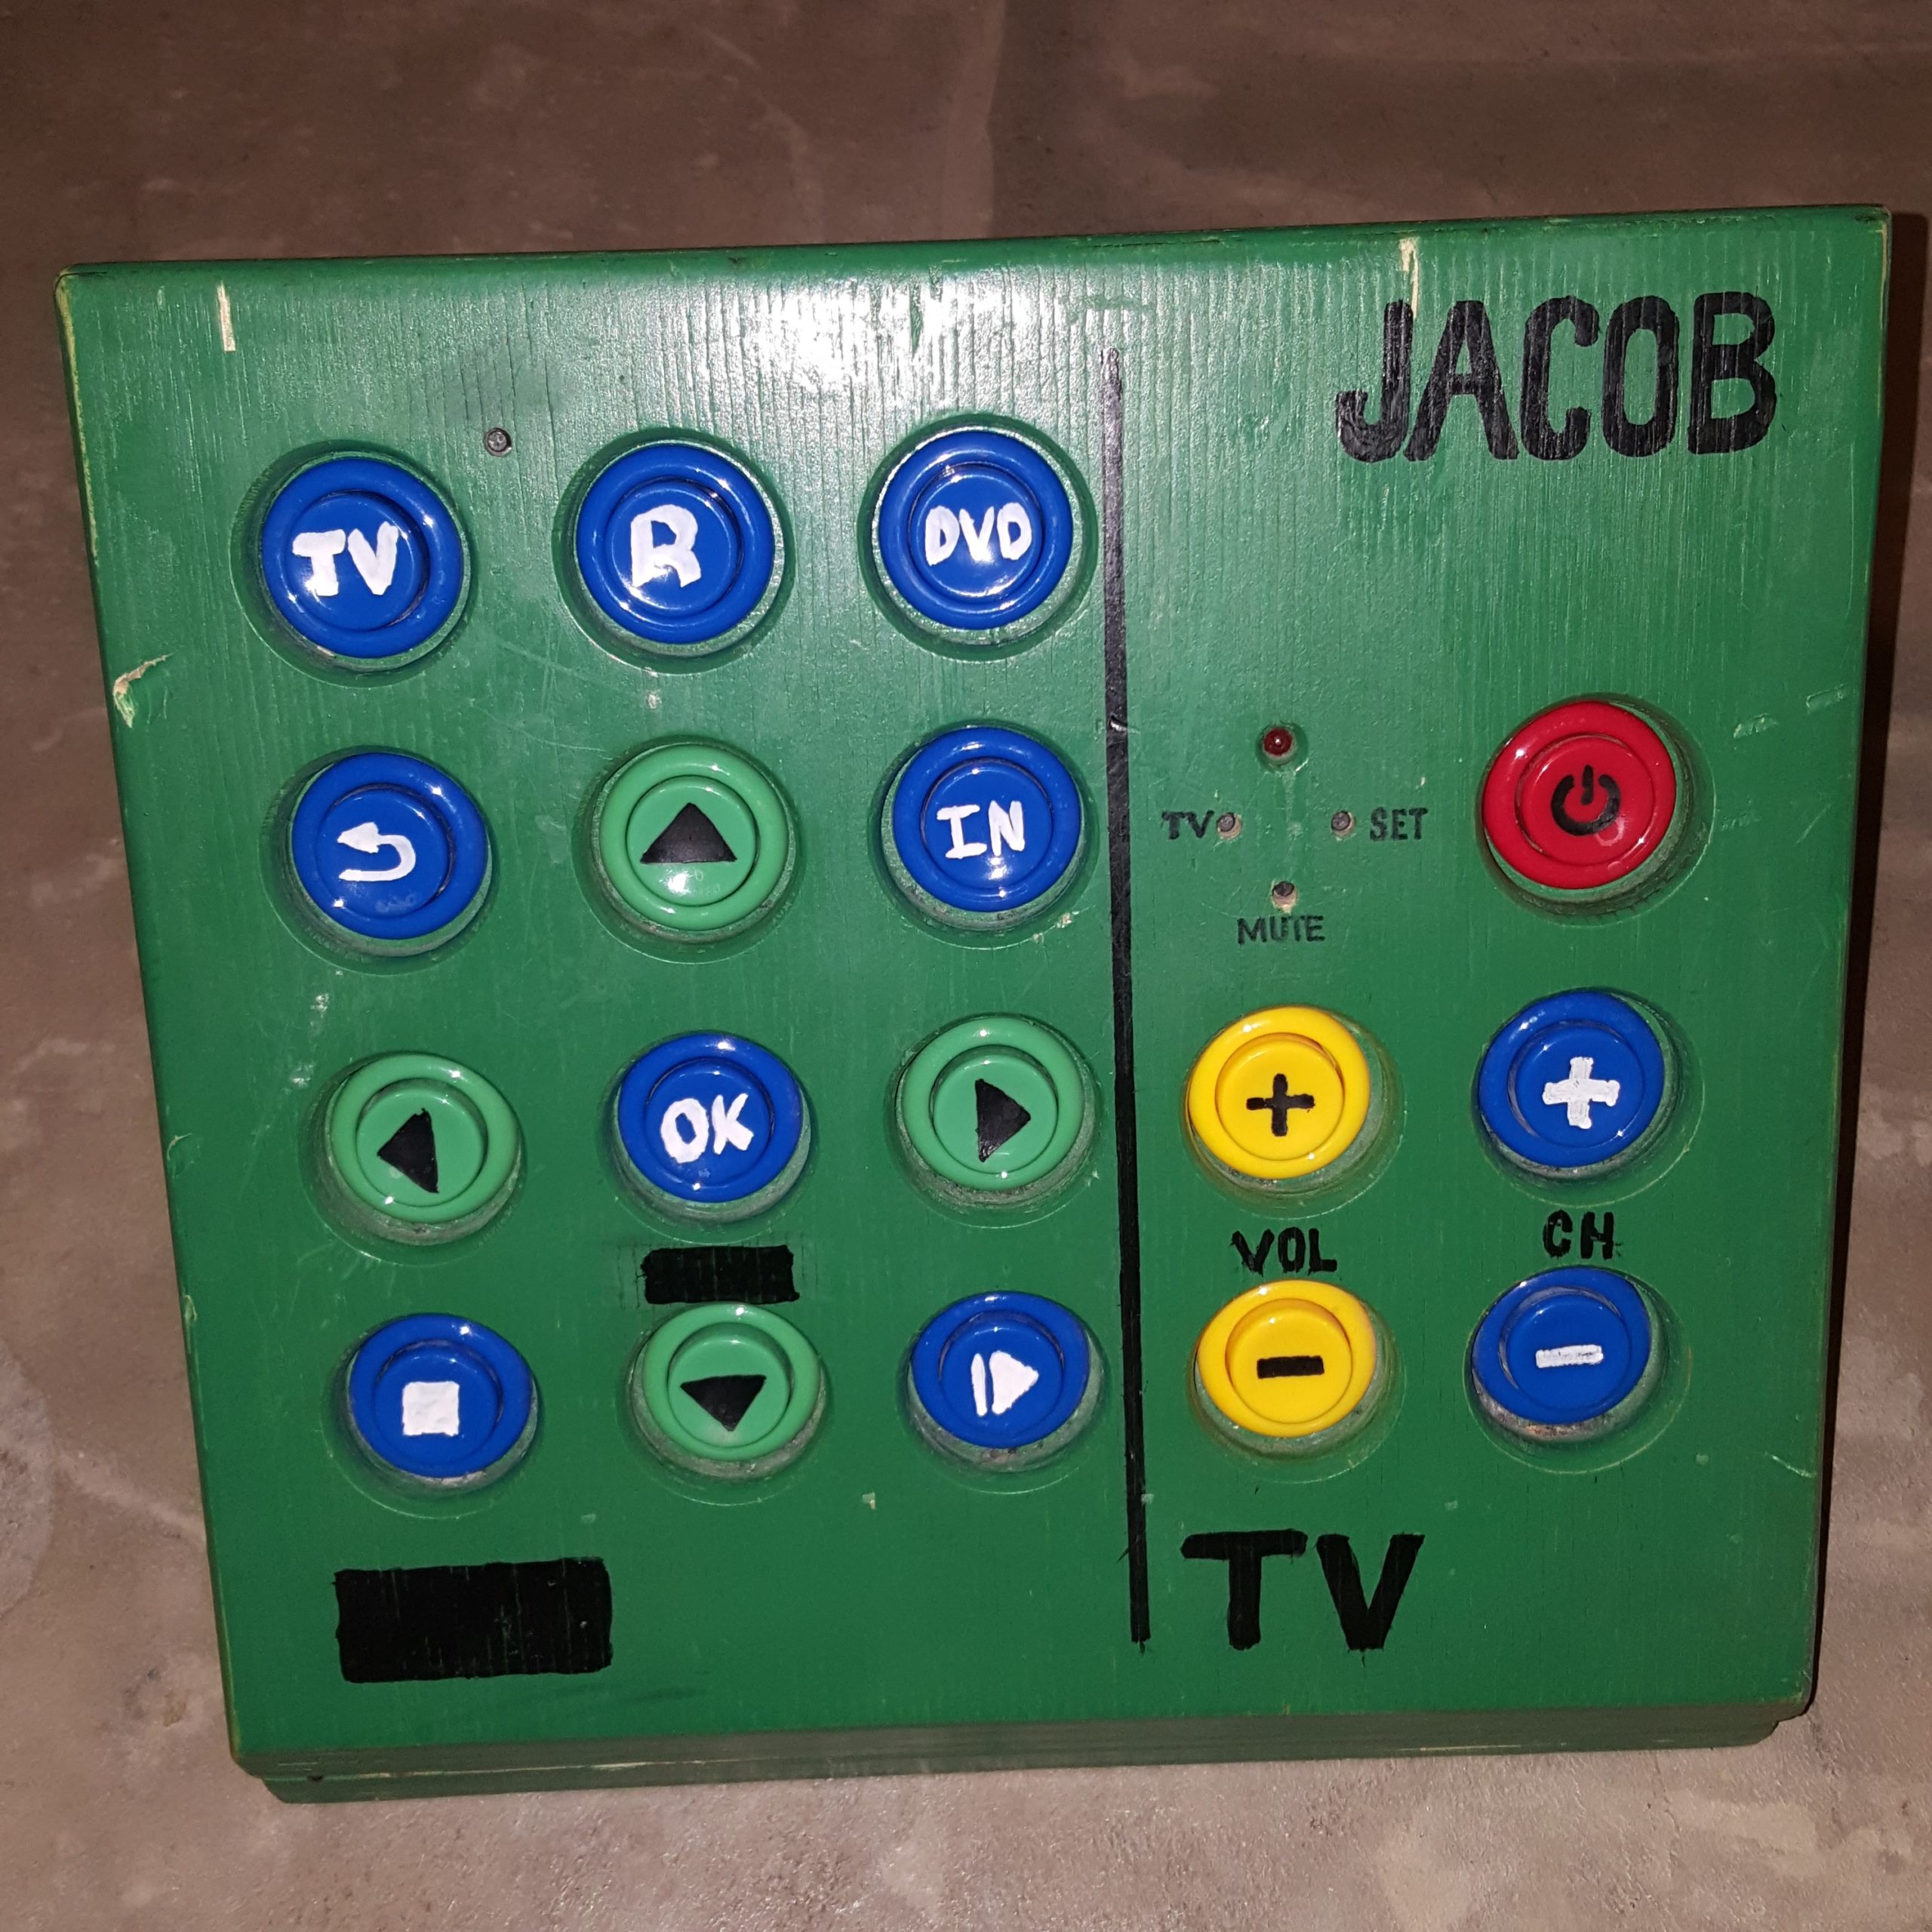
This is when I decided to build him a Megabutton Universal Remote. A simple durable box, that could be dedicated to controlling the entertainment center.
Originally, their entertainment system was setup with an OLD CRT tv and a Wii. So my original design included a very simply 6 button universal remote, and a Will controller hacked to use 17 arcade buttons recessed to help prevent accidental button smashing.
The problem with that design was that the remote had to be programmed by pressing the volume and channel buttons in a proper sequence. Which was hard to remember. The problem was made worse by the fact that every time the batteries fell out, which happened more often when the battery door was lost, the remote would “forget” it’s program. Even after I put a different off the shelf universal remote, that was to remember it’s program between battery changes. The other problem was that there were limited things he could do on the Wii, and eventually the Wii controller I hacked, died.
In the mean time I had discovered Plex, a self hosted media server that you could give access to friends and family, and had built up decent library of films me and my family owned.
When I showed my Plex media collection to my brother-in-law, he was so excited and sent me home with a box of movies to add to the collection. And he pointed out that the green box that he once loved and used so much, doesn’t work anymore with their upgraded entertainment center. It was time for a makeover.
In this new design I wanted to eliminate the most annoying problems he had with the old universal remote. Namely, settings being lost during a battery change, and tedious programming. Also I had to do something about that Wii controller.
This is when I decided to see if it may be possible to use a LG Harmony remote as the brains. I had a couple Harmony 200 remotes that I’ve used, and decided to open one up to see what I could find. One neat design I discovered on this remote is that it had bare copper test points for each trace on the button matrix. I was able to use these point to solder wires to the remote, since it is extremely difficult to solder wires right onto the button pad.

I also had to extend the IR led, the device LED’s, the USB port, and power lines to get it to fit in the box. I also thought it would be much easier to wire up the buttons by using a breadboard, and a button-to-test-point map. This way to configure a button in the box, I just had to look at the map to find out which two test points to plug the arcade buttons into. Another neat trick I discovered was, that if I put an LED inside one of these arcade buttons, it is visible enough to light up the buttons. Since this Harmony remote has 3 device buttons that light up, I was able to transfer this usability design to the arcade buttons.

I was even able to leverage the Wii window in the original design for the IR receiver on the Harmony 200. This way you can still have the “remote” learn codes from other remotes.

While these upgrades made the remote 1000 times better, it still has problems. For one, the wires for the buttons would sometimes fall out of the breadboard, and I’d have instruct people over the phone on how to service it. And for some reason, this remote seems to suffer from the 3 blinking lights, problem more often than I’d like. And the fix is to hold down the number 3 button, while replacing the batteries. And the breadboard design was a lifesaver here, allowing me to add that button to one of the small push buttons leftover from the old design (3 of them and an LED right above the volume up button).
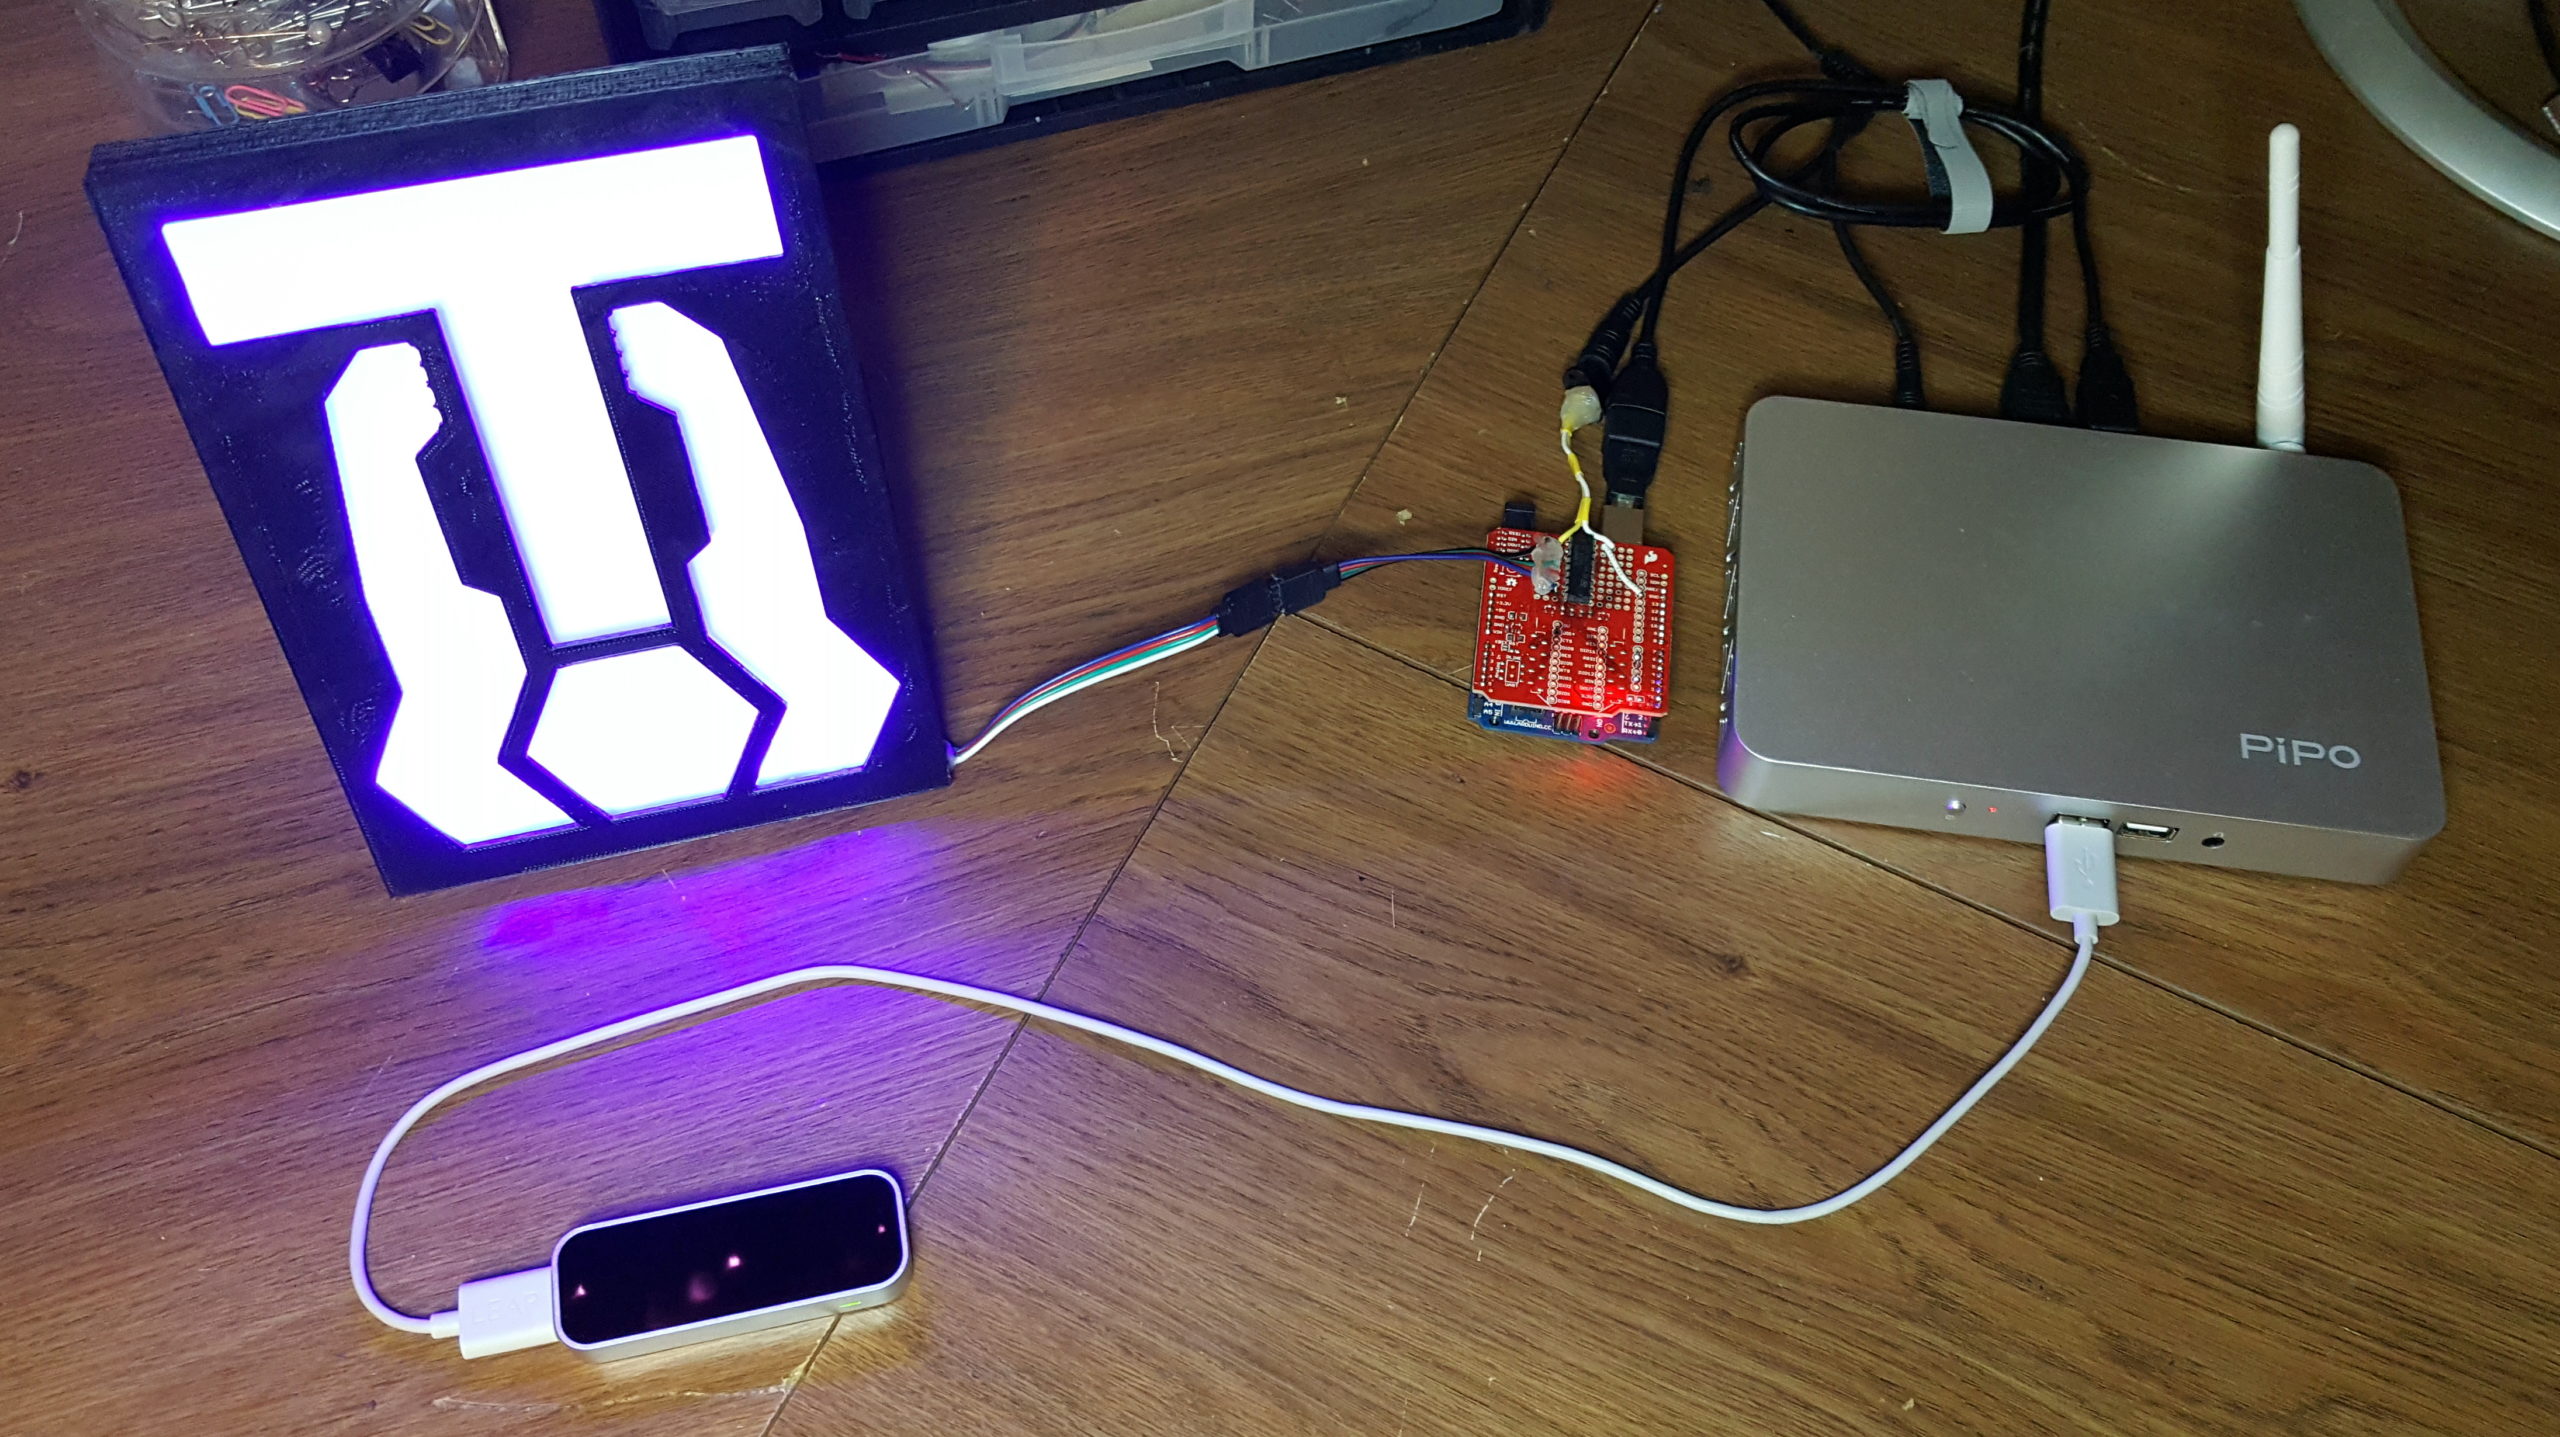
This was a fun project I worked on for TangibleTec. A LeapMotion demo for an up coming Elementary Schools STEM night.
For those of you who are unfamiliar with LEAP Motion, it is a hardware sensor device that supports hand and finger motions as input, analogous to a mouse, but requires no hand contact or touching.
You can read more about is and get instructions on how to build it on Instructable.com
It is nearing Christmas time again.
Last year, I was in an apartment that was doing a Christmas Light Decoration Competition. The first three winner received a discount on the next months rent.
So I decided to order some RGB LED strips from banggood.com and make some really cool IR controllable stars.
The process was simple, if not a bit tedious…
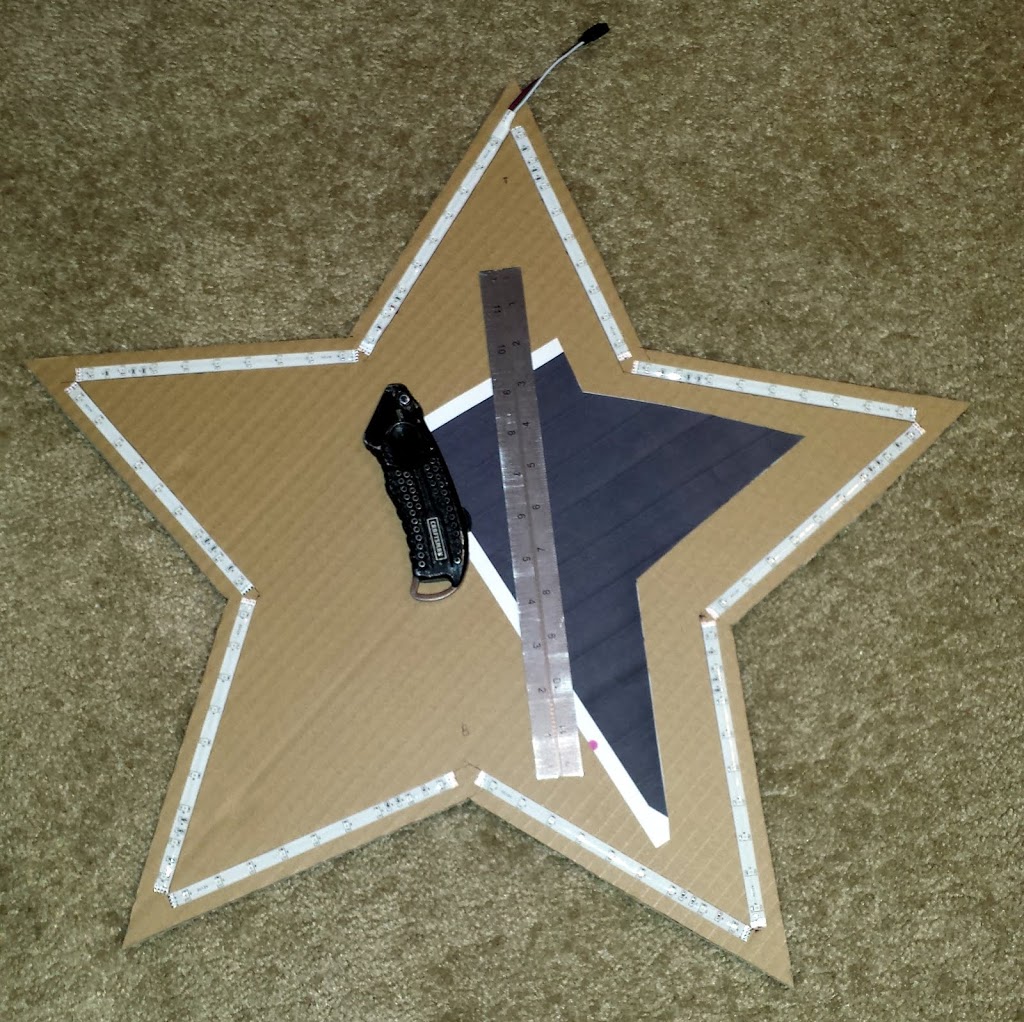
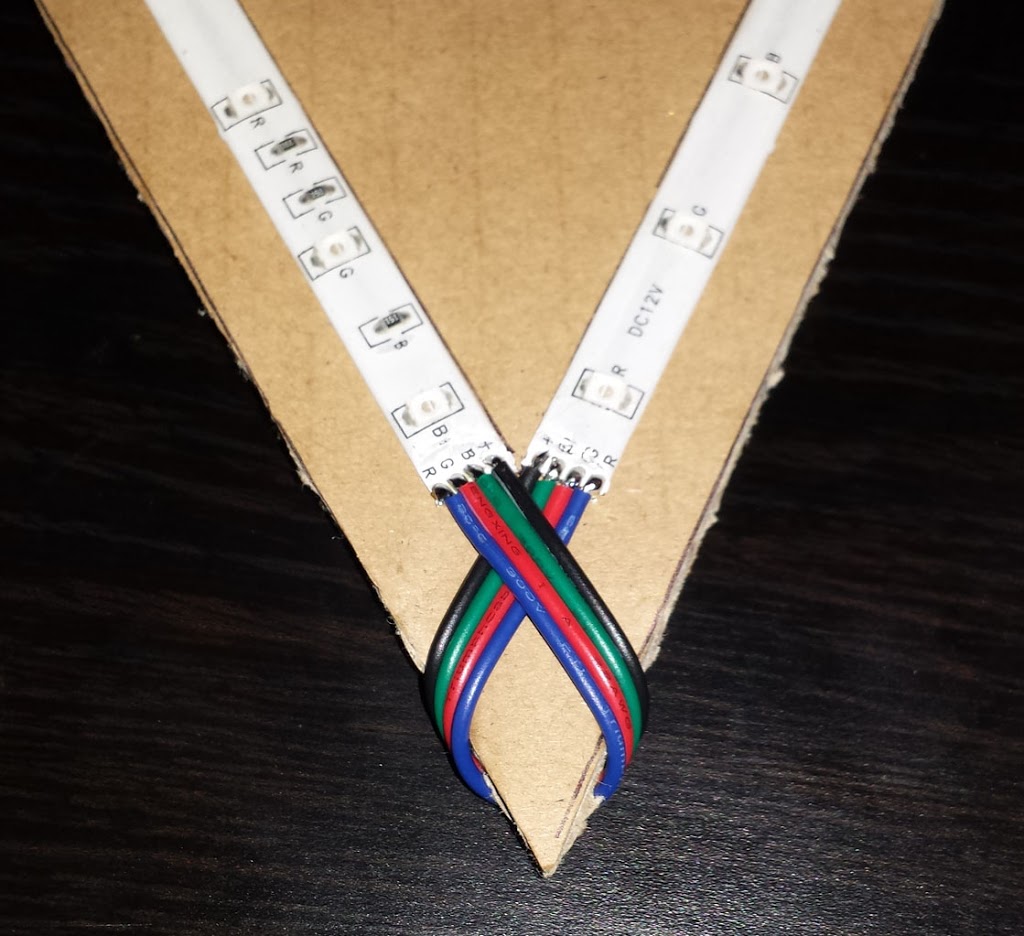
First, I measured the length of the smallest section I could get from the LED strop. Then I made a pattern, on a regular sheet of paper, that would give me the angles and length for each point in the star.
Then, I traced the angles on a piece of cardboard, cut the star out, and placed the sections of LED strips, to make sure everything fit.
Here is a picture of the star, the template, the tools I used, and the LED strips in place.
Now all that is left is to solder all the LED segments together.
This was by far the most tedious part.
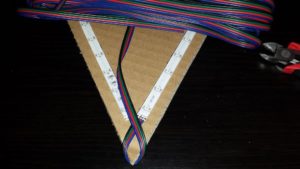
And here it is all lit up.
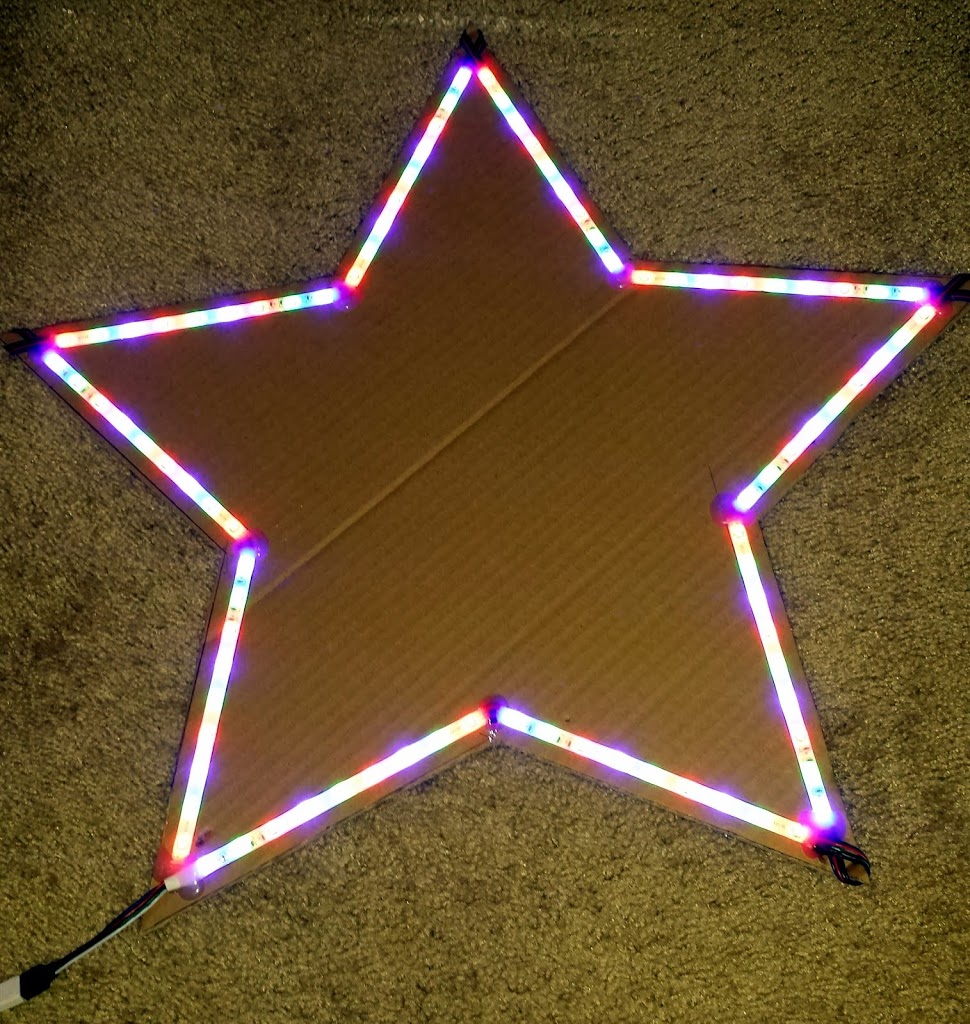
And, why only make one when I can make three!
So Here is our final apartment balcony.
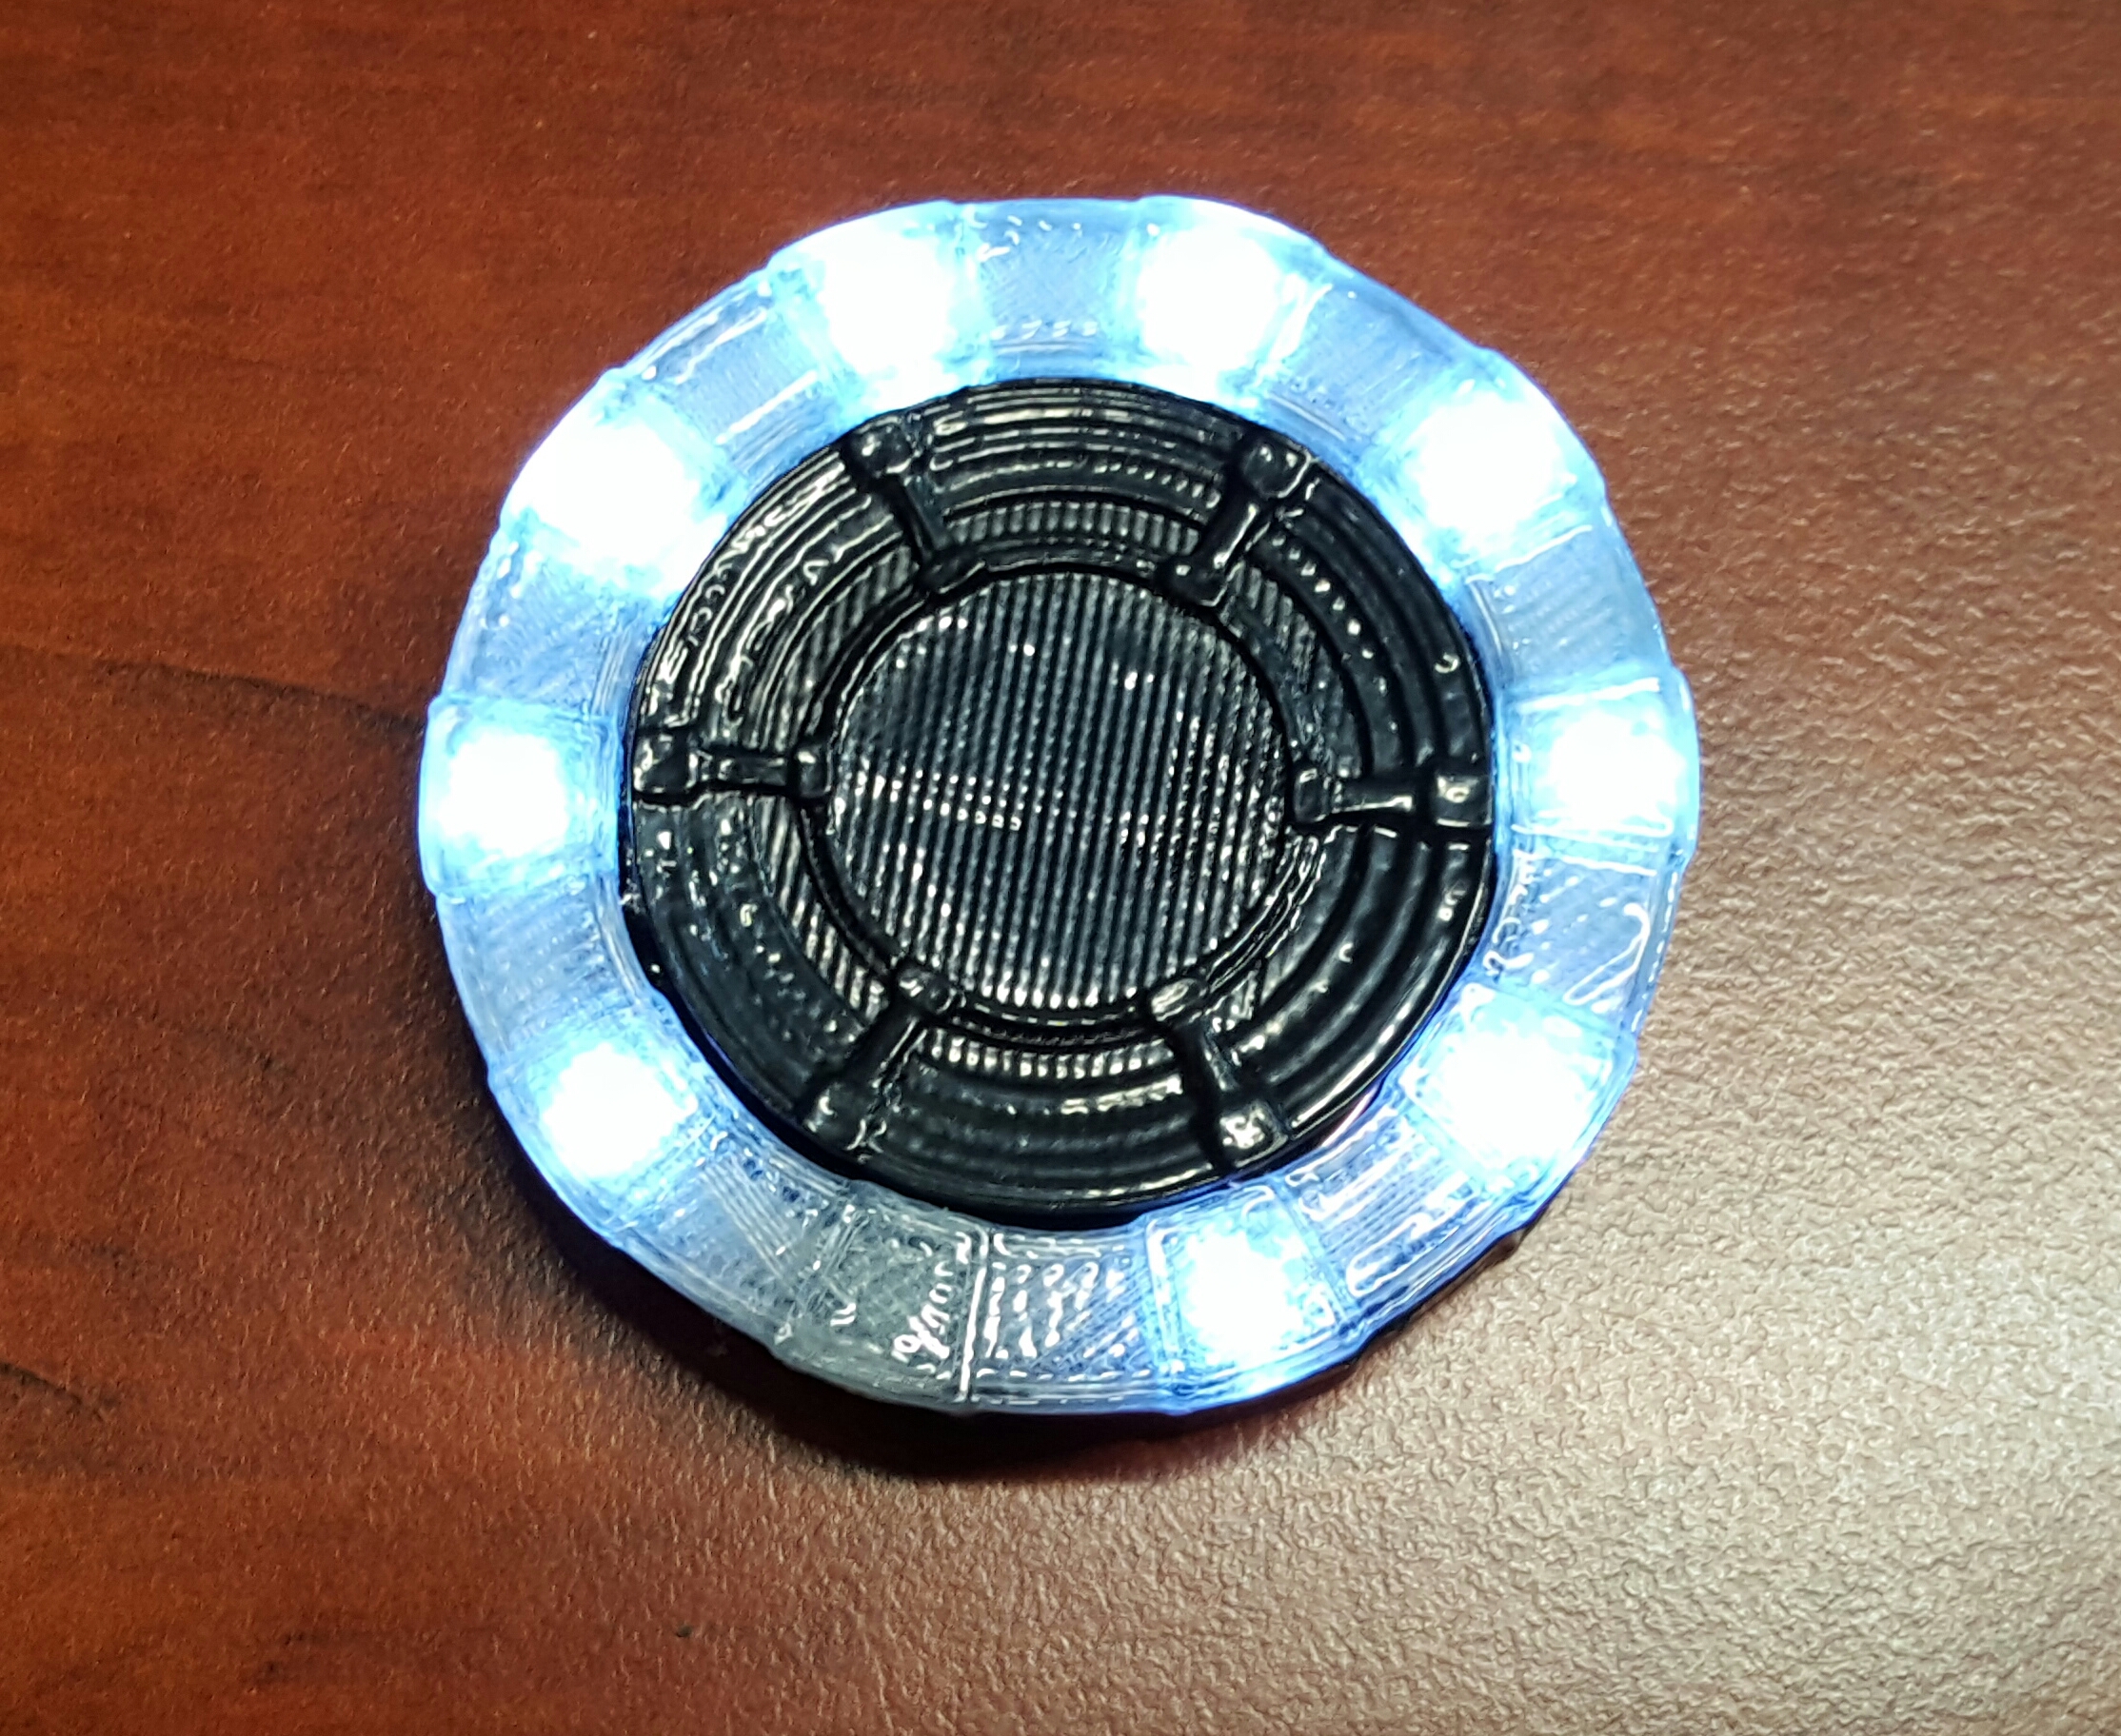
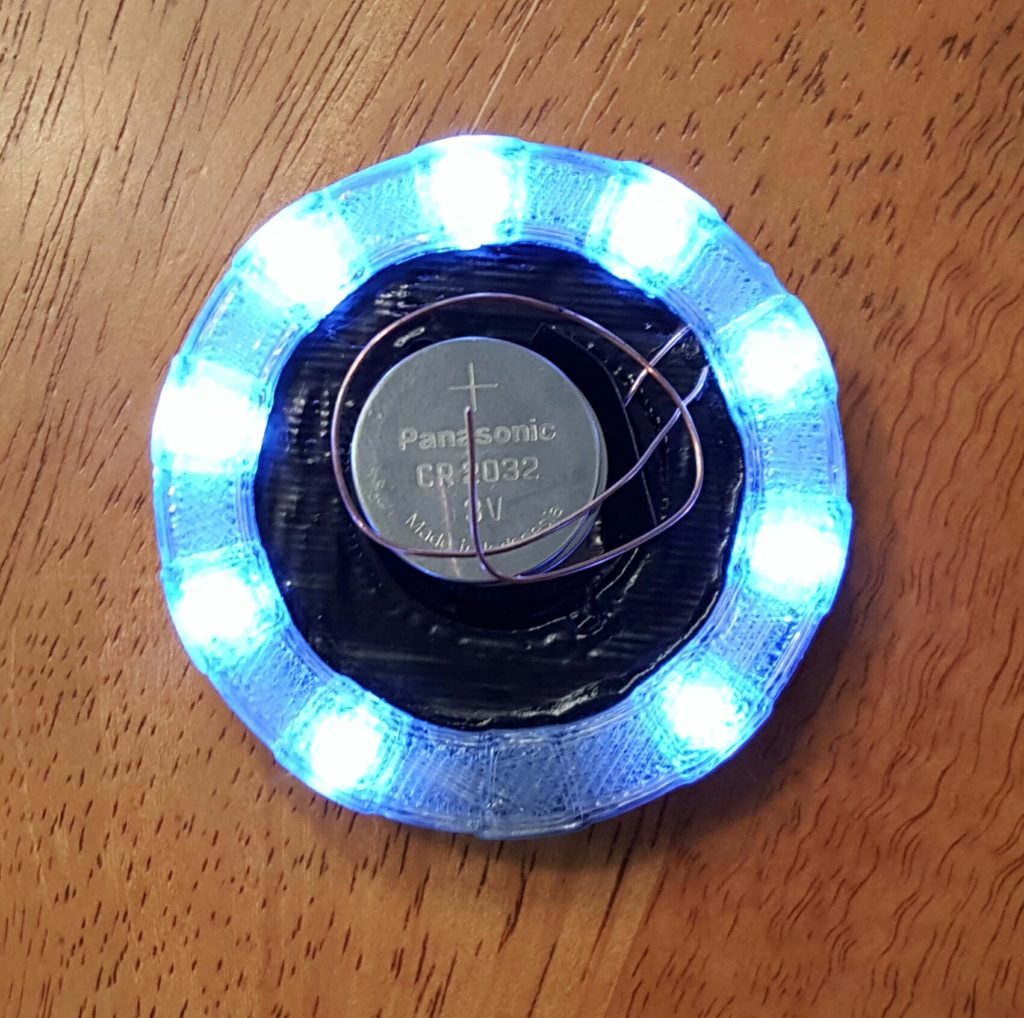
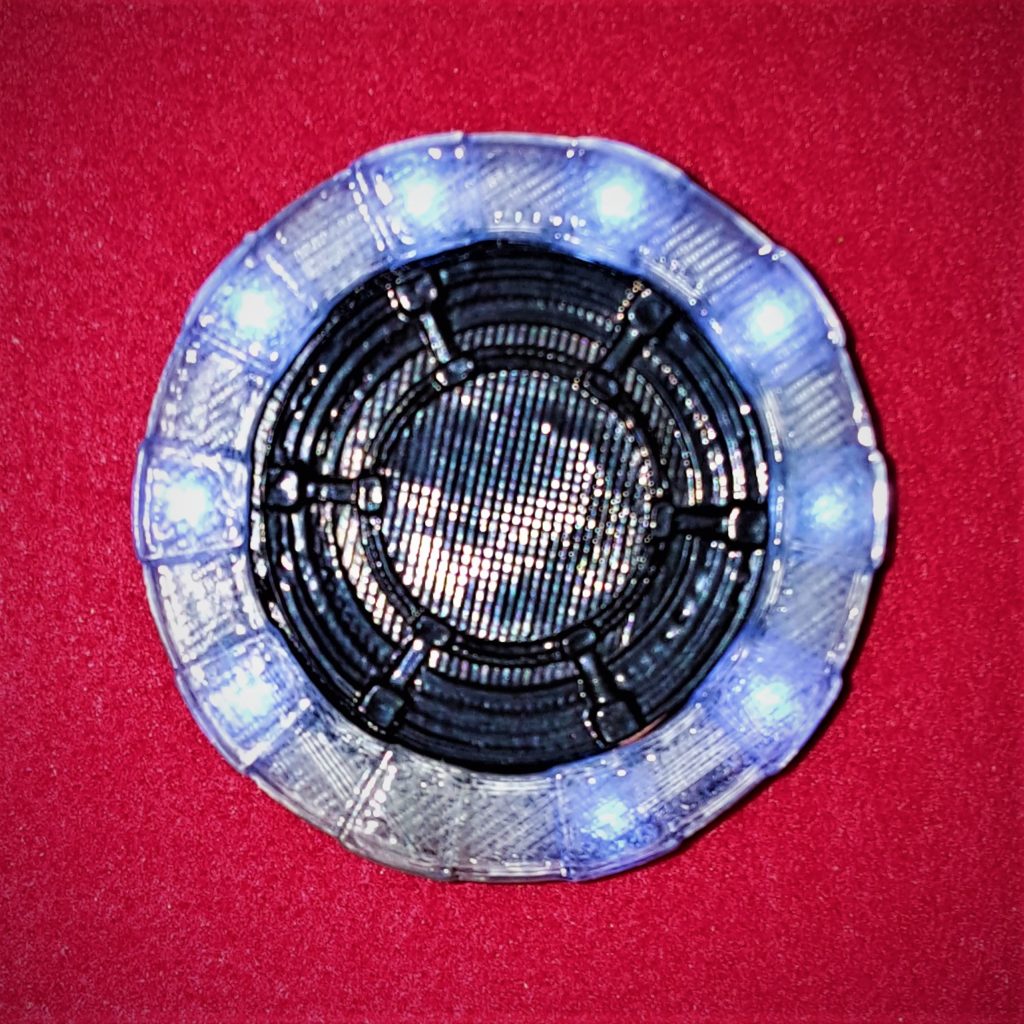
This was a costume prop my brother and I made for our nephew Carter.
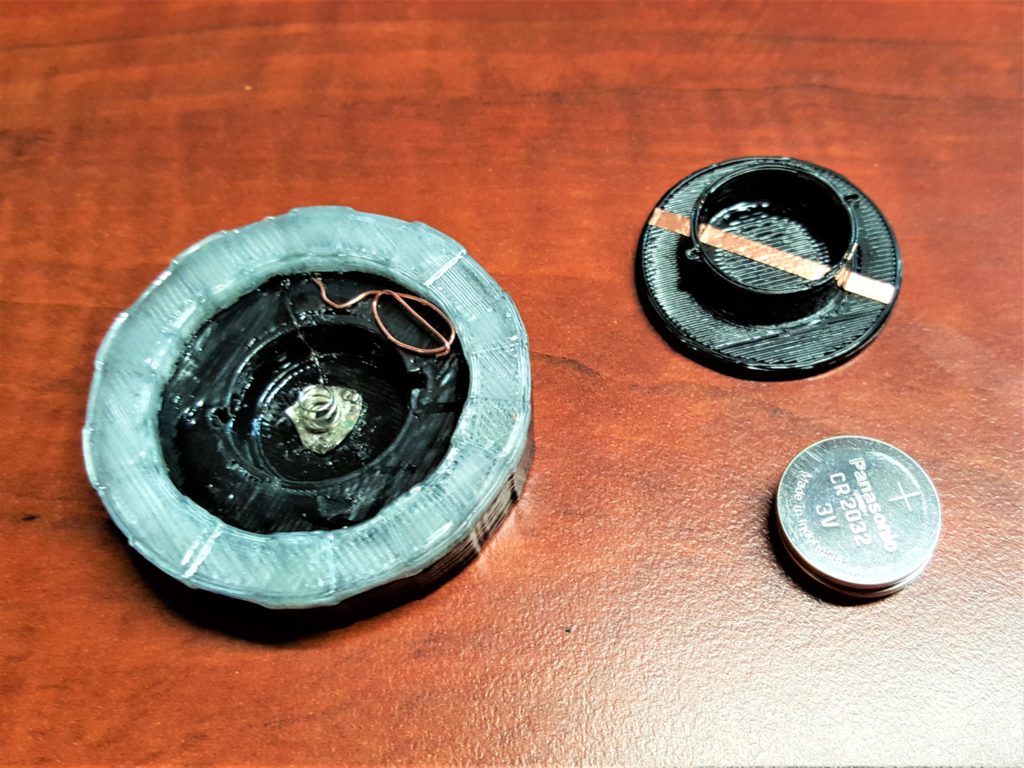
Nothing special, just soldered a ring of white LED lights into a transparent 3D printed ring, and powered it all with a couple coin cells. Somehow we missed an LED and couldn’t get it working. And since we welded the LEDs between the ABS printed parts. We would have to destroy it and start over to try and fix it.
I wish I had taken more pictures early during the build.
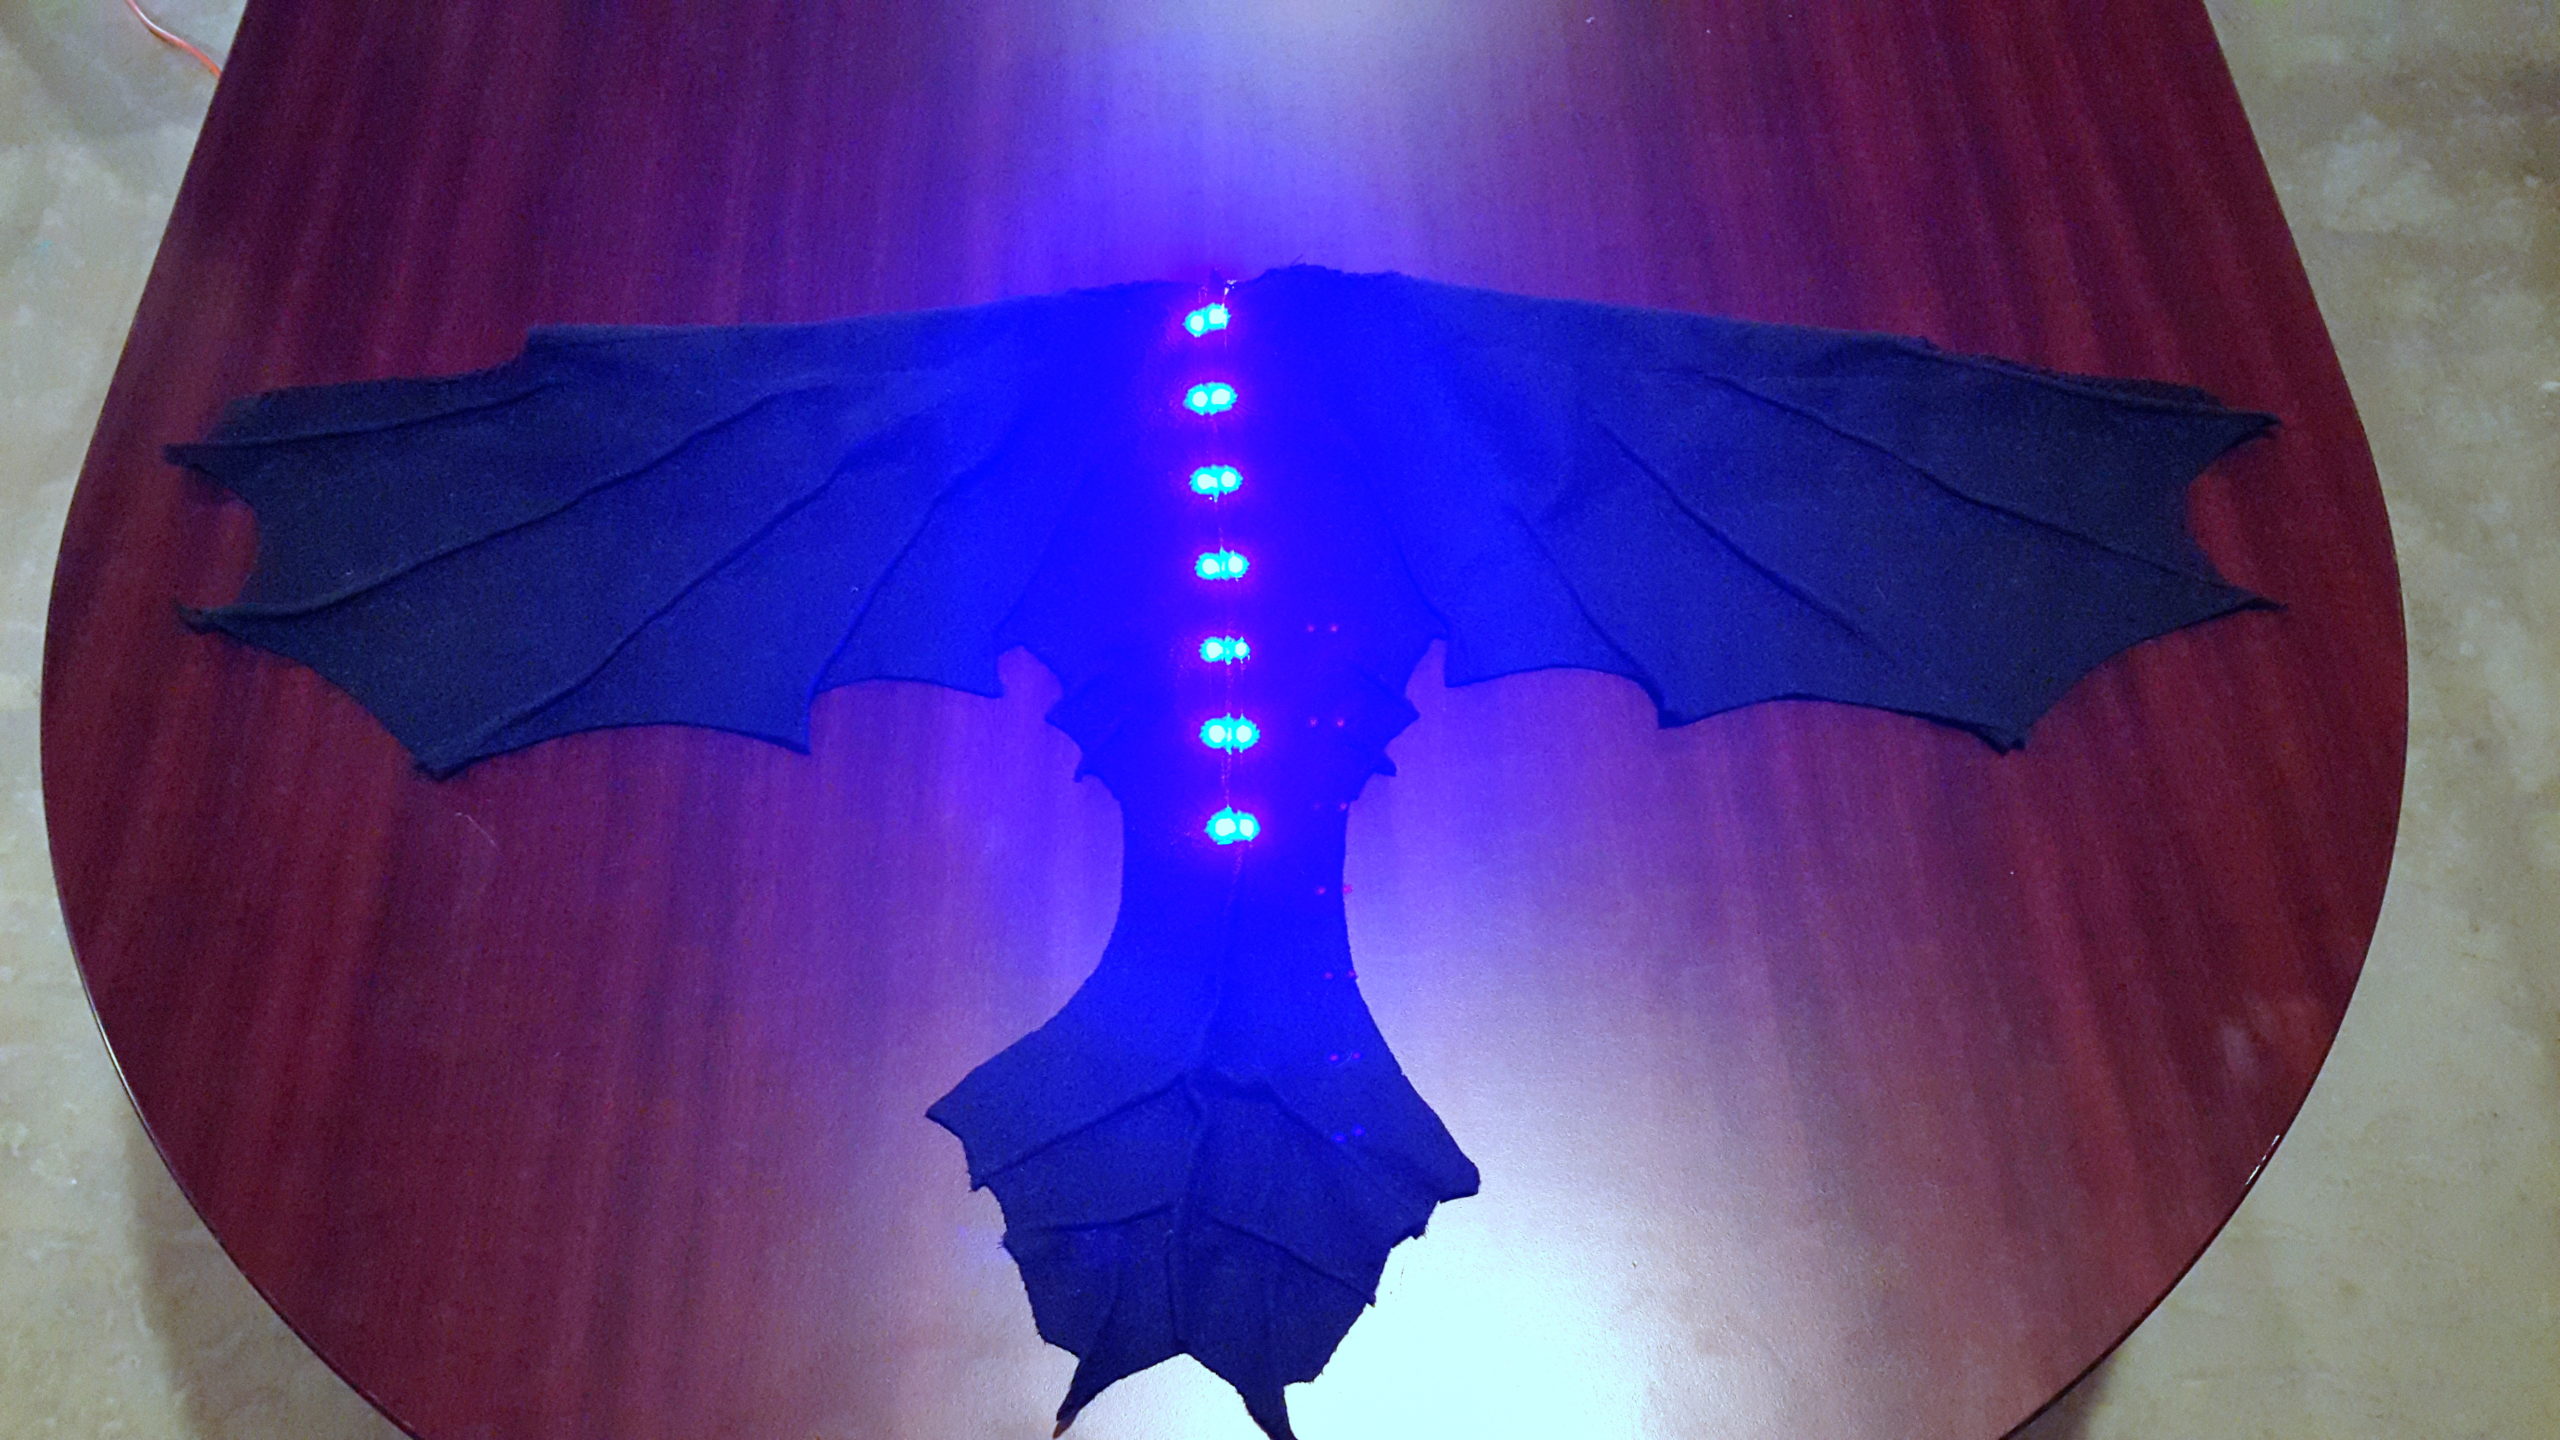
Nothing much to this costume. I just cut up a black fleece blanket into the general shape of toothless wings. Then used a sowing machine to sow the ridges.
I was very lazy with the lights. I hot-glued some RGB LED strips to the wings, one on each side of the center ridge. Then wired the blue lights to a 9V battery plug. Then hot glued a Velcro cable tie to the back side of the wings to hold the 9V battery.
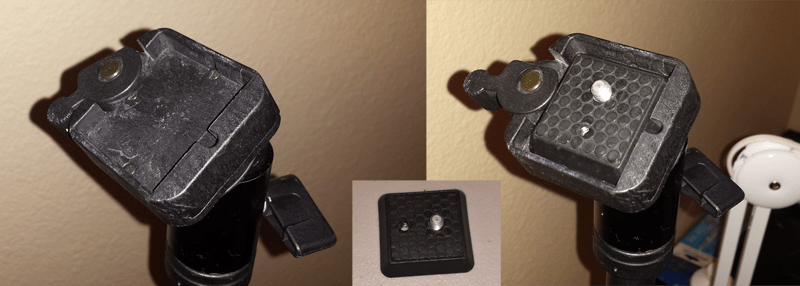
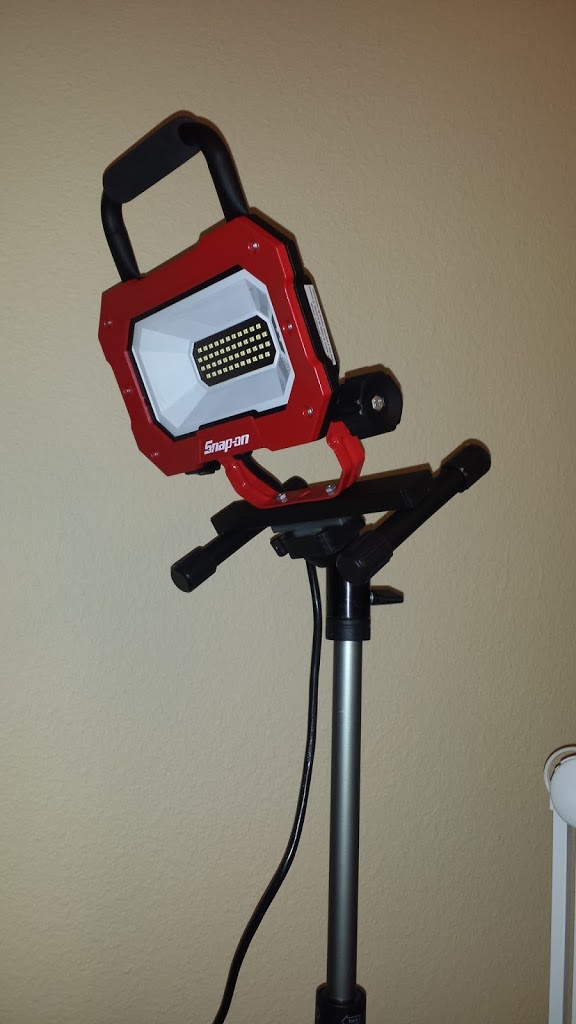
I recently acquired an LED flood light to help shed some light on my projects. I found that it works best if it is mounted up high. To do this, without putting holes in the wall, I used my tripod. It has a quick release attachment that I find very useful.
This quick release mechanism is designed to be used with a camera. However, the concept is pretty simple. In the image above, the left is the empty quick-release housing. By moving the lever on the left up, it makes it possible to insert the camera mount pad (center). The mounting pad is simply a square piece with beveled edges.
Now, How to mount the floodlight to the tripod? This is where I had the idea of creating another mounting pad that would mount to the floodlight using the existing hardware. I decided that is would be easiest to just 3D print the part even though it very well could have been made from wood or other materials with a little more effort.
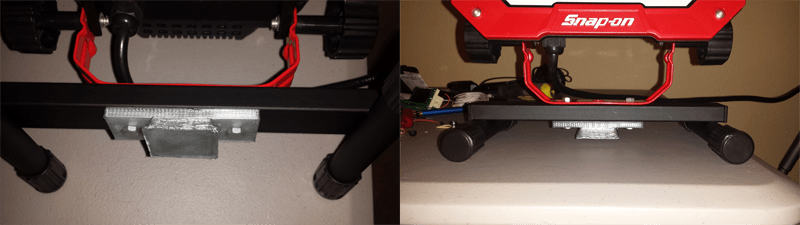
As you can see, I simply duplicated the mounting pad and extended it. This allowed the nuts and bolts that hold the legs onto the light to also hold the mounting pad.
Now I can put my light on my tripod with just a flick of a switch.
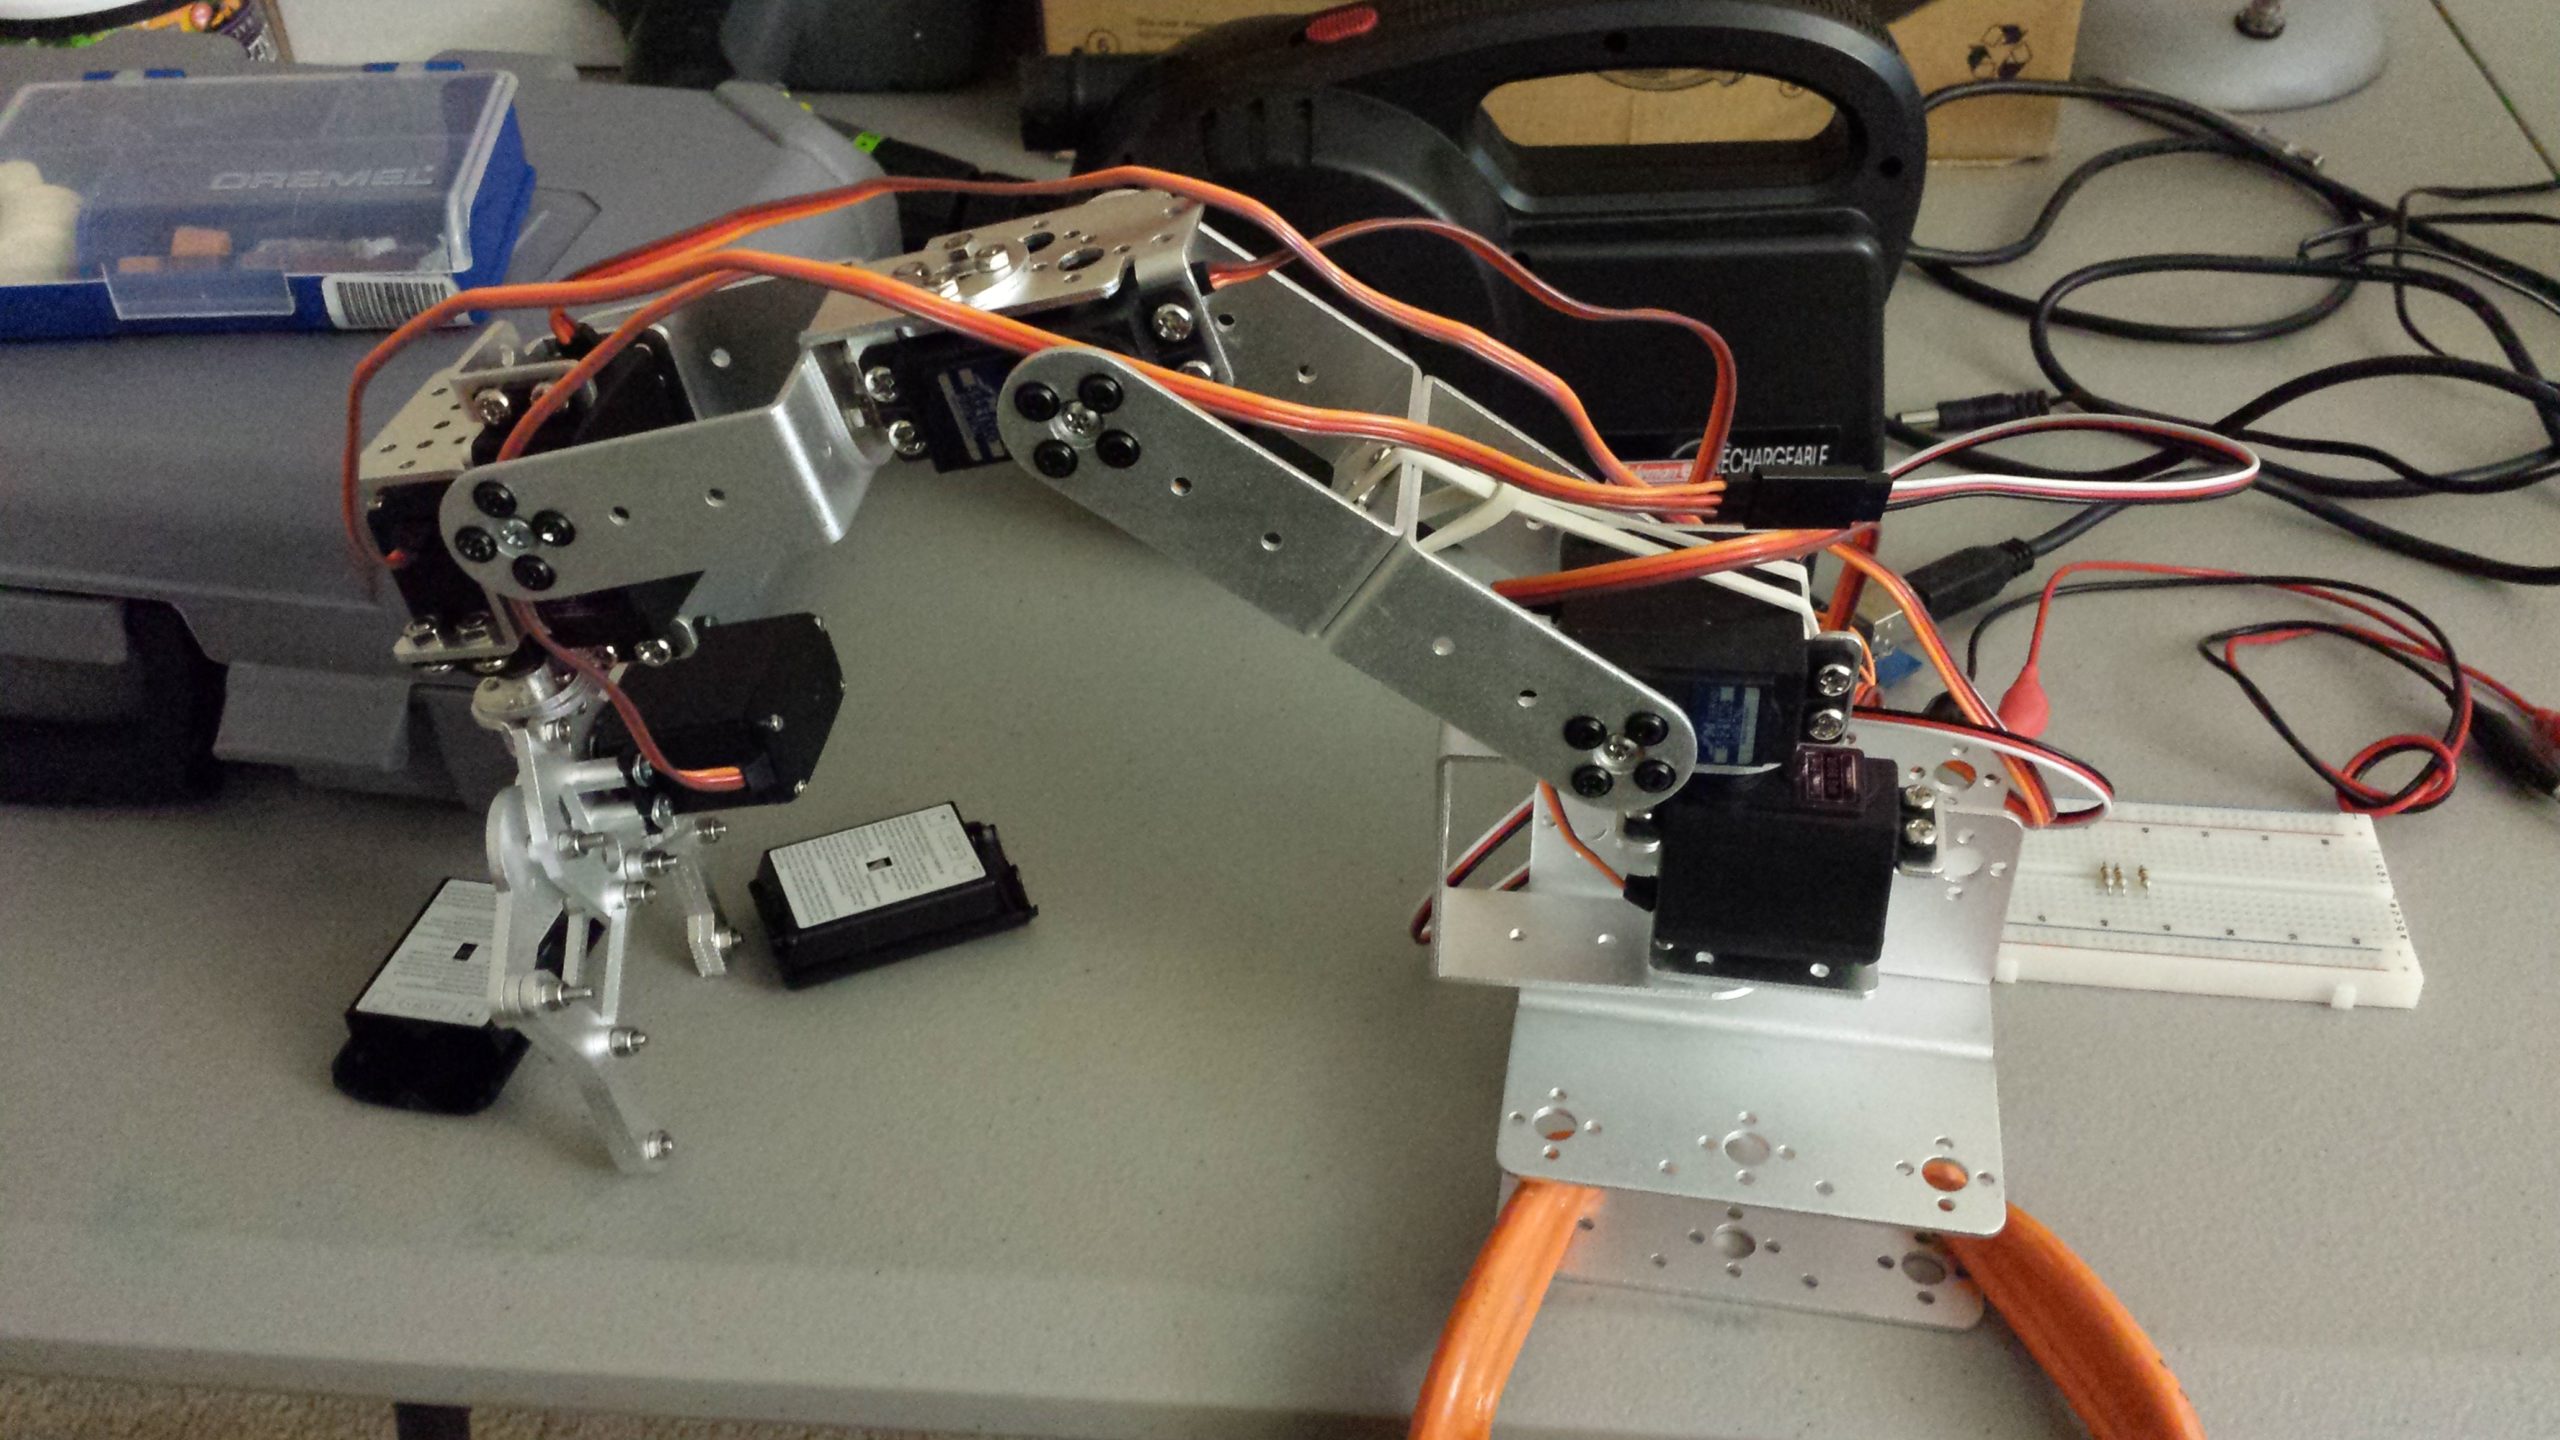
I’ve always wanted to get into robotics, and building a robotic arm is a great place to start. But what can we do with a simple robotics arm kit?
I’ve got to start somewhere, and when learning a new skill it helps to start simple. So for this project, I wanted to figure out how I could control a robotic arm using a familiar control platform. For me, that was an Xbox controller. I’ve had a USB Xbox wireless controller receiver for a PC and found a Linux driver that would allow me to interface with it on a Raspberry Pi. Then with a bit of python code, I could send serial messages to an Arduino that would control the various robot arm servos using PWM signals.
Then I assigned different buttons to control different parts of the robot arm, and the basics of my project were completed. It was fun attempting to use the robot arm to stack blocks and move other objects. But it was a bit challenging to do, as I wasn’t used to thinking about how to move an arm in terms of individual pivot points.
What could a more intuitive user interface look like. What If the claw could be moved like it were a flying object in 3D space? This lead me down the path of reverse kinematics, which is really fascinating, but was an advanced topic I just started to scratch the surface of. It’s amazing what we learn when we explore new technologies.

EDIT: Now you can start building your Xbox One games library from your Xbox 360. Just go to “Games with Gold” from the Gold tile on Home.
For a while now Microsoft has been giving away free games to their Xbox live gold members twice a month. When the Xbox One came out they included the same deal. You can get Xbox One games for free as a gold member. Originally I thought that you had to own a Xbox One to use this benefit. But one day I discovered that you can “purchase” these free games through their website (http://www.xbox.com/en-US/live/games-with-gold).

This is awesome because I don’t own the Xbox One, yet. So Twice a month I visit xbox.com and claim my free games for the Xbox One. This way when I finally have enough saved up enough to buy it, I’ll already have plenty of games to enjoy. I just wish I discovered this sooner, because I haven’t found a way to go back and claim the free offers I missed.
Note: This also works for those that don’t have enough hard drive space for all their games. You can still claim your free game and just wait to download it.
Here are instructions on re-downloading online purchases content. (http://support.xbox.com/en-US/xbox-360/downloadable-content/redownload-content)
