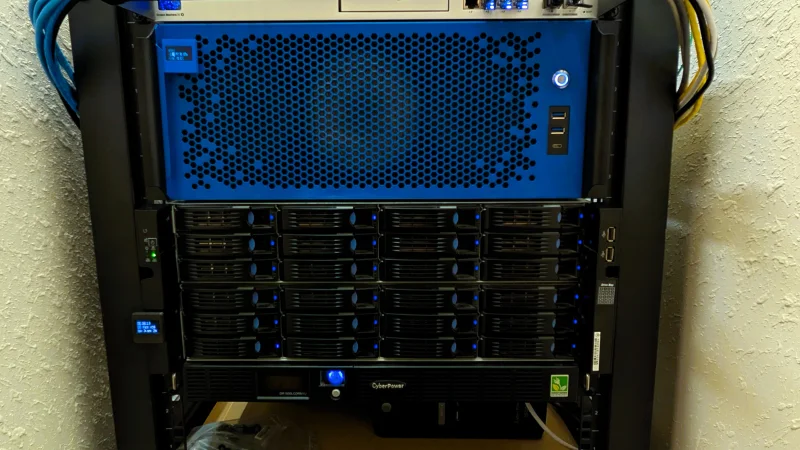
My Homelab VM Server
What started as a couple of web apps on my desktop grew into dedicated hardware. After several rebuilds and a lot of troubleshooting, I finally feel like I've arrived at a solid design that's running well.
How I got started
It all started with a Plex server on my desktop back in 2013 as a way to digitize and organize my slowly growing collection of DVDs. Even back then, I really enjoyed having a media library that I manage and control myself. Running my own service feels much closer to ownership, with more control over what's available. I eventually added ownCloud for self-hosted cloud storage, before the split that gave us Nextcloud.
It wasn’t until I started a small business that I became serious about setting up a dedicated server. I didn't know much about this field, but I knew enough about virtualization to know it would be a good place to start as the basis for the design. I'd heard good things about XenServer, and this seemed like a great opportunity to give it a try. In July 2018, I purchased a used dual-Xeon server from North American Technologies Exchange (NATEX.us) as the core system. I ordered it in a 4U chassis with 24 large-form-factor drive bays to give me plenty of room to expand.
Original server configuration
- Chassis: 4U, 24 large-form-factor drive bays
- Motherboard: Dual LGA 2011 v1 sockets, 16 DIMM slots
- Compute: Two Xeon E5-2670 CPUs
- Memory: 64 GB, using eight 8 GB PC3-10600R modules
- Storage: 48 TB raw, 16 HGST HUS723030ALS640 3 TB SAS drives
- Storage controllers: Three LSI 9211-8i cards
- Boot drive: Samsung 860 EVO 250 GB SATA SSD
- Networking: 1 GbE via an SFP-to-RJ45 module
I built the rest of the rack around it: a 12U open frame to hold everything, a TP-Link router for networking and isolation, and UPSes for battery backup, with a management card for the rack UPS. Here's the complete starting setup and its historical purchase costs:
| Part of the build | Hardware | Cost |
|---|---|---|
| Used server | NATEX configuration above, including setup, caddies, and a second LiteOn PS-2112-5L 1200 W PSU | $1,716.66 |
| Rack | StarTech 4POSTRACK12U, 12U open-frame rack | $183.70 |
| Rack UPS | CyberPower OR1500LCDRM1U | $369.95 |
| UPS management | CyberPower RMCARD205 | $159.95 |
| Tower UPS | CyberPower CP1500PFCLCD | $119.95 |
| Router | TP-Link TL-R600VPN | $57.99 |
| Boot SSD | Samsung 860 EVO, 250 GB | $76.74 |
| Accessories | SFP-to-RJ45 module, rack shelf, mounting hardware, and SSD bracket | $53.84 |
| Total | About $2,740 | $2,738.78 |
There were a few oversights and false starts along the way: forgetting to add caddies, ordering a UPS with the wrong capacity for the rack's power draw, and the server's original power supply failing within days. NATEX was willing to replace the failed supply at no charge, and I bought a second one from them for redundancy. It took a few adjustments to arrive at the final build.
With XenServer as the OS, booting from a SATA SSD, I was easily able to set up several VMs: Nextcloud, Plex, development systems, various Linux distributions to experiment with, and even some Windows remote workstation VMs. I eventually had to upgrade the RAM from 64 GB to 128 GB to accommodate all of the VMs.
Sharing the storage
The original design was centered on a single system running XenServer. Being a bit new to Linux servers, I struggled to find a good way to add the large storage arrays needed by some of the VMs. My first approach was to attach the storage directly to individual VMs. While this worked, only one VM could use a given mount at a time, and configuring the disk passthrough was a bit of a process and a pain to maintain.
I eventually came to my senses and realized I could just share those mounts locally through NFS. Not only was this simpler to set up, it also allowed multiple VMs and local systems to share the large storage arrays.
Not long after that, I decided to change the OS to the open-source fork of XenServer called XCP-ng and then ran Xen Orchestra as a VM for better XenServer management. The biggest benefit of Xen Orchestra is its web portal for full server configuration, including automated backups. For me, this is a much better experience than setting up a NAS that can do some virtualization. Overall, this is a pretty clean design for a single machine as a storage and virtualization server.
Reducing the upkeep
Building the server and trying new apps was fun, but maintenance was taking a lot of my time. Near the end of 2021, I started exploring other solutions for hosting web apps and came across Cloudron. It makes managing many web apps almost effortless, with automatic backups, updates, and DNS configuration, all of which I had been doing manually. It also made trying new apps so much easier: a few clicks, and an app was configured and ready to use within minutes. Its free tier is limited to two apps. Since it would save me so much time and the annual license was very reasonable, I fully adopted it in January 2022.
Reducing the noise
While Cloudron solved the web app management, it didn't help with the loud server fans. That isn't such a big deal in a server room, but at home it can be a real nuisance. In June 2024, I came across a YouTube tutorial on silencing a Supermicro 4U server similar to mine.
I went with three Phanteks T30 fans for this fan-wall modification because, from my research, they had better performance at higher speeds than Noctua and were perfect for this job. The modification drastically reduced the noise while still keeping the system cool.
Separating the VM host and NAS
Around the same time, I was reconsidering the single-server setup. NFS had made sharing storage easier, but managing shares and pools was still a bit involved. A single system also means a single point of failure, and the six-disk RAID 10 media array, with 9 TB of usable space, was nearly at capacity. Separating storage from the VM host would make disaster recovery and future VM-host migrations easier.
I decided to go with TrueNAS SCALE as it got good reviews and has a free community edition that would suit my needs. I started the process in July 2024, when I bought six used server-grade 12 TB drives for about $500 from ServerPartDeals. The additional storage would give it plenty of room to grow. I also bought an 18 TB drive to use as a staging area for the data while rebuilding the NAS.
For the VM server, I had an older gaming desktop available now that my Framework 16 was my daily driver. The gaming desktop had been crashing under Windows, but from what I could tell, the crashes were related to Windows drivers. I expected it to do better as a Linux server. I upgraded it to 64 GB of TeamGroup T-Create Expert DDR4 and used NVMe drives for boot and VDI storage.
I wanted to keep everything in the rack and started looking into rack-mountable chassis for the new VM host hardware. After looking around for a bit, I settled on Sliger. They get really good reviews, and I'd rather pay more for something well designed than spend all my time trying to make a cheaper case work. I ended up going with a cobalt-blue Sliger CX4170a: a 17-inch-deep 4U case with 360 mm AIO support, 20-inch rack slides with 22-inch extensions, and three Noctua NF-A12x25 PWM fans. While that set me back around $400, I do believe it was worth it. That's the most I've ever spent on a case!
The original 24-bay server became a dedicated TrueNAS system using ZFS storage pools. I also installed a PCIe PiKVM in the VM server for remote management. This also seemed like a good time to do some hands-on learning with SFP and fiber for the network connection between the NAS and the VM server.
Gateway and NVR: Ubiquiti Dream Machine SE
- Compute: Quad-core ARM Cortex-A57 at 1.7 GHz
- Memory: 4 GB
- Networking: Eight 1 GbE PoE LAN ports, one 2.5 GbE WAN port, and two 10G SFP+ ports
- Storage: Built-in 128 GB SSD and a 3.5-inch NVR drive bay
VM host: repurposed gaming desktop
- Chassis: Sliger CX4170a, 4U
- Motherboard: Asus PRIME Z390-A
- Compute: Intel Core i9-9900K
- Memory: 64 GB (4 × 16 GB) TeamGroup T-Create Expert DDR4-3200 CL16, from two 32 GB kits at $51 each
- Storage: NVMe for VM virtual disks
- Networking: 10G SFP+ fiber through a PCIe adapter to the UDM SE, with 1 GbE as failover
- OS: XCP-ng
- Remote management: PiKVM on a Geekworm KVM-A8 with a 2 GB Raspberry Pi 4
NAS: original server repurposed for storage
- Chassis: Original 4U, 24-bay server
- Compute: Two Xeon E5-2670 CPUs
- Memory: Upgraded to 128 GB
- Storage controllers: Three LSI 9211-8i cards
- Networking: 10G SFP+ fiber to the UDM SE, with a 1 GbE SFP-to-RJ45 module as failover
- OS: TrueNAS SCALE
- Storage: ZFS pools described below
Sometime before the server split, I had set up my home with a UDM SE as the primary gateway and NVR. I moved it into the rack as part of this rebuild. This also allowed for shorter fiber and Ethernet cables. In the photo, you can even see my PoE-powered Pi-hole sitting on the top corner of the rack.
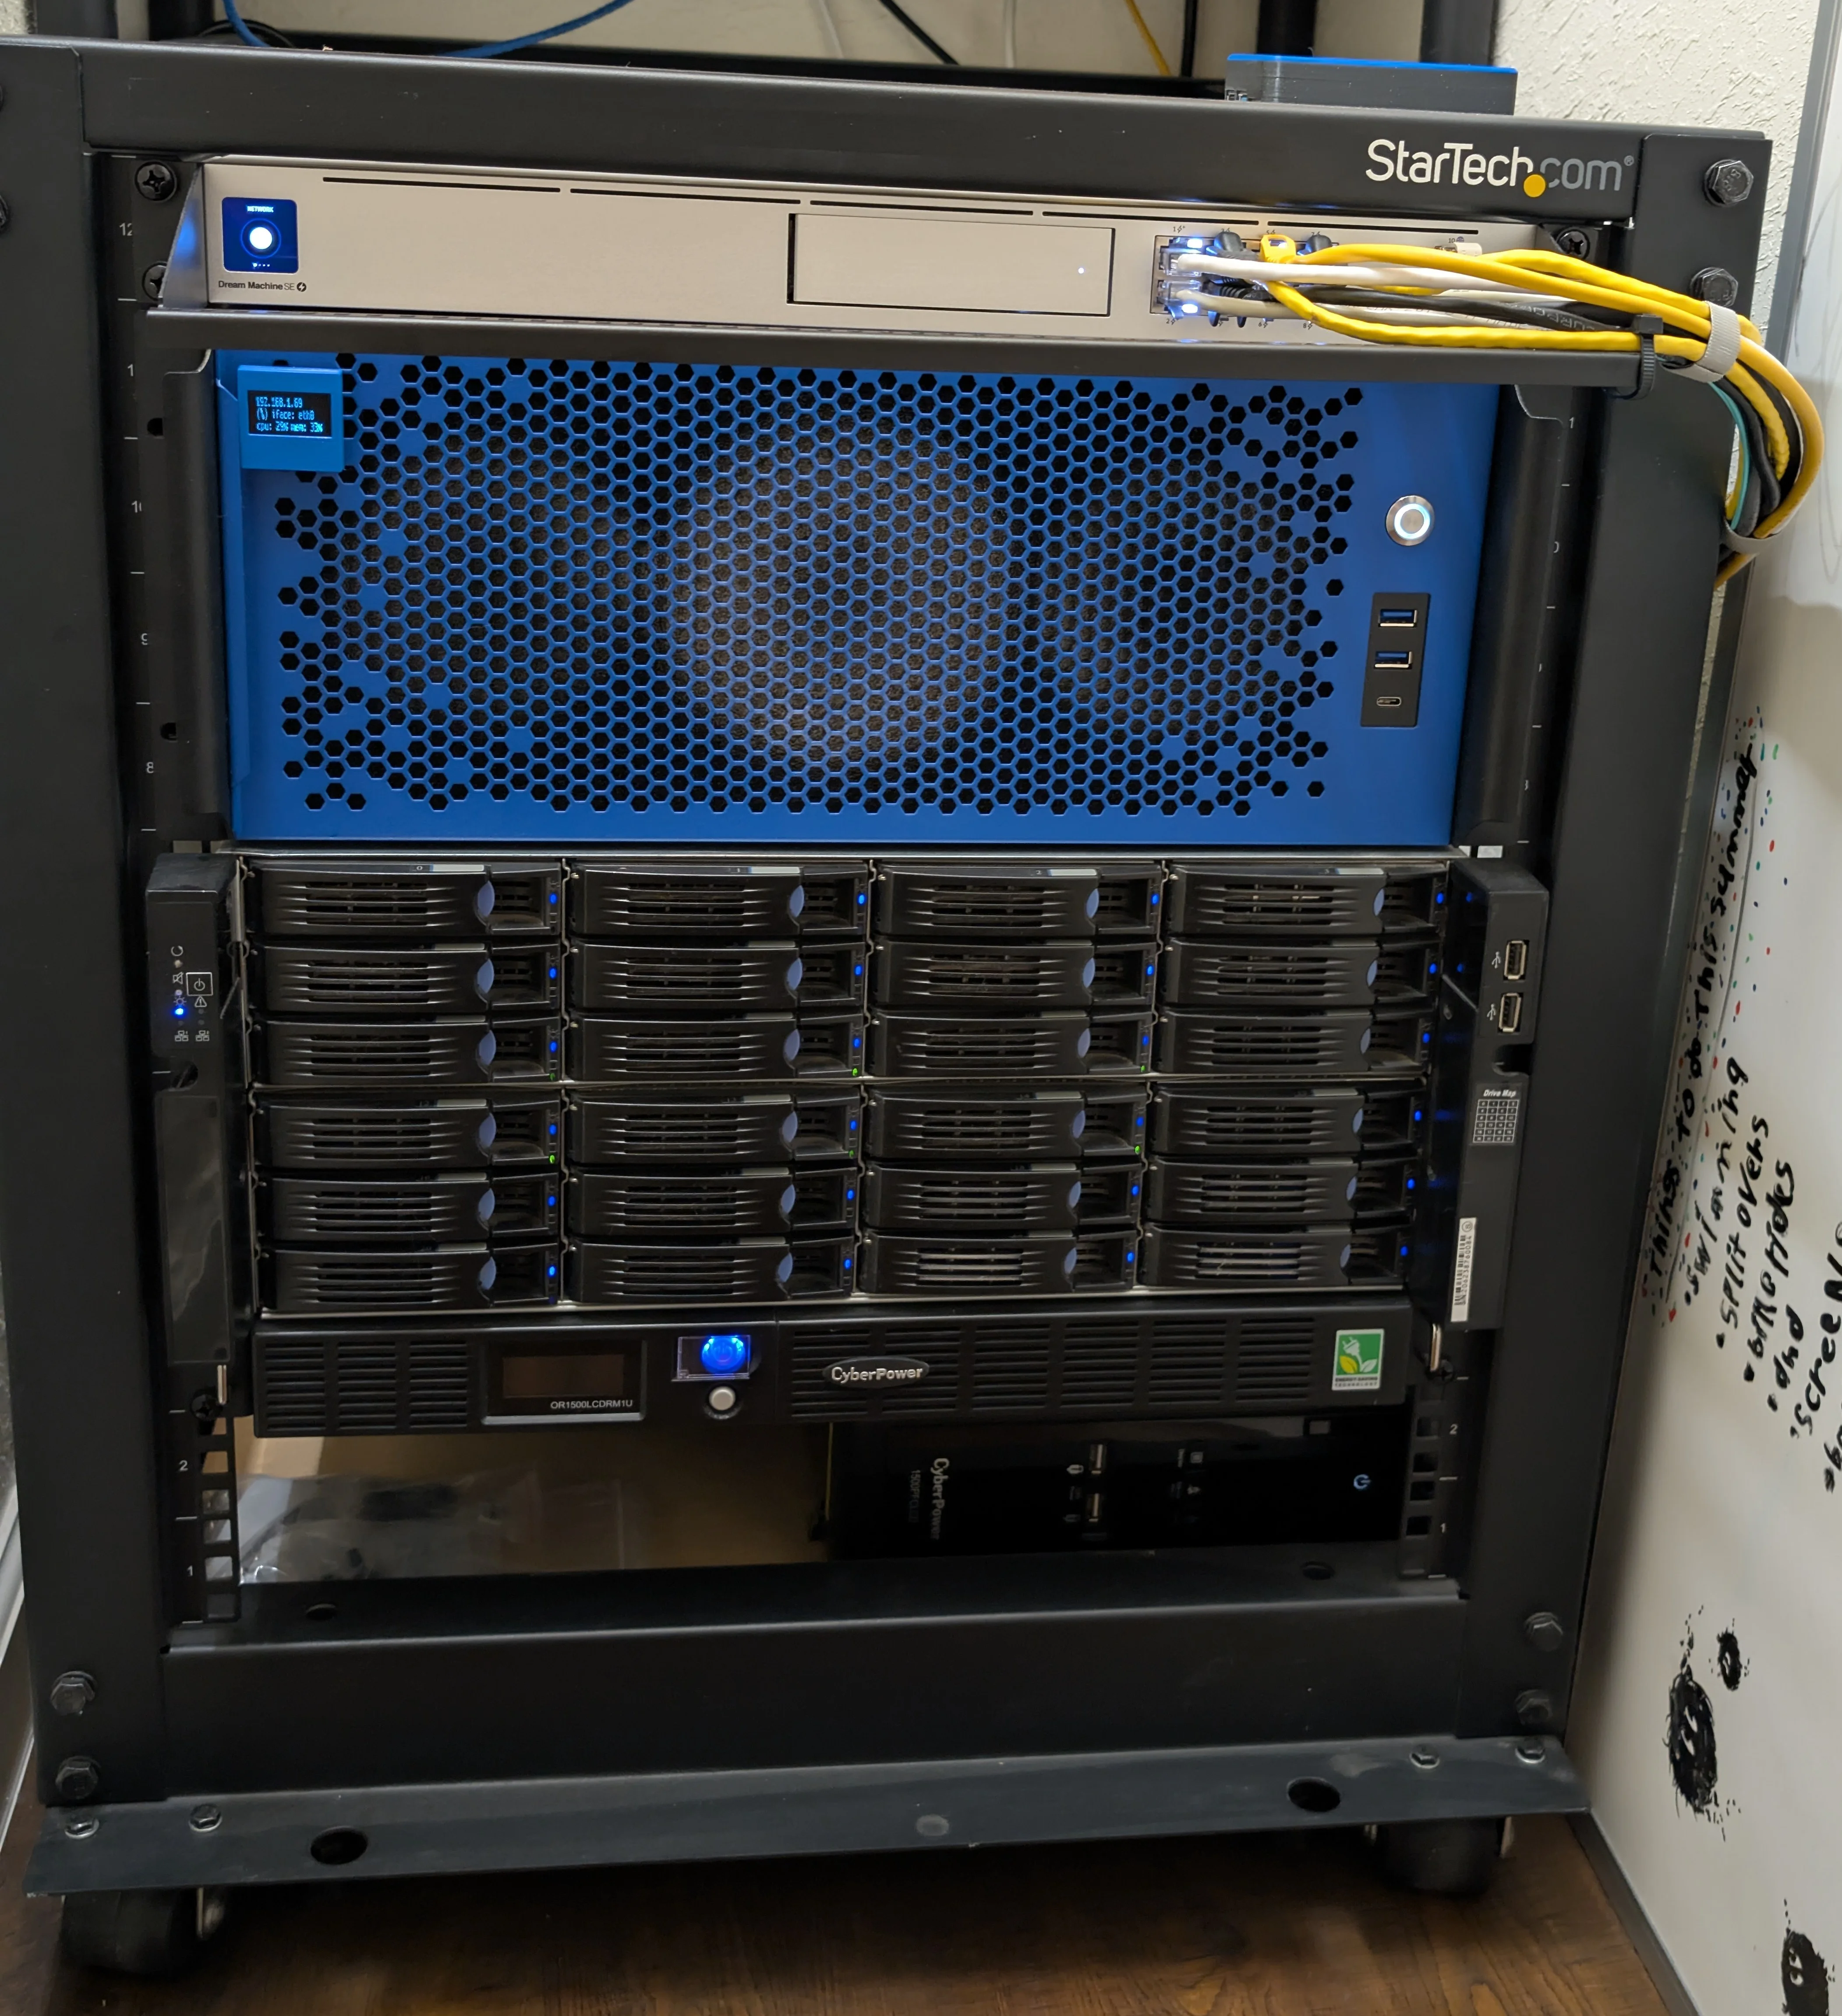
The server rack after the split.
The NAS layout
I split the NAS storage into three pools for media, general storage and backups, and application data. This is the layout I use today, and it should take me quite a while to fill:
| Purpose | Layout | Physical HDD capacity | Reported usable capacity |
|---|---|---|---|
| Media | Eight 3 TB disks in one RAIDZ2 vdev | 24 TB | 15.4 TB |
| General storage and backups | Six 12 TB disks in one RAIDZ2 vdev | 72 TB | 43.5 TB |
| Service data | Eight 3 TB disks in four mirrored pairs | 24 TB | 10.75 TB |
| Total | 22 hard drives | 120 TB | 69.65 TB |
Service data includes files saved by applications such as Nextcloud, separate from the VM virtual disks on the host's NVMe storage. That pool also has two mirrored 250 GB SATA SSDs as a log vdev to boost performance. The original Samsung 860 EVO cost about $77 in 2018; years later I bought its matching drive on eBay for $25 to make the pair.
Repairs and a new VM host
The split worked very well. TrueNAS was absolutely rock solid, and I could really notice the difference with the VMs running on newer hardware with NVMe. Everything ran beautifully for almost a year. Then disaster struck. An unexpected power failure took the VM server down while I was on vacation in April 2025. Even with UPSes, it still went down: apparently, my CyberPower units hadn't reliably reported the batteries' condition. And if the batteries are dead, there's not much the UPS can do about power failures. Afterward, the main NVMe for VDI storage had strangely disappeared. The boot drive was fine, and I had a spare NVMe already installed. So I was able to get back up and running pretty quickly from my VM backups. When I investigated the failed NVMe, it seemed to work fine again during external testing. So I reinstalled it as a spare for VM storage.
What followed felt like a never-ending troubleshooting project, with data degradation and performance problems getting worse over time. As part of that troubleshooting, I tested and upgraded the RAM and ran it at slightly lower speeds. After ruling out the RAM, my next prime suspect was the NVMe storage. I was still having data corruption issues on the second NVMe, which made me question the condition of the motherboard's PCIe hardware. I tried everything I could think of, such as moving the NVMes to different slots and even to a PCIe adapter. Each change would seem to resolve the issue, but then similar data corruption symptoms would resurface. By February 2026, Nextcloud was repeatedly going down and needing to be restored from backups. Even some of the backups were starting to become corrupted. I was about at my wits' end and started looking into replacing the VM host's core hardware. After a bit of research and comparing prices and specs between used servers and consumer hardware, I still couldn't decide on what to go with, so I put it on hold for a bit longer.
An emergency NAS rebuild
Almost a year after the power failure, disaster struck again. In February 2026, while I was still troubleshooting the VM host, the NAS refused to come back online after a routine maintenance reboot. It had been rock solid for nearly two years, and I needed it running again because it was a critical part of the setup. After troubleshooting the dual-Xeon board, I couldn't determine the issue and started looking for replacement hardware.
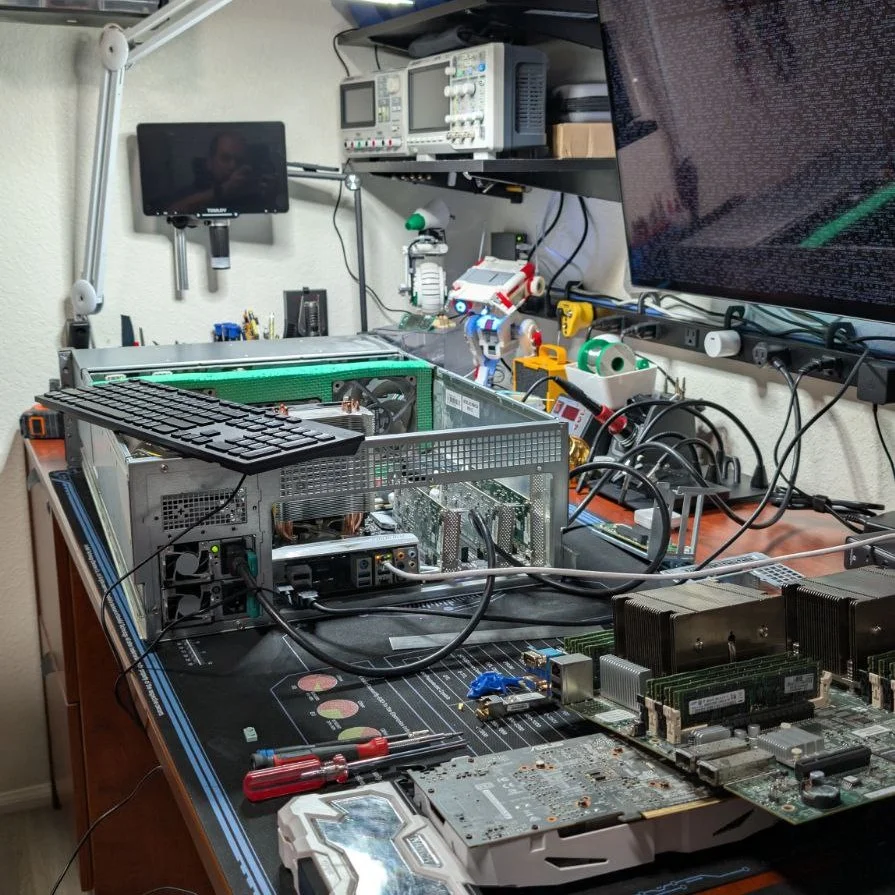
The NAS rebuild in progress, with the original dual-socket motherboard off to the side. You can even see part of my custom quiet fan wall.
Comparable used servers were all pretty old, and newer used servers were outside of my budget. So I ended up replacing the original server hardware with a spare PC system I had lying around. I also added a dedicated KVM during the rebuild. One of the biggest drawbacks of going with consumer hardware is the limited number of PCIe lanes available for the three LSI cards. While the switchover went surprisingly smoothly, one LSI card is now running at half speed. The replacement system also didn't have enough PCIe bandwidth for the SFP+ adapter, so I went with a PCIe 2.5 GbE NIC. One welcome benefit was that the rack's typical power draw dropped from around 600 W to closer to 400 W.
- Chassis: Original 4U, 24-bay server, with the quieter fan wall
- Compute: Intel Core i7-6700K at 4.00 GHz
- Memory: 32 GiB DDR4, non-ECC
- Storage controllers: Three LSI 9211-8i cards
- Storage: Existing ZFS pools and mirrored SATA log SSDs
- Networking: 2.5 GbE, with 1 GbE as failover
- OS: TrueNAS Community Edition
- Remote management: PiKVM on a Geekworm X651 with a Compute Module 4: 2 GB RAM, 32 GB eMMC, no Wi-Fi
Replacing the VM core
The NAS was back, but the VM server issues continued to get worse. At the end of April 2026, I had enough and replaced the VM host's motherboard, CPU, and RAM with a Ryzen 9 9900X, MSI PRO X870E-P WiFi, and 64 GB of DDR5 RAM. The upgrade set me back around $1,050 for just the core components. I'd been considering the rebuild for about six months, but by the time I bought the parts, RAM and NVMe prices had skyrocketed. I decided to stick with my existing NVMe drives. I still found a decent deal at Micro Center, but I wish I'd decided to rebuild sooner.
- Chassis: Sliger CX4170a, 4U
- Motherboard: MSI PRO X870E-P WiFi
- Compute: AMD Ryzen 9 9900X
- Memory: 64 GB DDR5
- Storage: 250 GB NVMe for the OS and 2 TB NVMe for VM storage
- Networking: 5 GbE onboard Ethernet
- OS: XCP-ng
- Remote management: PiKVM on a Geekworm KVM-A8 with a 2 GB Raspberry Pi 4
This rebuild also provided another way to validate my existing NVMe drives. The one that had been exhibiting strange behavior also showed issues with the new hardware. Even so, I don't know for sure why I still had issues with the one good NVMe on the previous hardware. Since the rebuild, the new VM server has been running smoothly with the good NVMe.
Alongside the server work, I also upgraded the Ethernet connections and switches around the house. The rack got a UniFi Pro HD 24 switch, giving me 2.5 GbE and 10 GbE connections while consolidating the separate switches I'd been using. It also left plenty of room to grow. The upgrade also gave my office a 10 GbE connection to a UniFi Flex 2.5G 8 switch.
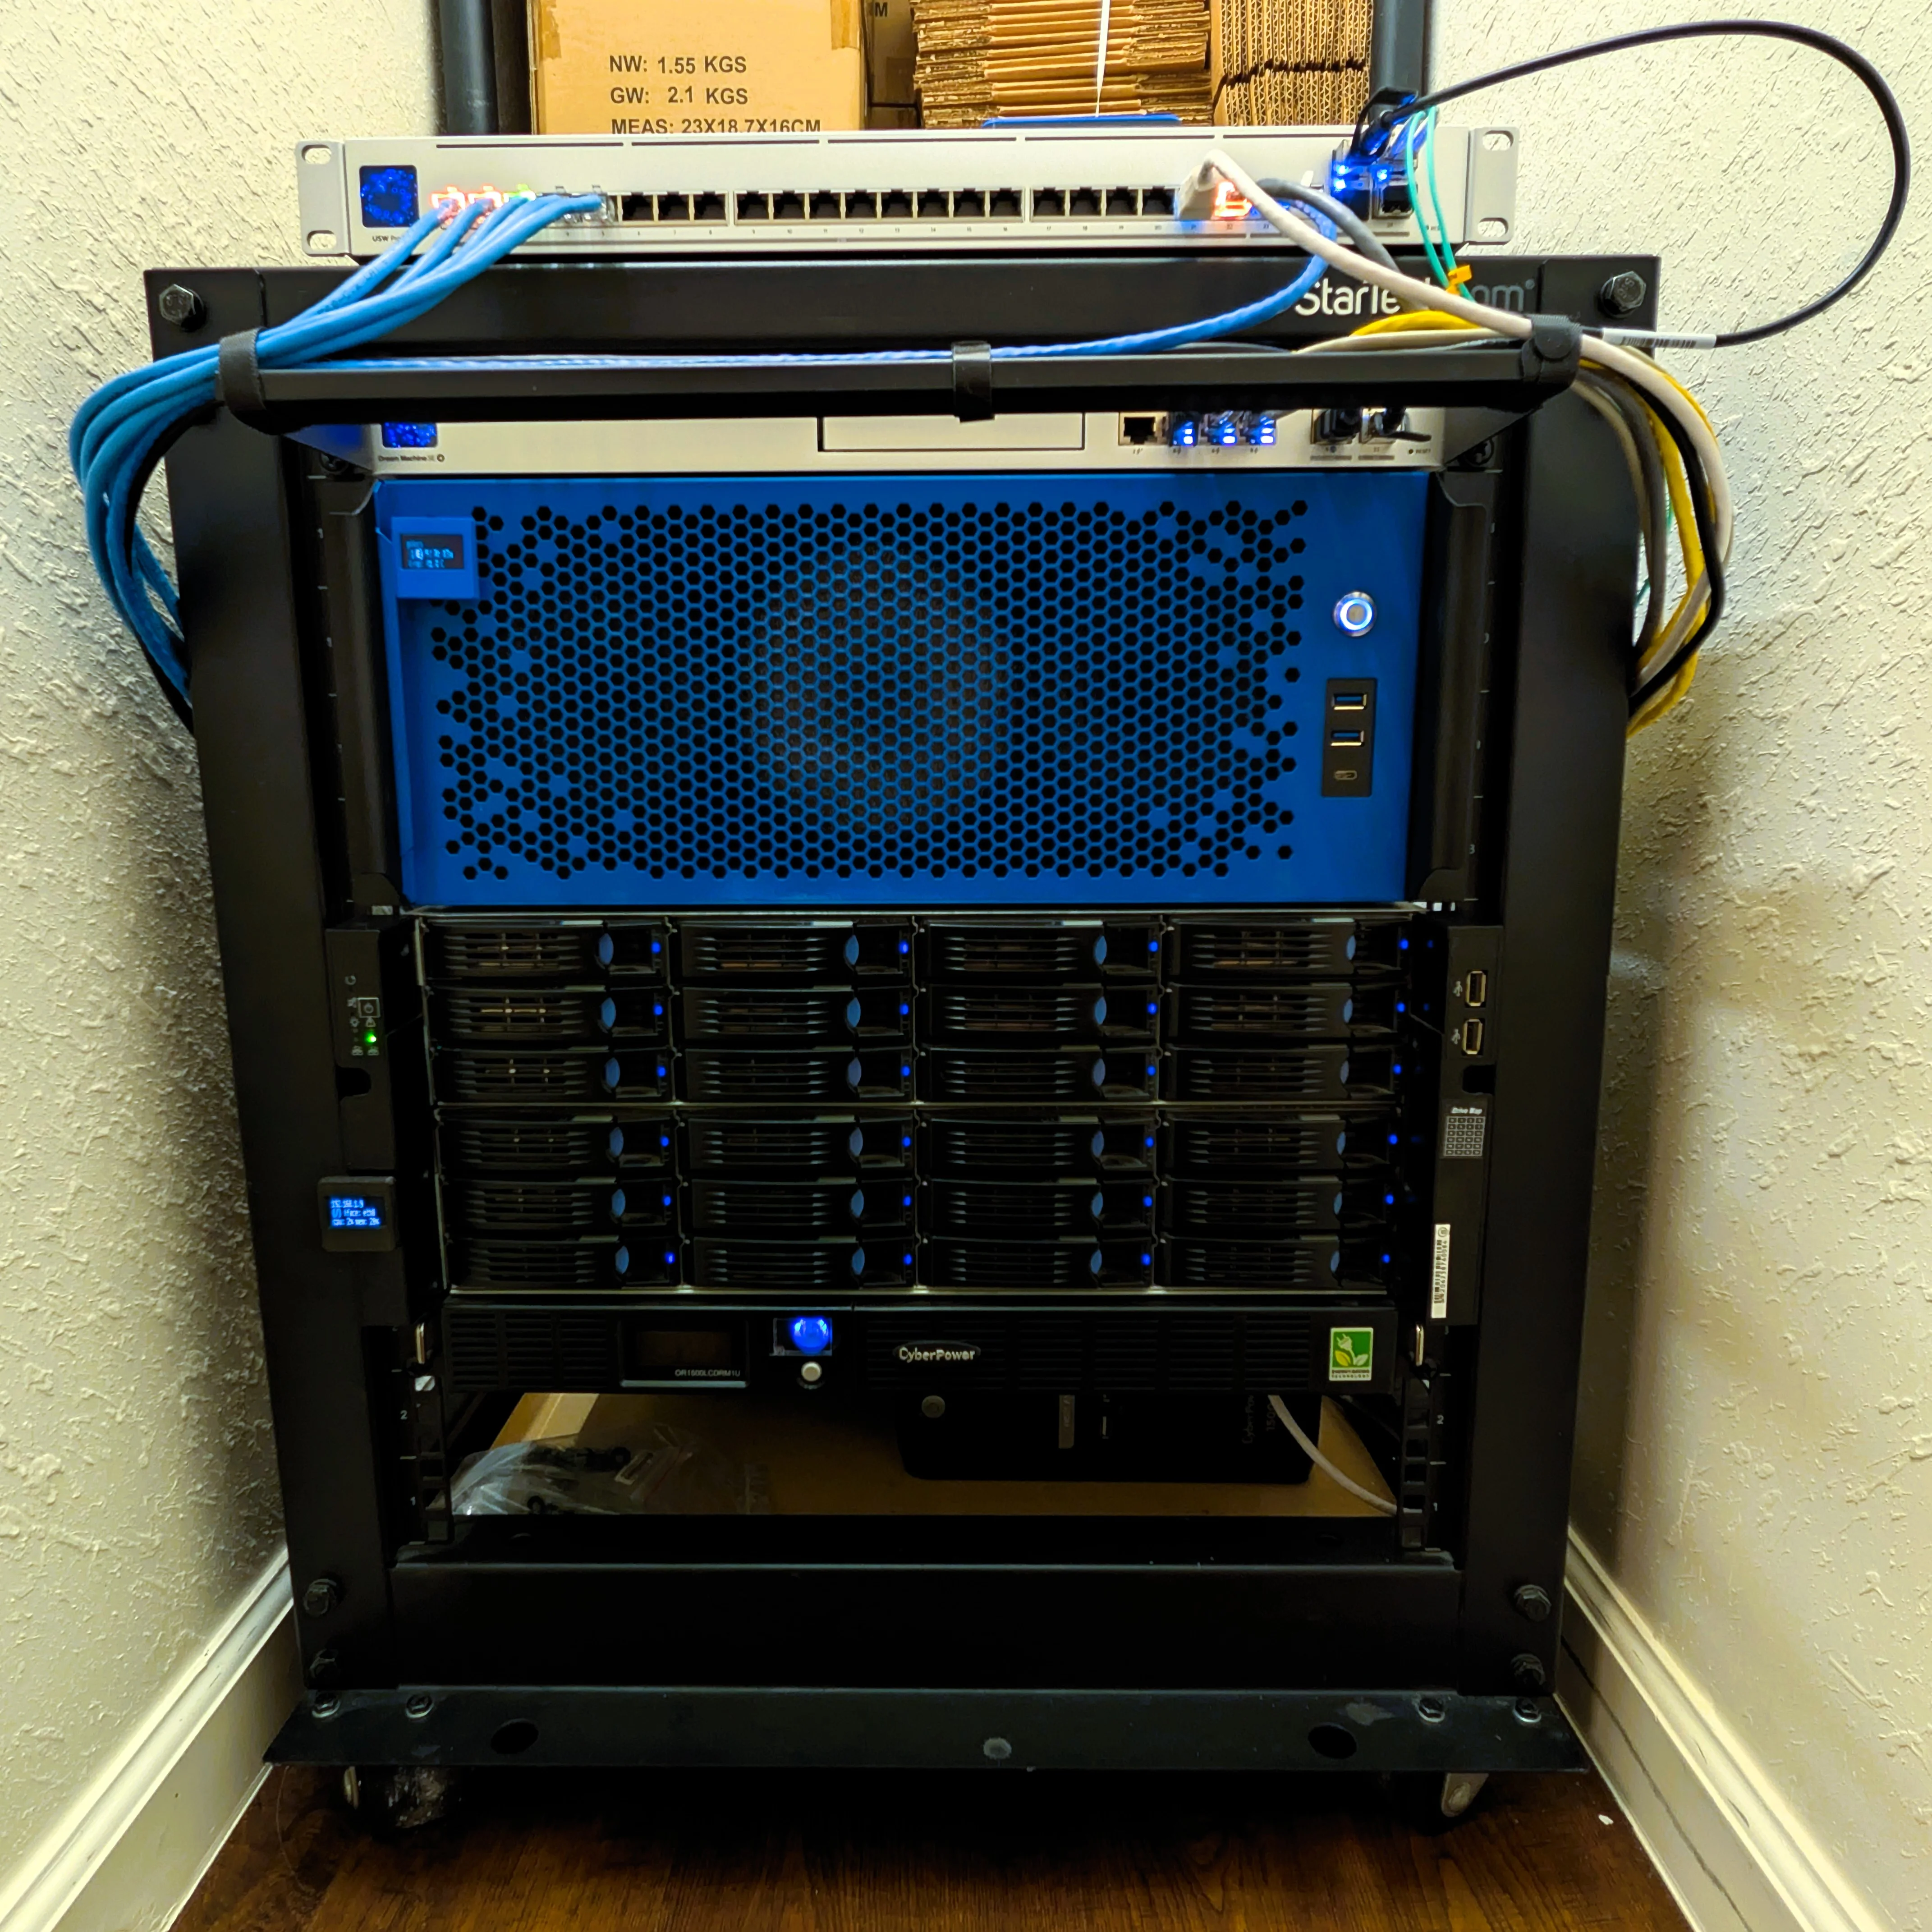
Server rack with the 24-port switch.
Moving management outside the host and other improvements
Later in 2026, while going through a stack of old laptops, I had the idea to repurpose one as a management kiosk for the rack. This change resolved the last major design flaw of my setup. Moving the management tools (like Xen Orchestra and Docker management) outside the system I'm managing is so much cleaner. I no longer have to jump through hoops when managing the rack. It can even be used to access the servers' dedicated KVMs.
- Model: Lenovo ThinkPad E580
- Compute: Intel Core i5-8250U at 1.60 GHz
- Memory: 8 GiB DDR4-2400, with one empty memory slot
- Storage: 256 GB NVMe SSD
- Networking: Gigabit Ethernet and Wi-Fi
- OS: Xubuntu
- Role: Management kiosk, Xen Orchestra, and Arcane
We finally got fiber internet in our area, and our service was activated at the end of July 2026. We now get 2 Gbps up and down for less than I was paying for Xfinity's top tier, which provided 2 Gbps down but only 400 Mbps up.
In October 2026, I moved Docker management from Portainer to Arcane, using the Xubuntu laptop to manage itself and the Ubuntu Docker VM. What I really like about Arcane over Portainer is the simpler configuration and management of Docker containers and stacks. I tried moving Portainer when I first set up the laptop, but Portainer's stack management was tightly coupled to the instance that created it. Arcane had zero issues because its configuration is directory-based, so moving management was as simple as reorganizing files.
What does it cost to run?
With the setup finally running well, I wanted to know what it actually costs to keep it that way. I broke the budget into recurring bills and money set aside for hardware replacement. Annual amounts and totals are rounded to dollars. These are November 2026 planning estimates based on the current market.
| Recurring expense | Basis | Annual cost |
|---|---|---|
| Rack electricity | About $0.85/day | $310 |
| Internet upgrade | $105/month for 2 Gbps minus the $85/month 1 Gbps plan I'd otherwise use | $240 |
| Cloudron | Application hosting | $180 |
| Recurring total | $730 |
The power reading for the server rack includes the ISP equipment, networking, both servers, and UPSes. Its roughly 9.7 kWh/day reading averages about 404 W. Internet cost is only the upgrade premium because I'd keep a household connection either way, but probably not the highest tier.
| Replacement reserve | Allowance and interval | Annual reserve |
|---|---|---|
| VM-host core | $1,050 over four years | $263 |
| NAS core | $588 over four years | $147 |
| VM-host NVMe | One 2 TB drive at $500 over six years | $83 |
| NAS hard drives | 120 physical TB at $25/TB over five years | $600 |
| UPS batteries | Annual allowance across the units | $100 |
| UPS hardware | $500 total for three approximately 1500 VA units over six years | $83 |
| Network equipment | $1,200 over ten years | $120 |
| Management laptop | Comparable used ThinkPad at $150 over six years | $25 |
| PiKVM hardware | Two complete systems at about $360 total over eight years | $45 |
| Hardware reserve total | $1,466 |
The rounded planning total is about $2,200/year, or $183/month, before labor.
The NAS-core allowance comes from a lower-tier workstation I recently built, since I can't count on always having spare hardware available. The network budget covers my Ubiquiti UDM and 24-port switch, currently using about eight or nine ports. A $128 battery purchase early in 2026 covered only some UPSes, so I allow $100/year across them. This assumes I'll continue to build battery packs, which is much cheaper than buying ready-made packs. I expect the VM host's 2 TB VDI NVMe to last six years or longer.
For the management laptop, I allow $150 for a comparable used ThinkPad every six years, adding $25/year to the reserve. It doesn't need much power to run the management tools.
The NAS PiKVM cost $192 for the Geekworm X651 kit and Compute Module 4. The VM host's KVM-A8 kit and Raspberry Pi 4 were about $162. I round the combined replacement allowance to $360 over eight years, or $45/year. That's a budgeting assumption; I'll keep using them longer if they remain reliable and supported.
I didn't account for everything, such as the small NAS log SSDs, boot storage, space rent, and external backup costs, but this gives us a pretty good minimum cost estimate.
What would it cost per VM?
Adding all this up made me wonder what the cost would look like per VM. For this thought experiment, suppose I used the same hardware for four VMs with the same resource allocation. Storage still limits this example to four: allocating 17 TB each uses 68 TB of the NAS's 69.65 TB usable capacity. The RAM allocation leaves 16 GB for the host and other overhead. The underlying $2,196 annual infrastructure budget is divided across those four VMs, each running Ubuntu Linux:
| Resource | Per VM | Used by all four | Available |
|---|---|---|---|
| CPU | 6 shared vCPUs | 24 shared vCPUs | Ryzen 9 9900X |
| RAM | 12 GB | 48 GB | 64 GB |
| VM disk | 60 GB on NVMe | 240 GB | 2 TB |
| Redundant data storage | 17 TB usable | 68 TB | 69.65 TB usable |
That puts the infrastructure cost at $549/year per VM, or about $46/month. That leaves little room for surprises, so I added a 25% contingency beyond the scheduled replacements:
| Cost per VM | Approximate monthly | Annual |
|---|---|---|
| Infrastructure and scheduled replacements | $46 | $549 |
| Contingency: 25% | $11 | $137 |
| Total planning cost | $57 | $686 |
Annual amounts drive the calculation; monthly figures are rounded independently. The contingency is rounded to the nearest dollar and covers uncertainty beyond scheduled replacements.
Homelab vs. Hetzner
Here's the same cost-per-VM estimate beside two Hetzner options. Prices are rounded USD list prices for Germany/Finland, checked November 4, 2026, including one IPv4 address and excluding tax.
| Resource or cost | Homelab: one of four VMs | Hetzner CPX32 + BX41 | Hetzner SX65 |
|---|---|---|---|
| What is being compared | One VM's share of the rack | One cloud VM plus a Storage Box | A whole dedicated server |
| CPU | 6 shared vCPUs | 4 shared vCPUs | Dedicated Ryzen 7 3700X |
| RAM | 12 GB | 8 GB | 64 GB |
| VM/system disk | 60 GB NVMe allocation | 160 GB NVMe allocation | Two 1 TB NVMe drives |
| Data storage | 17 TB usable on the NAS | 20 TB RAID-backed network file storage | Four 16 TB HDDs; about 32 TB with RAIDZ2 before filesystem overhead |
| Connection | Shared household 2 Gbps fiber | Shared cloud networking | Dedicated 1 Gbps uplink |
| Annual planning cost | $686 | About $1,063 | $1,128 |
| Monthly equivalent | About $57 | About $89 | $94 |
| Upfront setup | Hardware bought upfront | No setup fee listed | $44 setup fee |
| Rack assembly, maintenance, and physical upkeep | My time | Hetzner maintains its equipment | Hetzner maintains its equipment |
| Hardware faults | I diagnose faults and replace parts | Hetzner maintains the physical hosts and storage systems | I monitor and report faults; Hetzner replaces faulty components |
| OS, applications, backups, and data recovery | My responsibility | My responsibility | My responsibility |
Sources: CPX32, Storage Box plans, SX65, and Hetzner's live price feed.
The CPX32 package has less CPU and RAM than my hypothetical VM, but more VM disk and data storage. Its Storage Box is network file storage. The SX65 is a whole host with more compute and memory; its physical disks need a redundancy layout before comparing usable capacity.
The cash comparison leaves out an important difference: I do the physical work at home. That includes assembling the rack, cleaning, hardware maintenance (such as replacing UPS batteries), diagnosing faults, and replacing components. My reserves cover parts, but the $57/month estimate doesn't put a value on that time.
Hetzner's rental includes operating the equipment and facilities. Its cloud host maintenance and power and cooling systems are handled by the provider. That also applies to the dedicated server's physical infrastructure: Hetzner replaces faulty components for free after a support request. I would still monitor the dedicated server and handle its software RAID and data recovery.
So the homelab has the lower estimated cash cost, with more of the physical work falling to me. OS configuration, application updates, and backups still need my attention with any of these options. That hardware work is part of the hobby for me, but it's a real difference in what the prices cover.
Rented infrastructure also comes with provider acceptable-use rules and, on some plans, traffic allowances and overage charges. Keeping the hardware at home gives me more freedom over what I run, though my ISP and the software I use still have their own terms.
Why I keep it at home
For my own homelab, the estimated $183/month budget excludes my labor because maintaining and rebuilding systems is part of the hobby. Cloudron reduces application upkeep, while the hardware, storage, and management systems still give me plenty to work on.
Keeping the servers at home also lets me access local services when the internet is down. It gives me more freedom in what systems and services I can run, though my ISP may impose limits on services exposed to the internet.
And, coming full circle, I remain in control of the system and own every aspect of it.

